How to Make Car Seat Cover without Sewing Easy DIY Guide
Discover how to create a stylish, protective car seat cover without any sewing skills. This easy DIY guide walks you through no-sew methods using fabric, Velcro, and adhesive tools—perfect for beginners who want a custom look fast.
Key Takeaways
- No sewing required: Use fabric glue, iron-on tape, or Velcro to secure materials—perfect for beginners.
- Choose the right fabric: Opt for durable, washable materials like canvas, denim, or waterproof polyester for long-lasting results.
- Measure accurately: Take precise measurements of your car seat to ensure a snug, professional fit.
- Use templates for precision: Create a paper pattern first to avoid mistakes when cutting fabric.
- Secure with smart fasteners: Use adhesive-backed Velcro, safety pins, or fabric straps to hold the cover in place.
- Customize for style and function: Add pockets, padding, or decorative elements to match your car’s interior.
- Maintain easily: Most no-sew covers are machine-washable or wipeable for quick cleaning.
How to Make Car Seat Cover without Sewing: Easy DIY Guide
Want to protect your car seats from spills, pet hair, or wear and tear—but don’t know how to sew? No problem! You can make a custom car seat cover without a single stitch. This beginner-friendly DIY project uses simple tools and materials you can find at any craft or hardware store. Whether you’re covering a driver’s seat, passenger seat, or even a child car seat, this no-sew method gives you a professional-looking result in under an hour.
In this guide, you’ll learn how to create a durable, stylish car seat cover using fabric glue, iron-on adhesive, Velcro, and other easy-to-use fasteners. We’ll walk you through every step—from measuring your seat to attaching the final piece—so you can enjoy a clean, personalized interior without the hassle of sewing.
Why Choose a No-Sew Car Seat Cover?
Traditional car seat covers often require sewing skills, time, and special equipment. But with a no-sew approach, you skip the complexity and still get great results. Here’s why this method is perfect for DIYers:
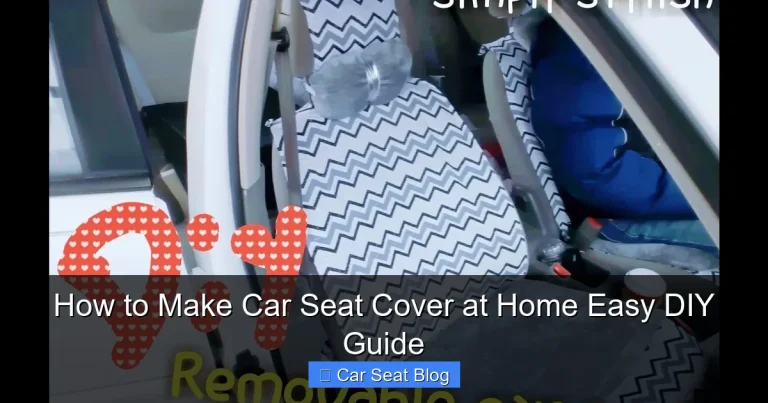
Visual guide about How to Make Car Seat Cover without Sewing Easy DIY Guide
Image source: i.pinimg.com
- Accessible to everyone: No sewing machine or experience needed.
- Quick and affordable: Most projects take under an hour and cost less than store-bought covers.
- Customizable: Choose any fabric, color, or pattern to match your car’s style.
- Reversible and removable: Easy to take off for cleaning or switching designs.
Plus, no-sew covers are ideal for renters or people who frequently change cars—no permanent modifications required!
Materials You’ll Need
Before you start, gather these supplies. Most are available at craft stores, hardware shops, or online:
- Fabric: 1–2 yards of durable material (canvas, denim, upholstery fabric, or waterproof polyester).
- Measuring tape: To get accurate seat dimensions.
- Fabric scissors: Sharp scissors for clean cuts.
- Iron and ironing board: For heat-activated adhesives.
- Iron-on hem tape or fabric glue: To bond fabric edges without sewing.
- Velcro strips (adhesive-backed): For securing the cover in place.
- Safety pins or fabric straps: Optional for extra hold.
- Pencil and paper: To create a template.
- Ruler or straight edge: For precise cutting.
Pro Tip: Choose a fabric that’s machine-washable and resistant to stains. Waterproof options are great for families with kids or pets.
Step-by-Step Instructions
Step 1: Measure Your Car Seat
Start by measuring the seat you want to cover. Use a flexible measuring tape to get the length, width, and depth of the seat back, seat base, and headrest (if applicable).
- Measure the seat back from the top edge to the bottom where it meets the seat base.
- Measure the seat base from front to back and side to side.
- Don’t forget the headrest—measure its height and width if you plan to cover it.
Write down each measurement. Add 1–2 inches to each dimension for seam allowance and ease of fitting.
Step 2: Create a Paper Template
Use newspaper, wrapping paper, or large sheets of paper to create a full-size template of your seat. Lay the paper over the seat and trace the shape with a pencil. Include curves, contours, and any gaps (like between the seat back and base).
Cut out the template and test it on the seat. Adjust as needed until it fits snugly. This template will guide your fabric cutting and ensure accuracy.
Step 3: Cut the Fabric
Place your fabric on a flat surface, right side down. Lay the paper template on top and trace around it with a fabric marker or chalk. Use fabric scissors to cut along the lines.
If your seat has separate parts (like a detachable headrest), cut individual pieces for each section. Label each piece (e.g., “seat base,” “seat back”) to avoid confusion later.
Pro Tip: Use pinking shears to prevent fraying, or apply a thin line of fabric glue along the raw edges.
Step 4: Hem the Edges (No Sewing!)
To give your cover a clean, finished look, hem the edges using iron-on hem tape or fabric glue.
For iron-on tape:
- Fold the raw edge of the fabric under by ½ inch.
- Place the hem tape inside the fold.
- Press with a hot iron for 10–15 seconds until bonded.
For fabric glue:
- Apply a thin line of glue along the folded edge.
- Press firmly and let dry for 1–2 hours.
Repeat for all edges. This step prevents fraying and adds durability.
Step 5: Add Fasteners for a Secure Fit
Now it’s time to attach the cover to the seat. Since you’re not sewing, use adhesive-backed Velcro or fabric straps to hold everything in place.
For Velcro:
- Cut Velcro strips into 2–3 inch pieces.
- Attach the soft side to the underside of the fabric cover.
- Attach the rough side to the corresponding spot on the car seat (use a small piece of double-sided tape if the seat material isn’t sticky-friendly).
- Press firmly to secure.
Place Velcro at key points: under the seat base, along the sides of the seat back, and around the headrest.
For fabric straps:
- Cut 2–3 strips of fabric (2 inches wide, 12–18 inches long).
- Fold and glue the edges to create strong ties.
- Attach one end to the cover with glue or Velcro.
- Wrap the strap around the seat frame and tie or secure with a buckle.
Pro Tip: Test the fit before attaching all fasteners. Make sure the cover lies flat and doesn’t slip.
Step 6: Customize Your Cover (Optional)
Make your cover unique with fun additions:
- Add pockets: Glue or iron a small fabric pocket to the back of the seat for phones, snacks, or tissues.
- Include padding: Use iron-on foam or batting for extra comfort—especially on long drives.
- Decorate with fabric paint: Add patterns, logos, or quotes using fabric markers or stencils.
- Use contrasting trim: Glue a strip of contrasting fabric along the edges for a stylish border.
Let all glue and paint dry completely before using the cover.
Troubleshooting Common Issues
Even with careful planning, you might run into a few hiccups. Here’s how to fix them:
- Cover slips or shifts: Add more Velcro strips or use safety pins underneath for extra hold. Avoid placing pins where they’ll be visible.
- Fabric wrinkles or bunches: Re-iron the cover with steam or adjust the fit by trimming excess fabric.
- Velcro won’t stick: Clean the car seat surface with rubbing alcohol before applying. Use heavy-duty adhesive Velcro for textured seats.
- Cover too tight or too loose: Double-check your measurements and template. It’s better to cut slightly larger—you can always trim later.
- Fabric frays over time: Reapply fabric glue to edges or use a fabric sealant spray for extra protection.
Maintenance and Care
One of the best things about no-sew car seat covers is how easy they are to clean. Most fabrics can be:
- Machine washed: Remove the cover and wash on a gentle cycle with mild detergent. Air dry to prevent shrinkage.
- Spot cleaned: Use a damp cloth and mild soap for spills or stains.
- Wiped down: Waterproof fabrics can be cleaned with a disinfecting wipe.
Store the cover in a dry place when not in use. Avoid direct sunlight to prevent fading.
Conclusion
Making a car seat cover without sewing is a fun, practical DIY project that anyone can tackle. With just a few supplies and simple techniques, you can protect your seats, refresh your car’s look, and save money—all without touching a needle.
From measuring and cutting to hemming and fastening, each step is designed for beginners. Whether you’re covering one seat or all five, this no-sew method gives you a custom fit and professional finish. So grab your fabric, fire up the iron, and start creating a car interior that’s truly yours.
Ready to upgrade your ride? Your perfect car seat cover is just a few folds and glue strokes away!