How to Make Car Seat Covers Fit Better for a Perfect Look
Struggling with loose or ill-fitting car seat covers? This guide walks you through practical, easy-to-follow steps to ensure your seat covers fit snugly and look great. From measuring correctly to using smart securing techniques, you’ll get a polished, custom look without the hassle.
Key Takeaways
- Measure your seats accurately: Proper measurements prevent buying covers that are too big or small, ensuring a better starting point.
- Choose the right material: Neoprene, polyester, and leather each behave differently—pick one that suits your climate and usage.
- Use seat cover clips and straps: These simple tools help anchor covers in place, reducing shifting and bunching.
- Tuck and secure excess fabric: Neatly tucking fabric into seat crevices creates a tighter, cleaner appearance.
- Wash and condition before installing: Pre-washing can help materials relax and conform better to your seat shape.
- Adjust headrests and armrests: Removing and reinstalling these parts ensures full coverage and a seamless fit.
- Use a heat gun or hair dryer for stubborn wrinkles: Gentle heat helps stretch and smooth out tight spots for a flawless finish.
How to Make Car Seat Covers Fit Better for a Perfect Look
If you’ve ever installed car seat covers only to find them sagging, wrinkling, or sliding around, you’re not alone. Even high-quality seat covers can look sloppy if they don’t fit properly. The good news? With a few simple techniques, you can make your car seat covers fit better—giving your interior a clean, custom look that feels like it came straight from the factory.
Whether you’re protecting your seats from pets, kids, or daily wear and tear, a well-fitted cover makes all the difference. In this guide, we’ll walk you through step-by-step methods to ensure your seat covers stay snug, look sharp, and last longer. From choosing the right size to securing loose fabric, you’ll learn everything you need to know to get that perfect fit.
Step 1: Measure Your Seats Accurately
Before you even buy seat covers, the most important step is measuring your seats correctly. Many people assume “universal fit” means one-size-fits-all, but that’s rarely true. Seats vary widely between car models, even within the same brand.
How to Measure Your Car Seats
Grab a soft measuring tape and follow these steps:
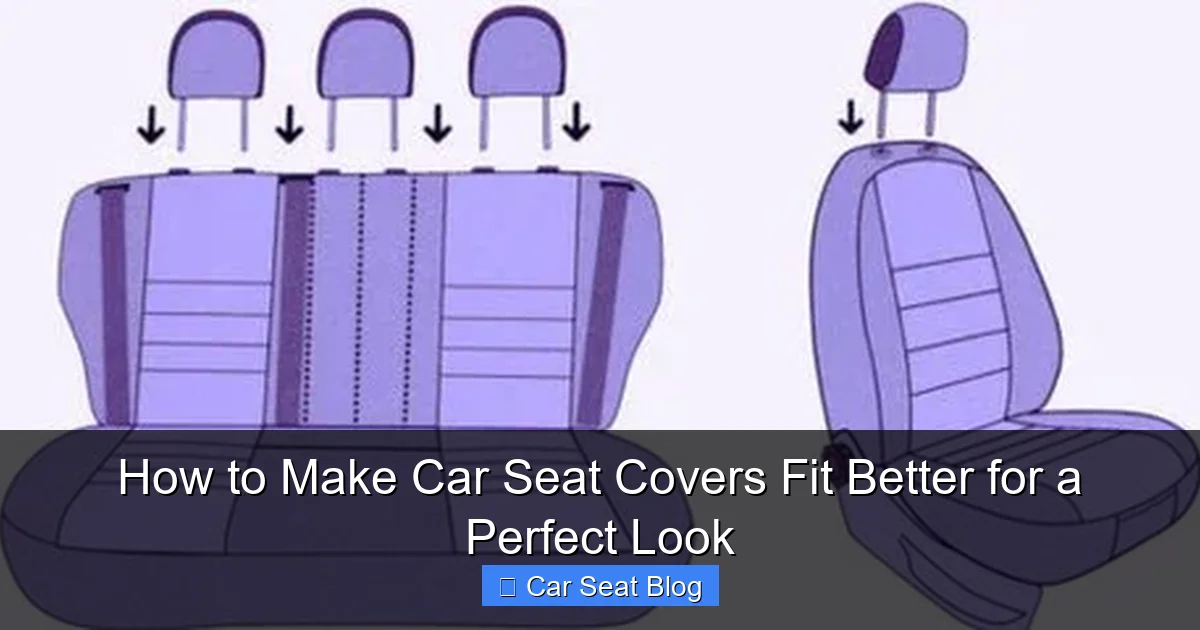
Visual guide about How to Make Car Seat Covers Fit Better for a Perfect Look
Image source: cdn.shopify.com
- Seat width: Measure from the outer edge of the seat cushion on one side to the other. Include any bolsters (the raised sides).
- Seat depth: Measure from the front edge of the seat to the backrest base.
- Backrest height and width: Measure from the top of the headrest down to the seat base, and across the widest part of the backrest.
- Headrest dimensions: Measure the width and depth of the headrest, especially if it’s removable.
Write these numbers down and compare them to the product specifications before purchasing. If you’re between sizes, go with the larger option—you can always adjust for a snug fit, but you can’t stretch a cover that’s too small.
Pro Tip: Take Photos
Snap a few pictures of your seats from different angles. This helps when shopping online or asking for advice in car forums. Some manufacturers even offer custom-fit covers based on your car’s make, model, and year—so check if that’s an option.
Step 2: Choose the Right Material for Your Needs
Not all seat cover materials are created equal. The fabric you choose affects how well the cover conforms to your seat and how durable it will be over time.
Common Seat Cover Materials
- Neoprene: Stretchy, water-resistant, and great for active lifestyles. It hugs seats tightly but may require a bit of stretching during installation.
- Polyester or Microfiber: Affordable and easy to clean, but can be prone to wrinkling if not secured properly.
- Leather or Faux Leather: Sleek and stylish, but less flexible. These work best on seats with simple contours.
- Canvas or Heavy-Duty Fabrics: Ideal for trucks and work vehicles. Durable but may need extra tucking and strapping.
If you live in a hot climate, avoid materials that trap heat, like thick polyester. In colder areas, neoprene or padded covers add comfort. Choose a material that balances durability, comfort, and flexibility for the best fit.
Bonus: Pre-Wash Fabric Covers
For cloth or neoprene covers, consider hand-washing them before installation. This helps the material relax and reduces stiffness, making it easier to mold to your seat shape. Just let it air dry completely—never use a dryer, as heat can shrink or warp the fabric.
Step 3: Prepare Your Seats Before Installation
A clean, smooth surface is essential for a tight fit. Dirt, crumbs, or old seat protectors can create bumps and prevent the cover from lying flat.
Clean Your Seats Thoroughly
Use a vacuum to remove debris from crevices, then wipe down the seats with a damp cloth. For leather seats, use a gentle cleaner to avoid residue. Let everything dry completely before installing the cover.
Remove Headrests and Armrests
Most seat covers are designed to fit around removable parts. Take out headrests, armrests, and any seatbelt buckles if possible. This gives you full access to the seat and makes it easier to slide the cover on evenly.
Label each part with tape if you’re worried about mixing them up. Reinstalling them correctly ensures the cover stays aligned and doesn’t slip.
Step 4: Install the Seat Cover Correctly
Now for the main event—putting the cover on. Rushing this step is the #1 reason covers end up loose or crooked.
Start with the Backrest
Begin by draping the cover over the backrest. Align the seams with the center of the seat. Pull the material down evenly on both sides. If your cover has elastic bands or hooks, attach them to the underside of the seat first.
Move to the Seat Cushion
Next, cover the seat base. Pull the fabric taut but not so tight that it distorts the shape. Tuck excess material into the gap between the seat and backrest. Use your hands or a plastic trim tool to push fabric deep into crevices—this creates a smooth, wrinkle-free surface.
Secure with Clips and Straps
Most quality seat covers come with clips, straps, or hooks. Use these to anchor the cover underneath the seat. Pull each strap snugly and fasten it securely. Don’t overtighten—this can cause tearing or uneven tension.
If your cover didn’t come with fasteners, you can buy universal seat cover clips online. They’re inexpensive and make a huge difference in fit.
Step 5: Tuck and Smooth Out Excess Fabric
Even the best covers can have a little extra material. The key is to tuck it neatly out of sight.
Use the “Crease and Tuck” Method
Run your hand along the edges of the seat, feeling for loose fabric. Gently pull and fold excess material toward the bottom or sides, then tuck it into the seat frame gaps. Use a flat tool (like a butter knife or plastic pry tool) to push fabric deep into tight spaces.
For bucket seats, focus on the sides and front edge. For bench seats, work from the center outward to maintain symmetry.
Smooth Out Wrinkles
Once everything is tucked, go over the entire cover with your hands, smoothing out any bumps or folds. Sit in the seat a few times to help the material settle. Sometimes, the weight and movement naturally tighten the fit.
Step 6: Use Heat to Stretch and Shape the Cover
If your cover is still wrinkling or feels tight in certain areas, gentle heat can help.
Apply Heat with a Hair Dryer or Heat Gun
Set your hair dryer to medium heat and slowly move it over tight or wrinkled areas. Keep it at least 6 inches away to avoid damage. As the material warms, it becomes more pliable. Use your hands to stretch and smooth the fabric while it’s warm.
This works especially well with neoprene and some synthetic fabrics. Avoid using heat on leather or vinyl unless the manufacturer specifically recommends it.
Let It Cool in Place
Once you’ve shaped the cover, let it cool completely while it’s stretched over the seat. This helps the material “remember” its new shape and reduces future wrinkling.
Step 7: Reinstall Headrests and Accessories
Now that the cover is in place, it’s time to put everything back.
Reattach Headrests and Armrests
Slide headrests back into their posts, making sure the cover isn’t bunched up around the base. If the cover has cutouts for headrests, align them carefully. Do the same for armrests and seatbelt clips.
Check for Gaps or Loose Spots
Sit in the seat and adjust your position. Look for any areas where the cover pulls or shifts. If you find loose spots, lift the cover slightly and re-tuck the fabric underneath.
Troubleshooting Common Fit Issues
Even with careful installation, problems can pop up. Here’s how to fix the most common ones.
Problem: Cover Keeps Sliding Forward
Solution: Check the straps underneath. Make sure they’re tight and anchored to solid parts of the seat frame. If the straps are too long, shorten them or add extra clips.
Problem: Wrinkles or Bunching on the Sides
Solution: Remove the cover and re-tuck the side fabric. Use a heat gun to relax the material, then smooth it out as you reinstall.
Problem: Cover Doesn’t Fit Around Seat Bolsters
Solution: Look for seat covers labeled “contoured” or “custom-fit” for your car model. Universal covers often struggle with aggressive bolsters. Alternatively, use a sharp seam ripper to carefully enlarge the cover’s side openings—just be cautious not to tear the fabric.
Problem: Headrest Area Is Too Tight
Solution: Ensure the headrest is fully removed before installing the cover. If the cutout is too small, gently stretch the fabric around the headrest post or use a small pair of scissors to widen the opening slightly.
Maintenance Tips to Keep Your Covers Fitting Well
A great fit doesn’t end at installation. Regular care keeps your covers looking sharp.
- Vacuum weekly: Remove dirt and debris that can cause wear or shifting.
- Spot clean spills immediately: Prevent stains and material damage.
- Re-tighten straps every few months: Fabric can stretch over time, so check and adjust as needed.
- Avoid sharp objects: Keys, tools, or pet claws can tear or loosen the cover.
Conclusion
Making car seat covers fit better isn’t just about aesthetics—it’s about comfort, durability, and protecting your investment. By measuring accurately, choosing the right material, and using proper installation techniques, you can achieve a snug, professional look that lasts.
Don’t settle for saggy or wrinkled covers. With the tips in this guide—from tucking fabric to using heat for shaping—you’ll transform your car’s interior into a clean, polished space. Whether you’re covering cloth seats for the first time or upgrading to neoprene for your SUV, a perfect fit is within reach.
Take your time, follow each step, and enjoy the results. Your car—and your passengers—will thank you.