How to DIY Car Seat Covers for a Custom Look
Transform your car’s interior with handmade seat covers that reflect your style. This guide walks you through measuring, cutting, sewing, and installing custom DIY car seat covers using simple tools and durable fabrics—no professional experience needed.
Key Takeaways
- Measure twice, cut once: Accurate measurements ensure a snug, professional fit and prevent fabric waste.
- Choose the right fabric: Opt for durable, stain-resistant materials like canvas, neoprene, or upholstery-grade polyester for longevity.
- Use existing seat covers as templates: Trace your current covers to create precise patterns for each seat section.
- Sew with a heavy-duty needle: A strong needle and upholstery thread prevent fabric tearing and ensure durable seams.
- Install with care: Take time to tuck and secure fabric around headrests, armrests, and seat contours for a clean finish.
- Customize with style: Add piping, contrast stitching, or embroidered logos to make your DIY covers truly unique.
- Maintain regularly: Spot-clean spills quickly and vacuum frequently to keep your custom covers looking fresh.
How to DIY Car Seat Covers for a Custom Look
Want to give your car’s interior a fresh, personalized upgrade without spending hundreds on professional upholstery? DIY car seat covers are a fun, affordable, and rewarding project that lets you express your style while protecting your seats from wear and tear. Whether you’re covering up stains, refreshing faded fabric, or just craving a bold new look, making your own seat covers is easier than you think.
In this step-by-step guide, you’ll learn how to create custom-fit car seat covers using basic sewing skills and accessible materials. We’ll cover everything from measuring your seats to choosing the best fabric, cutting patterns, sewing seams, and installing your finished covers. By the end, you’ll have a sleek, tailored look that turns heads—and all for a fraction of the cost of store-bought alternatives.
Why Make Your Own Car Seat Covers?
Factory seat covers often wear out, fade, or get stained over time. Buying replacements can be expensive, and generic aftermarket covers rarely fit perfectly. DIY seat covers solve these problems by giving you full control over fit, fabric, and design. Plus, you can match your car’s interior to your personal taste—think bold colors, textured fabrics, or even custom embroidery.

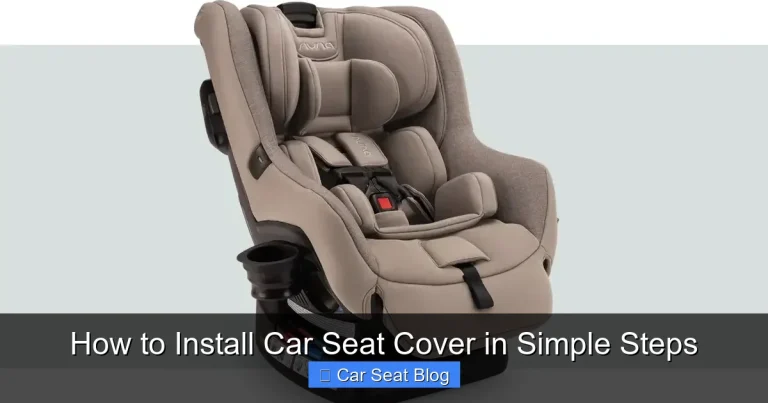
Visual guide about How to DIY Car Seat Covers for a Custom Look
Image source: altdriver.com
Another bonus? It’s eco-friendly. Instead of tossing old seats or buying new covers, you’re repurposing materials and reducing waste. And if you enjoy hands-on projects, this is a satisfying way to combine creativity with practicality.
What You’ll Need
Before you start, gather these essential tools and materials:
- Measuring tape – For accurate seat dimensions
- Fabric scissors – Sharp and large enough for cutting heavy materials
- Chalk or fabric marker – To trace patterns
- Pins or fabric clips – To hold pieces together while sewing
- Sewing machine – Ideally with a heavy-duty needle
- Upholstery thread – Stronger than regular thread
- Fabric – 2–4 yards depending on seat size (see fabric tips below)
- Seam ripper – To remove old covers (optional)
- Iron and ironing board – For pressing seams
- Elastic or Velcro – For securing covers (optional)
Step 1: Remove the Old Seat Covers (If Needed)
If your seats have removable covers, start by taking them off. Use a seam ripper or flathead screwdriver to gently loosen clips, zippers, or Velcro strips. Be careful not to damage the foam underneath.
Tip: Take photos as you remove the covers. This helps you remember how they were attached and where seams were located.
If your seats are upholstered directly (no removable covers), you can still make slip-on covers. Just measure carefully and design your new covers to fit over the existing material.
Step 2: Measure Your Seats
Accurate measurements are critical for a professional fit. Use a flexible measuring tape to record the length, width, and depth of each seat section:
- Seat base (the part you sit on)
- Backrest
- Headrest (if removable)
- Side bolsters (the raised edges on the sides)
Don’t forget to measure around curves and contours. Add 1–2 inches to each dimension for seam allowances and ease of movement.
Pro Tip: Measure both front seats—they’re often slightly different sizes. Label each piece (e.g., “Driver Seat Base”) to avoid confusion later.
Step 3: Choose the Right Fabric
Not all fabrics are created equal when it comes to car interiors. You need something durable, easy to clean, and resistant to fading and stretching. Here are the best options:
- Canvas: Heavy-duty and affordable. Great for a rugged look. Choose a water-resistant finish if possible.
- Neoprene: Waterproof, stretchy, and perfect for sporty or modern styles. Ideal for cars exposed to moisture or pets.
- Upholstery-grade polyester: Resists stains and fading. Often comes in vibrant colors and patterns.
- Leather or faux leather: Sleek and easy to wipe clean. Requires more sewing skill but looks luxurious.
- Denim or twill: Stylish and durable, but may fade over time with sun exposure.
Avoid lightweight fabrics like cotton or silk—they tear easily and aren’t practical for daily use.
Fabric Quantity Guide:
- Front seats: 2–3 yards total
- Rear bench: 3–4 yards
- Add extra if you’re making headrest covers or want decorative elements like piping.
Step 4: Create a Pattern
The easiest way to make a pattern is to use your old seat covers—or the seats themselves—as a template.
Method 1: Use Old Covers
If you removed the original covers, lay them flat on your new fabric. Trace around each piece with chalk, adding 1 inch for seam allowances. Cut out the fabric pieces.
Method 2: Make a Paper Pattern
If you don’t have old covers, use butcher paper or large sheets of newspaper. Drape the paper over each seat section and trace the shape with a marker. Include curves, seams, and attachment points. Cut out the paper pattern, then use it to trace onto your fabric.
Tip: Label each pattern piece (e.g., “Backrest Left Side”) and note which direction is up to avoid confusion.
Step 5: Cut the Fabric
Lay your fabric on a flat, clean surface. Pin the pattern pieces to the fabric, ensuring the grain runs in the same direction for a consistent look. Cut carefully with sharp fabric scissors.
Important: Don’t rush this step. Jagged cuts or uneven edges will show in the final product. If using patterned fabric, align the design across pieces for a cohesive look.
Step 6: Sew the Pieces Together
Now it’s time to assemble your seat cover. Start by sewing the main sections together—base to backrest, side panels, etc.
Step-by-Step Sewing:
- Pin the fabric pieces right sides together.
- Sew with a ½-inch seam allowance using a straight stitch.
- Press seams open with an iron to reduce bulk.
- Reinforce stress points (like corners and edges) with a second row of stitching.
Sewing Tips:
- Use a heavy-duty needle (size 90/14 or 100/16) to prevent breaking.
- Go slow around curves to maintain smooth lines.
- If your fabric is thick, adjust your machine’s tension or use a walking foot.
Adding Custom Touches
Want to elevate your design? Try these upgrades:
- Piping: Insert cord between two fabric strips and sew along edges for a polished look.
- Contrast stitching: Use colored thread that stands out against your fabric.
- Embroidery or patches: Add logos, initials, or fun designs with an embroidery machine or iron-on patches.
Step 7: Install the Seat Covers
Once your covers are sewn, it’s time to put them on. Start with the seat base, then move to the backrest.
Installation Tips:
- Begin at the center and work outward to avoid wrinkles.
- Tuck fabric into crevices using a blunt tool (like a chopstick or seam roller).
- Secure elastic straps or Velcro at attachment points if your design includes them.
- For headrests, make a separate cover with a zipper or Velcro closure for easy removal.
If your cover is too tight, don’t force it—recheck your measurements and adjust the pattern. If it’s too loose, consider adding darts or elastic bands for a snugger fit.
Troubleshooting Common Issues
Even with careful planning, you might run into a few hiccups. Here’s how to fix them:
- Cover won’t stay in place: Add non-slip fabric grips underneath or use Velcro strips at key points.
- Fabric wrinkles or bunches: Re-tuck and smooth out the material. Use a fabric steamer to relax tight areas.
- Seams come apart: Reinforce with upholstery thread and a double stitch. Avoid overstretching fabric while sewing.
- Color fades quickly: Choose UV-resistant fabric or park in the shade to protect your covers.
- Zippers or closures don’t work: Test hardware before sewing. Use heavy-duty zippers for durability.
Maintaining Your DIY Seat Covers
To keep your custom covers looking great:
- Vacuum weekly to remove dust and crumbs.
- Blot spills immediately with a damp cloth.
- Use a fabric cleaner designed for upholstery every few months.
- Avoid harsh chemicals that can damage fibers or fade colors.
- Rotate or flip cushions if possible to even out wear.
With proper care, your DIY seat covers can last for years—longer than many store-bought options.
Final Thoughts
Making your own car seat covers is a rewarding project that combines creativity, practicality, and personal style. You’ll save money, reduce waste, and end up with a truly custom interior that reflects who you are. Whether you go bold with bright colors or keep it classic with neutral tones, the result is a car that feels uniquely yours.
So grab your measuring tape, pick out your favorite fabric, and get started. With a little patience and attention to detail, you’ll have professional-looking seat covers that turn every drive into a stylish adventure.