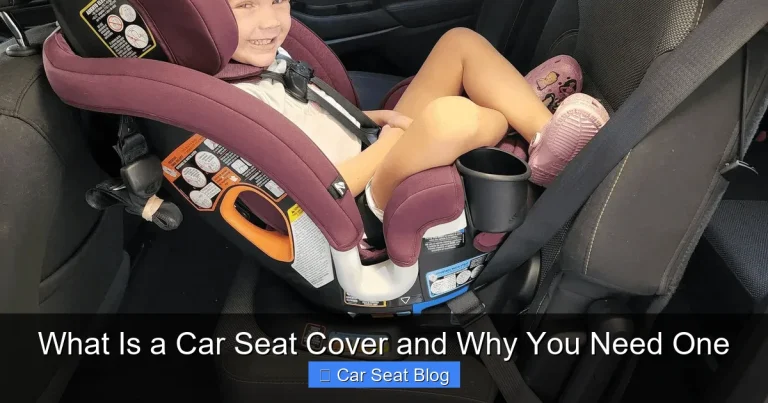
How to Get Car Seat Cover on Easily Step by Step
Installing a car seat cover doesn’t have to be frustrating. This guide walks you through each step to ensure a snug, professional-looking fit every time. Save time and protect your car’s interior with these simple tips.
Key Takeaways
- Choose the right cover: Measure your seats and check compatibility before buying to avoid fit issues.
- Clean your seats first: Remove dirt and debris so the cover sits flat and lasts longer.
- Start with headrests: Most covers require removing headrests—do this first for easier installation.
- Use clips and straps: Secure all fasteners tightly to prevent slipping or bunching while driving.
- Tuck and smooth as you go: Work from top to bottom, smoothing out wrinkles for a clean look.
- Double-check airbag compatibility: Ensure covers don’t block side airbags for safety.
- Practice makes perfect: First-time installs may take 15–20 minutes, but you’ll get faster with experience.
How to Get Car Seat Cover on Easily Step by Step
So, you’ve bought a brand-new car seat cover—maybe it’s sleek neoprene, durable canvas, or plush leather-style fabric. You’re excited to protect your seats from spills, pets, and daily wear. But now comes the tricky part: actually putting it on.
Don’t worry. Installing a car seat cover might seem intimidating at first, but with the right approach, it’s totally doable—even for beginners. In this guide, we’ll walk you through how to get car seat cover on easily, step by step. Whether you’re covering front bucket seats, rear bench seats, or even captain’s chairs, these tips will help you achieve a snug, professional fit without frustration.
By the end of this guide, you’ll know exactly how to install your seat cover quickly, avoid common mistakes, and keep it looking great for years. Let’s get started!
Step 1: Choose the Right Seat Cover for Your Vehicle
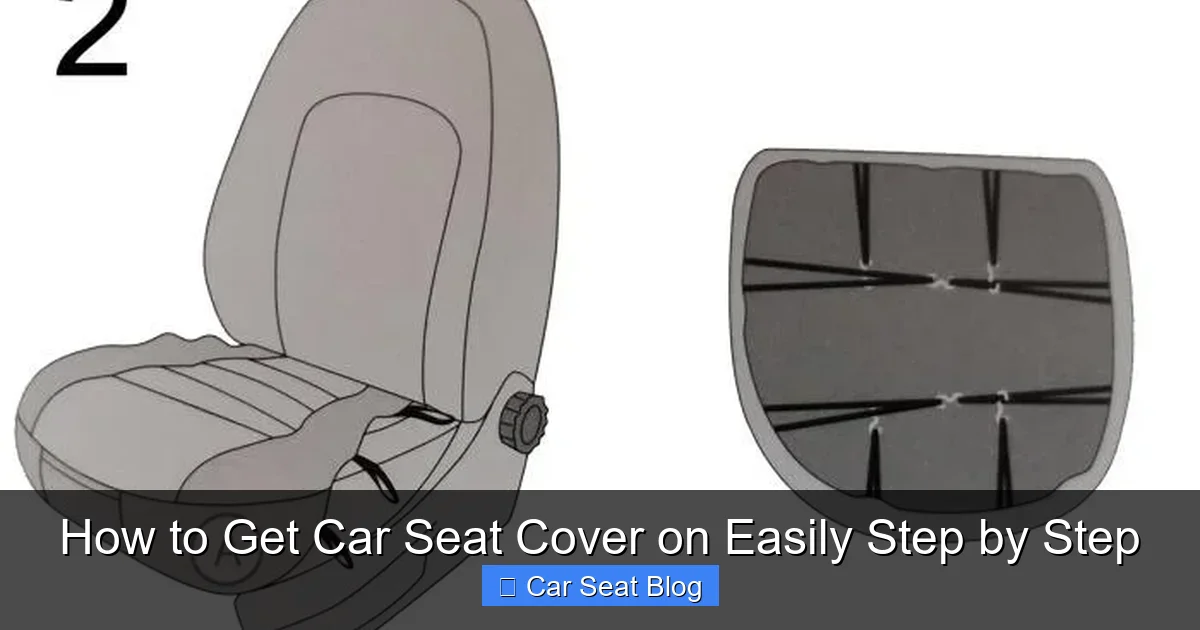
Visual guide about How to Get Car Seat Cover on Easily Step by Step
Image source: keilsgarage.com
Before you even think about installation, make sure you’ve got the right cover. A mismatched cover won’t fit properly, no matter how hard you try.
Check Your Car’s Make, Model, and Year
Seat shapes vary widely between vehicles. A cover made for a Honda Civic won’t fit a Ford F-150. Always check the product description to confirm compatibility with your car’s make, model, and year. Many brands offer custom-fit options designed specifically for your vehicle.
Measure Your Seats
If you’re unsure, grab a tape measure. Measure the width, depth, and height of your seat back and cushion. Compare these to the dimensions listed by the manufacturer. This extra step saves you from buying a cover that’s too tight or too loose.
Consider Seat Features
Does your seat have side airbags? Built-in heaters? Adjustable headrests? Make sure your cover is designed to accommodate these features. For example, airbag-compatible covers have special stitching that allows the airbag to deploy safely.
Step 2: Prepare Your Car and Seat Cover
A little prep work goes a long way. Taking time to get organized now will make installation much smoother.
Clean Your Seats Thoroughly
Dirt, crumbs, and pet hair can prevent the cover from lying flat. Vacuum the seats, wipe them down with a damp cloth, and let them dry completely. This also helps the cover stay in place and prevents odors from getting trapped underneath.
Unpack and Inspect the Cover
Lay out all parts of the seat cover. Most sets include:
– Seat back cover
– Seat cushion cover
– Headrest covers (if applicable)
– Clips, straps, or hooks
– Installation instructions
Check for any damage or missing pieces. If something’s wrong, contact the seller before you start.
Read the Instructions
Every cover is a little different. Take 2–3 minutes to read the manufacturer’s guide. It might include tips specific to your model, like which straps go where or how to handle built-in seat belts.
Step 3: Remove the Headrest (If Needed)
This is a crucial step that many people skip—and then wonder why the cover won’t fit.
Locate the Headrest Release Button
Most headrests have a small button or lever on the side or base. Press or pull it to release the headrest from the seat. Some models require you to press the button while gently pulling up.
Set the Headrest Aside
Place it somewhere safe where it won’t get damaged. You’ll reinstall it after the cover is on.
Check for Integrated Headrests
Some newer cars have fixed headrests that can’t be removed. In that case, look for a cover designed to fit over them. These usually have a zipper or stretch panel at the top.
Step 4: Install the Seat Back Cover
Now it’s time to put the cover on. Start with the seat back—the vertical part of the seat.
Slide the Cover Over the Top
Begin at the top of the seat back. Pull the cover over the headrest posts (if removable) or stretch it over a fixed headrest. Work your way down, gently pulling the fabric taut.
Use the Elastic Edges
Most covers have elastic bands around the edges. These help the fabric hug the contours of the seat. Pull them snugly, but don’t overstretch—this can cause tearing.
Tuck Excess Fabric
If there’s extra material at the sides or bottom, tuck it into the crevices between the seat back and cushion. Use your hands or a soft tool (like a plastic spatula) to push it in neatly. This creates a clean, tailored look.
Secure with Clips or Straps
Many covers come with plastic clips or adjustable straps that attach underneath the seat. Snap or tie these tightly to hold the cover in place. Don’t skip this step—loose covers can shift while driving.
Step 5: Install the Seat Cushion Cover
Next, move to the seat cushion—the part you sit on.
Slide the Cover Over the Cushion
Start at the front edge and pull the cover back. Make sure it’s centered and aligned with the seat back cover.
Tuck the Front and Sides
Tuck the front edge under the seat, then work your way around the sides. Push fabric into the gaps between the cushion and the seat frame. This prevents bunching and keeps the cover flat.
Attach Under-Seat Straps
Like the seat back, the cushion cover usually has straps or hooks that go underneath. Fasten them securely. Some models use Velcro or buckle systems—follow the instructions for your specific cover.
Smooth Out Wrinkles
Run your hands over the surface to remove any creases or bumps. A smooth cover not only looks better but also lasts longer.
Step 6: Reinstall the Headrest
Once the main cover is on, it’s time to put the headrest back.
Slide It Back Into Place
Align the headrest posts with the holes in the seat back. Push down firmly until you hear a click. Make sure it’s locked in securely.
Check for Interference
Ensure the cover isn’t pinched or stretched too tightly around the headrest. If it is, adjust the fabric slightly or reposition the headrest.
Test the Adjustment
Move the headrest up and down to confirm it still works properly. You don’t want a cover that limits functionality.
Step 7: Final Adjustments and Checks
You’re almost done! Take a few minutes to fine-tune the installation.
Inspect All Fasteners
Double-check that all clips, straps, and hooks are secure. Give them a gentle tug to make sure nothing’s loose.
Look for Gaps or Bunching
Walk around the seat and look from different angles. Are there any areas where the cover is loose or wrinkled? Adjust as needed.
Test the Seat Function
If your seat slides, reclines, or has adjustable lumbar support, test these features. The cover shouldn’t interfere with movement.
Sit in the Seat
Actually sit down and shift around. Does the cover feel comfortable? Does it stay in place? Make minor adjustments if needed.
Troubleshooting Common Installation Issues
Even with careful installation, you might run into a few hiccups. Here’s how to fix them.
Cover Is Too Tight or Won’t Fit
This usually means the cover isn’t the right size. Double-check compatibility. If it’s slightly tight, try stretching the fabric gently while installing. Avoid forcing it—this can cause tears.
Cover Keeps Slipping
Loose straps or missing clips are often the culprit. Make sure all fasteners are used and tightened. If your cover didn’t come with enough straps, consider buying aftermarket seat cover clips for extra security.
Wrinkles or Bunching
This happens when fabric isn’t tucked properly. Remove the cover and reinstall it, paying extra attention to tucking excess material into seat crevices. Use a soft tool to push fabric into tight spaces.
Headrest Won’t Reinstall
The cover might be blocking the posts. Loosen the fabric around the headrest area slightly, then try again. If it still doesn’t fit, the cover may not be compatible with your headrest design.
Cover Blocks Airbag Deployment
Never install a cover that covers or restricts side airbags. Look for covers labeled “airbag-safe” with reinforced stitching on the sides. If in doubt, consult your vehicle manual or a professional.
Tips for Long-Lasting Seat Cover Performance
Now that your cover is on, keep it looking great with these care tips.
Clean Regularly
Wipe down the cover weekly with a damp cloth. For deeper cleaning, use a mild soap and water solution. Avoid harsh chemicals that can damage fabric or coatings.
Remove for Deep Cleaning
If your cover is machine-washable, take it off and wash it according to the instructions. This prevents buildup of dirt and bacteria.
Protect from Sun Damage
UV rays can fade and weaken fabric over time. Use a sunshade when parked, or choose a cover with UV protection.
Check Straps Periodically
Over time, straps can loosen. Give them a quick check every few weeks and tighten as needed.
Conclusion
Installing a car seat cover doesn’t have to be a headache. By following these steps—choosing the right cover, preparing your seats, removing headrests, and securing all fasteners—you can get a professional-looking fit in under 20 minutes.
Remember, the key to success is patience and attention to detail. Take your time, tuck fabric neatly, and double-check all connections. With practice, you’ll be able to install a cover in just a few minutes.
Not only will your car look cleaner and more stylish, but you’ll also protect your investment from spills, stains, and wear. Whether you’re a pet owner, a parent, or just someone who loves a tidy car, a good seat cover is worth the effort.
So go ahead—grab your cover, follow this guide, and enjoy a fresh, protected interior. Your seats (and your passengers) will thank you.