How to Replace Car Stereo in 5 Easy Steps
Replacing your car stereo doesn’t require a mechanic—just the right tools and a bit of patience. This guide walks you through the entire process in five simple steps, from removing the old unit to enjoying crisp, upgraded sound in your car.
How to Replace Car Stereo in 5 Easy Steps
Upgrading your car stereo can transform your daily drive—better sound, smartphone integration, and modern features like Apple CarPlay or Android Auto. The good news? You don’t need to be a car expert to do it yourself. With the right tools and a clear plan, replacing your car stereo is a straightforward DIY project that most people can complete in under an hour.
In this guide, we’ll walk you through the entire process in five simple steps. Whether you’re swapping out an old cassette player or upgrading to a touchscreen unit, we’ve got you covered. You’ll learn how to safely remove your old stereo, connect the new one, and test everything before hitting the road. Let’s get started!
Step 1: Gather Your Tools and Prepare Your Vehicle

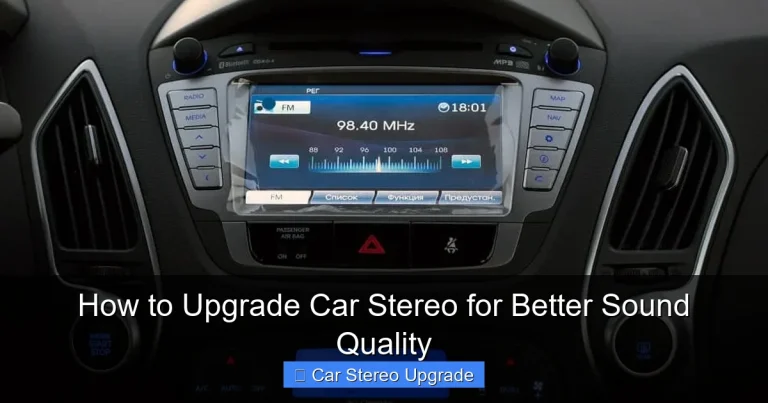
Visual guide about How to Replace Car Stereo in 5 Easy Steps
Image source: howstereo.com
Before you touch a single screw, make sure you have everything you need. Rushing this step can lead to frustration or damage.
What You’ll Need
- Trim removal tools (plastic pry tools)
- Screwdrivers (Phillips and flathead)
- Wire strippers and crimpers (if needed)
- Electrical tape or heat shrink tubing
- Wiring harness adapter (specific to your car and stereo)
- Antenna adapter (if required)
- Mounting kit or dash kit (for fitment)
- Multimeter (optional, for testing wires)
Prepare Your Car
Start by turning off the engine and removing the key. Then, disconnect the negative terminal of your car battery. This is crucial—it prevents accidental shorts, blown fuses, or damage to your new stereo.
Next, clear out any items from your dashboard and center console. A clean workspace helps prevent losing small screws or damaging trim pieces.
Check Compatibility
Not all stereos fit all cars. Check your vehicle’s make, model, and year against the new stereo’s specifications. Most manufacturers provide fit guides online. Also, confirm that your new unit supports your car’s speaker impedance (usually 4 ohms) and power output.
Step 2: Remove the Old Stereo
Now it’s time to take out the old unit. The method varies slightly depending on your car, but the general process is the same.
Remove the Trim Panels
Use a plastic trim removal tool to gently pry off the dashboard panels surrounding the stereo. Start at the edges and work your way around. Avoid using metal tools—they can scratch or crack the plastic.
Some cars have hidden screws behind climate control knobs or storage compartments. Pop those open and remove any screws you find.
Unscrew the Stereo
Once the trim is off, you’ll see the stereo mounted in a metal sleeve. Most factory stereos are held in place by four screws—two on each side. Use a Phillips screwdriver to remove them.
In some vehicles, the stereo is secured with spring clips or DIN tools (long, thin metal rods inserted into small holes on the sides). If your car uses DIN tools, insert them until you hear a click, then gently pull the stereo out.
Disconnect the Wiring
Carefully pull the stereo out just enough to access the wiring harness and antenna cable at the back. Press the release tab on the wiring harness and unplug it. Then, unscrew or unclip the antenna cable.
Label the wires if you’re not using a harness adapter—this will save time later. But ideally, you’ll use a wiring harness adapter that matches your car’s plug, so you don’t have to cut any factory wires.
Step 3: Install the Wiring Harness and Mount the New Stereo
This step is all about making clean, secure connections so your new stereo works perfectly.
Connect the Wiring Harness
Take the wiring harness adapter for your car and connect it to the factory plug you just removed. Then, connect the other end of the adapter to the harness that came with your new stereo.
Match the wire colors:
- Red to red (12V ignition/switched power)
- Yellow to yellow (12V constant power for memory)
- Black to black (ground)
- Blue/white to blue/white (amplifier or antenna trigger)
- Speaker wires (usually paired: white/white-black, gray/gray-black, etc.)
Use crimp connectors or solder the wires together, then cover each connection with electrical tape or heat shrink tubing. Never leave bare wires exposed.
Attach the Antenna Adapter
If your new stereo doesn’t have the same antenna connector as your car, use an antenna adapter. These are inexpensive and widely available. Simply plug it into the factory antenna cable and connect it to your new stereo.
Mount the New Stereo
Slide the new stereo into the mounting sleeve or dash kit. Make sure it fits snugly. Use the screws provided with your dash kit to secure the unit. Don’t overtighten—this can crack the plastic bezel.
If your car uses a single-DIN or double-DIN opening, ensure the stereo is centered and level. A crooked install looks unprofessional and can cause fit issues.
Step 4: Test the New Stereo Before Reassembly
Don’t put everything back together just yet. Testing now saves time and avoids re-disassembly if something’s wrong.
Reconnect the Battery
Reattach the negative terminal of your car battery. Turn the ignition to the “ACC” or “ON” position (don’t start the engine yet).
Power On and Check Functions
Turn on the new stereo. You should see the display light up. Test the following:
- Radio reception (AM/FM)
- Volume and balance controls
- Bluetooth pairing (if available)
- AUX or USB input (if applicable)
- Steering wheel controls (if your car has them—may require an interface module)
If something isn’t working, double-check your wiring. A common issue is reversed speaker wires, which can cause poor sound or no sound at all.
Troubleshooting Tips
- No power? Check the fuse in the stereo or the car’s fuse box. Also, verify the red and yellow wires are connected correctly.
- No sound? Ensure all speaker wires are connected and not crossed. Test each speaker individually.
- Bluetooth not pairing? Make sure the microphone (if included) is properly placed and unobstructed.
- Display flickering? This could indicate a loose ground connection. Recheck the black wire.
Step 5: Reassemble the Dashboard and Finalize Setup
Once everything is working perfectly, it’s time to put your car back together.
Reattach Trim Panels
Carefully snap the dashboard trim pieces back into place. Start from the top and work your way down, pressing firmly but gently. Make sure all clips are secure and there are no gaps.
Secure Loose Wires
Tuck any excess wiring behind the stereo or into the dash cavity. Use zip ties to bundle wires neatly. Avoid placing wires where they can rub against moving parts or get pinched.
Final Check
Turn the stereo on one more time and test all features. Adjust settings like equalizer, balance, and fader to your preference. If your new stereo has a touchscreen, calibrate it according to the manual.
Enjoy Your Upgrade!
You’ve successfully replaced your car stereo. Now sit back, turn up the volume, and enjoy your upgraded audio experience.
Bonus Tips for a Smooth Installation
- Take photos as you remove parts. This helps you remember where everything goes.
- Work in a well-lit area to avoid missing small screws or connectors.
- Don’t rush—hurrying increases the risk of mistakes.
- Keep the old stereo for a few weeks in case you need to return or reference it.
- Consider professional help if your car has a complex infotainment system or integrated controls.
Conclusion
Replacing your car stereo is easier than most people think. With the right preparation, tools, and a bit of patience, you can upgrade your audio system in just a few steps. Not only will you save money on installation fees, but you’ll also gain valuable DIY skills and the satisfaction of a job well done.
Remember: safety first—always disconnect the battery. Use a wiring harness adapter to avoid cutting factory wires. Test everything before reassembling. And most importantly, enjoy the journey. A better sound system means better road trips, commutes, and every drive in between.
So grab your tools, pick out your favorite playlist, and get ready to rock your ride with your brand-new car stereo.