Battery Corrosion Explained: Causes, Fixes, Prevention
Quick Summary: Battery corrosion is a build-up on your battery terminals that blocks power. You can clean it fast with baking soda and water, protect the posts with grease, and test voltage with a multimeter. Follow the steps below to fix it at home, prevent it from coming back, and know when to replace the battery.
If your car won’t start, slow cranks, or you see white or blue fuzz on the battery, you’re not alone. This is battery corrosion. It steals power and can leave you stuck. The good news? You can fix it at home in under an hour with simple tools. In this guide, I’ll give you Battery corrosion explained in plain words, why it happens, how to clean it safely, how to test your battery and alternator, what to do in cold weather, and how to keep it from coming back.
Battery Corrosion Explained: What It Is and Why It Happens
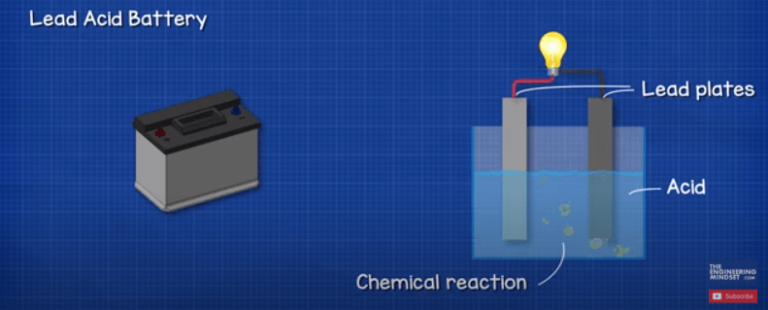
Battery corrosion is a crusty build-up on battery posts, clamps, and cables. It forms when acid fumes or moisture react with metal. In lead-acid batteries, tiny amounts of hydrogen gas and acid vapors escape. These react with copper or lead on your terminals. Add heat, salt, and time, and you get white, blue, or green deposits. These deposits raise resistance. High resistance means poor current flow. That leads to hard starts, dim lights, and charging problems.

Simple definition
Battery corrosion is a chemical build-up on battery terminals that blocks power from reaching your starter and electronics.
Common colors and what they mean
The color can hint at the cause. White or gray powder is often lead sulfate from acid vapor and moisture. Blue or green crystals are copper sulfate from copper reacting with acid. Brown or black film can be dried electrolyte or soot from arcing. Heavy wet goo may signal a leak. Color is a clue, not proof. Test and inspect to confirm.

| Corrosion Color | Likely Cause | Risk Level | What To Do |
|---|---|---|---|
| White/Light Gray powder | Lead sulfate from acid fumes and moisture | Medium | Clean posts, apply dielectric grease, check charge voltage |
| Blue/Green crystals | Copper sulfate from copper terminal reaction | Medium-High | Neutralize, scrub, add felt washers, confirm alternator output |
| Brown/Black film | Dried electrolyte or arcing residue | High | Inspect for leaks or loose clamps, replace damaged parts |
| Wet, oily residue | Active acid leak from cracked case or post seal | Very High | Replace battery, rinse area with baking soda solution, inspect tray |
Symptoms You’ll Notice and What They Mean
Corrosion shows up in everyday ways. Your engine cranks slow. You hear a click but no start. Lights flicker or dim at idle. The battery light comes on. You smell a rotten egg odor. Or you see fuzzy growth on the terminals. Each symptom points you toward a likely cause and a simple test you can do now.

| Symptom | Likely Cause | Quick Test | Fast Fix |
|---|---|---|---|
| Slow crank, worse in cold | Heavy terminal corrosion, weak charge, old battery | Measure open-circuit voltage (OCV) | Clean terminals, charge battery, retest |
| Click, no start | Loose/dirty clamp, sulfation, bad connection at ground | Wiggle cable while trying to start (with helper) | Tighten/clean clamps and chassis ground |
| Dim lights that brighten when revved | Poor connection or weak alternator | Check running voltage at idle vs 2,000 rpm | Clean terminals; if low output, test alternator |
| Battery light on | Charging fault or severe resistance at terminals | Voltage with engine running | Clean terminals; inspect belt/alternator |
| Rotten egg smell | Overcharge boiling electrolyte | Measure alternator voltage after drive | Repair charging system, replace battery if cooked |
| White/blue fuzz on terminals | Venting or leak; galvanic reaction on copper | Visual + brush test (does it reform fast?) | Clean, add protective grease, recheck in 1–2 weeks |
Tools and Supplies You’ll Need
You can fix most corrosion with basic gear. A few low-cost tools make the job faster and safer. Gather what you need first. That cuts your time and mess.
- Safety gear: nitrile gloves, safety glasses, old clothes
- Baking soda and water (neutralizes acid)
- Small brush or old toothbrush; dedicated battery terminal brush if you have one
- Rags or paper towels
- Wrenches: usually 8mm, 10mm, or 12mm for terminals and hold-down
- Terminal puller (optional but handy for stuck clamps)
- Spray bottle with water or premixed baking soda solution
- Dielectric grease or petroleum jelly
- Anti-corrosion felt washers (optional but helpful)
- Multimeter (digital)
- Battery charger or smart maintainer
- Wire brush or Scotch-Brite pad for ground connections
- Battery cleaning spray (optional; baking soda works fine)
- Battery terminal replacement kit or new clamps if old ones are damaged
- Memory saver for radio presets (optional)
Safety First: Do This Before You Touch the Battery
Car batteries hold a lot of current. Acid can burn skin and eyes. Work slow and safe. Vent the area. Keep flames and sparks away. Protect your eyes and hands. If acid gets on skin, rinse with plenty of water. Neutralize spills with baking soda solution.

- Turn the engine off. Remove the key. Set the parking brake.
- Open the hood and let the area air out.
- Wear gloves and glasses. Keep water nearby.
- Do not smoke or make sparks near the battery.
- Remove jewelry like rings and watches.
- Always disconnect the negative (-) cable first. Reconnect it last.
- Keep baking soda solution ready for neutralizing acid.
- Rinse tools later to prevent rust.
For general battery safety and roadside tips, resources like those from AAA offer clear guidance you can trust. See how to handle battery issues as explained by AAA.
Step-by-Step: How to Diagnose Battery Corrosion Problems
Find the root cause before you clean. It saves time and prevents repeat build-up. You can diagnose with your eyes and a simple meter.
.png)
- Visual check
- Look for white, blue, or green build-up on both posts and clamps.
- Check for wet spots on the battery top and around post seals.
- Inspect the hold-down bracket. A loose battery shakes and leaks.
- Follow the negative cable to the body and engine. Look for rust at grounds.
- Wiggle test
- Gently twist each clamp. It should not move on the post.
- If loose, note it. You will clean and retighten later.
- Open-circuit voltage (OCV) test
- Let the car sit off for at least 30 minutes.
- Set the multimeter to DC volts. Touch red to + and black to -.
- Use the table below to judge state of charge.
| Battery OCV (12V) | State of Charge | What It Means | Next Step |
|---|---|---|---|
| 12.6–12.8 V | 100% | Fully charged and healthy | Clean terminals, then load test if needed |
| 12.4–12.5 V | 75–85% | Slightly low | Charge and retest after cleaning |
| 12.2–12.3 V | 50–60% | Partially discharged | Charge fully; look for parasitic drain |
| 12.0–12.1 V | 25–35% | Very low | Charge now; battery may be weak |
| < 11.9 V | < 20% | Deeply discharged or failed cell | Slow charge and test; likely replace |
- Cranking test
- Have a helper start the car while you watch voltage.
- Normal dip is around 10–10.5 V during crank.
- If it drops below ~9.6 V, the battery is weak or clamps are bad.
- Charging test
- With the engine running, measure across the battery.
- Normal alternator output is about 13.8–14.7 V when warm.
- Above ~15 V means overcharging. That cooks batteries and causes heavy corrosion.
- Parasitic draw screen (simple)
- If the battery drains overnight, pull and re-seat one fuse at a time while watching for spark at the negative terminal on reconnection. Big spark hints at a draw on that circuit.
- For exact draw, you need a clamp meter or ammeter. Many shops can measure this fast.
Step-by-Step: How to Clean Battery Corrosion Safely
This is the part most drivers can do at home. Work slow. Keep track of hardware. Neutralize acid. Tighten to snug, not gorilla tight. Protect the surfaces when you’re done.
- Prepare a neutralizing mix
- Stir 1 tablespoon of baking soda into 1 cup of warm water.
- Fill a spray bottle or small bowl. Keep extra dry baking soda for spills.
- Power down
- Turn off the car. Remove the key.
- Wear gloves and glasses.
- Disconnect the battery (remember order)
- Loosen and remove the negative (-) clamp first.
- Loosen and remove the positive (+) clamp next.
- If clamps stick, use a terminal puller. Do not pry against the case.
- Neutralize the build-up
- Sprinkle dry baking soda on the crust.
- Drip or spray your mix. It will fizz as it neutralizes acid.
- Let it sit for 3–5 minutes.
- Scrub the terminals and clamps
- Use a terminal brush or toothbrush to scrub posts and the inside of clamps.
- For stubborn crystals, repeat the baking soda step.
- Do not let dirty slurry get into battery vents.
- Rinse and dry
- Wipe with a damp cloth. Then dry with a clean rag.
- Keep the top of the battery clean and dry to reduce future corrosion paths.
- Inspect and repair
- Check cables for bulges, green under the insulation, or broken strands.
- Replace cracked clamps or frayed cables now.
- Make sure the hold-down bracket is present and secure. A shaking battery leaks and corrodes.
- Protect the metal
- Slip on felt washers if you use them.
- Lightly coat posts and clamp interiors with dielectric grease or petroleum jelly.
- A thin film is enough. Do not go heavy.
- Reconnect (reverse order)
- Install the positive (+) clamp first. Tighten snugly.
- Install the negative (-) clamp last. Tighten snugly.
- Typical clamp torque is about 44–53 in-lb (5–6 N·m). Do not over-tighten.
- Final checks
- Start the engine. Watch for steady lights and normal cranking.
- Measure charging voltage. Confirm 13.8–14.7 V when warm.
Fixes for Specific Corrosion Causes
Cleaning is only half the job. Find the reason behind the build-up. Fix that root cause so the problem does not return in a few weeks.
Overcharging and acid venting
If voltage is above ~15 V at the battery while running, the alternator or regulator is overcharging. That boils electrolyte. It vents acid fog. Corrosion then blooms fast. Replace or repair the alternator or voltage regulator. Clean again after repair. If the smell was strong or the case looks swollen, replace the battery too.
Electrolyte leak at the post or a cracked case
Wet areas at the base of a post or a hairline crack on the top or side means a leak. No amount of cleaning will hold. Replace the battery. Neutralize the tray and surrounding metal with baking soda mix. Rinse and dry. Rust-proof the tray if needed.
Galvanic reaction on copper terminals
Blue/green crystals on copper clamps are copper sulfate. It happens even with a healthy battery if moisture and acid vapors reach copper. After cleaning, use felt washers and a light film of dielectric grease. Make sure the hold-down is snug so the case does not rub and vent more.
Road salt and moisture
Winter salt sprays up into the engine bay. Salt pulls moisture from the air and speeds corrosion. Rinse the engine bay gently after storms. Keep the battery top dry. In snow states, check terminals monthly.
Underuse and short trips
Short trips never fully recharge the battery. A half-charged battery sulfates. Sulfation raises internal resistance and heat. That speeds corrosion on top. Use a smart maintainer if you drive less than 10 miles a day or store the car.
Prevention: Keep Corrosion From Coming Back
Preventing corrosion is easier than dealing with no-start mornings. Set a simple routine. It takes minutes and saves money.
- Keep the top of the battery clean and dry. Wipe dust and moisture monthly.
- Use felt washers and a thin coat of dielectric grease on posts and clamps.
- Secure the hold-down so the battery cannot bounce.
- Test alternator output twice a year. Fix overcharge or undercharge fast.
- Use a smart maintainer during storage, or if you do many short trips.
- Inspect cable ends and grounds every oil change.
- Replace flooded batteries around 3–5 years, AGM around 4–6 years, based on tests.
- In winter regions, rinse salt from the engine bay. Avoid pressure directly at electrical parts.
When to Replace the Battery vs Repair the Terminals
Sometimes a clean-and-go is fine. Other times, replacement is the smart move. Use this quick guide to decide. This table includes a Battery corrosion explained snapshot for fast choices.
| Condition (Battery corrosion explained quick view) | Replace Battery? | Why | Next Step |
|---|---|---|---|
| Light white crust, battery age < 3 years, normal OCV and charge | No | Likely vapor build-up only | Clean, protect, recheck in 2 weeks |
| Blue/green on copper clamps, no leaks, normal charge | No | Galvanic film; easy fix | Clean, add felt washers, grease lightly |
| Wet area at post, cracked case, swollen sides | Yes | Active leak; unsafe | Replace battery; neutralize tray |
| Overcharge voltage > 15 V, strong sulfur smell | Likely | Boiled plates; damage likely | Fix alternator first, then replace battery |
| OCV < 12.0 V after full charge, fails load test | Yes | Internal sulfation/failure | Replace; clean connections during install |
| Repeated corrosion within weeks after proper cleaning | Maybe | Hidden leak or chronic overcharge | Inspect for leaks, test charge system, consider new battery |
Battery Types and Corrosion Differences
Not all 12-volt batteries behave the same. Flooded, AGM, and EFB each have quirks. Side-post and top-post layouts also change how corrosion shows up. Know what you have. Match your care to the type.
Flooded lead-acid (most common)
These have liquid electrolyte and vent caps or internal vents. They can vent more vapor, especially with heat or overcharge. You may see white crust on posts and even on the battery top. Keep the top clean and dry. Make sure the venting is not blocked by dirt or covers.
AGM and EFB (start-stop friendly)
AGM (Absorbent Glass Mat) and EFB (Enhanced Flooded Battery) are sealed or low-maintenance designs. They vent less under normal use. Corrosion is often from copper reaction on clamps, not heavy acid fog. Charging must match spec. Overcharge shortens life fast. If your car has start-stop, use the right group and rating. Based on this battery guide from Consumer Reports, using the correct type avoids early failure.
Side-post vs top-post terminals
Side-post batteries hide corrosion under the bolt head and cable end. You may not see build-up until you remove the bolt. If you have slow cranks on a side-post setup, remove the bolt and inspect inside. Clean, then torque to spec. Do not over-tighten into the case.
Hybrid and EV 12-volt systems
Hybrids and EVs still use a 12-volt battery for computers and relays. It can corrode like any other. Many charge differently than gas cars. If you see repeated corrosion on a hybrid or EV 12V, have the charging logic or DC-DC converter checked. Follow service-mode steps when disconnecting to protect systems.
Real-World Scenarios and Quick Fixes
Here are common moments you may face. I’ll show the fast move for each. These are real-world, simple fixes you can do now.
- Cold morning. Slow crank.
- Pop the hood. Check for white or blue build-up.
- Clean terminals. Charge the battery to full.
- Retest. If still weak, load test or replace.
- After a car wash, battery light flickers.
- Moisture on a dirty battery can create small current paths.
- Wipe the top dry. Clean any crust. Check belt tension and alternator output.
- Just bought a used car. Corrosion everywhere.
- Do a full clean and protect.
- Test OCV and alternator. Plan to replace the battery if older than 4–5 years or if tests fail.
- Smell of rotten eggs after a long drive.
- Measure running voltage. If it’s above ~15 V, stop driving until repaired.
- High voltage means overcharging. That damages the battery and can cause spills.
- Car sits a lot. Every start is weak.
- Top up with a smart maintainer. Set a once-a-month clean check.
- Consider AGM if your car supports it and you store often.
- After installing a new stereo, corrosion shows up fast.
- Check for parasitic draw and poor grounds.
- Clean and secure grounds with bare metal contact.
Charging and Alternator Checks After Cleaning
Once the connections are clean, verify that the system charges right. A good alternator keeps the battery happy. A bad one causes new corrosion or a dead battery.
- Baseline idle check
- Engine running, lights and blower off.
- Voltage at battery should be 13.8–14.7 V.
- Loaded check
- Turn on headlights, rear defogger, and blower.
- Voltage should stay above about 13.5 V on most cars.
- Warm recheck
- After 15–20 minutes, recheck voltage.
- It may drop slightly but should not exceed ~15 V.
- Belt and pulley look and listen
- Glazed belt or noisy pulley reduces charge and causes flicker.
- Replace worn belts. Check tensioners.
If you suspect a charging fault or recall, you can check for open recalls by searching your VIN through resources provided by the National Highway Traffic Safety Administration.
Costs, Time, and Tools: DIY vs Shop
Cleaning corrosion is a fast DIY win. It also saves you money. Here is what to expect for time and costs. If you prefer a shop, you will still know what they should do.
| Item/Service | DIY Cost | Shop Cost (Typical) | Time Needed |
|---|---|---|---|
| Baking soda, brush, rags | $5–$15 | Included | 30–45 min DIY |
| Dielectric grease + felt washers | $5–$12 | Included/Small fee | 5–10 min |
| New terminal clamps (pair) | $10–$25 | $40–$80 parts + labor | 30–60 min |
| Battery replacement (flooded) | $120–$200 | $170–$300 installed | 20–40 min |
| Battery replacement (AGM) | $180–$350 | $230–$450 installed | 20–60 min |
| Alternator test and replace | $0 test–$400+ | $300–$800+ installed | 1–3 hrs |
Warranty, Recycling, and Environmental Notes
Lead-acid batteries are recyclable. Most parts stores give a core credit for old batteries. Do not toss a battery in the trash. Neutralize spills, then recycle the unit. According to the EPA, proper recycling keeps lead and acid out of landfills and recovers valuable materials. Many stores test batteries for free and handle recycling when you buy a new one. Keep your receipt for warranty claims. Most car batteries carry 2–3 year free replacement periods, then prorated coverage.
Troubleshooting Flowchart (Text Version)
Use this fast flow to decide your next step. It takes you from symptom to fix without guesswork.
- Car cranks slow or clicks?
- Yes: Go to Step 2.
- No: If lights flicker or battery light is on, test alternator.
- See white/blue/green build-up on posts?
- Yes: Clean and protect. Then go to Step 3.
- No: Check clamp tightness and grounds.
- After cleaning, measure OCV.
- 12.6–12.8 V: Good. Go to Step 4.
- 12.2–12.5 V: Charge, then retest.
- < 12.0 V: Charge and load test. Replace if fails.
- With engine running, check charge voltage.
- 13.8–14.7 V: Normal. Problem likely solved.
- > 15 V: Overcharging. Repair alternator/regulator.
- < 13.5 V with loads: Alternator or belt issue.
- Repeat corrosion in weeks?
- Yes: Inspect for leaks and hold-down tension. Consider new battery.
- No: Maintain monthly. You’re good.
Voltage Reference Table You Can Save
Keep these numbers on your phone. They help you judge battery health at a glance. This also helps you explain Battery corrosion explained to friends when they ask why their car won’t start.
| Measurement | Good | Borderline | Bad |
|---|---|---|---|
| Open-Circuit Voltage (engine off, rested) | 12.6–12.8 V | 12.2–12.5 V | < 12.0 V |
| Cranking Voltage Dip | ≥ 10.0 V | 9.6–9.9 V | < 9.6 V |
| Charging Voltage (warm idle) | 13.8–14.7 V | 13.4–13.7 V | < 13.4 V or > 15.0 V |
| Parasitic Draw (typical modern car) | ≤ 50 mA after sleep | 50–100 mA | > 100 mA |
FAQ
What causes battery corrosion the most?
The top causes are acid vapors from normal venting, overcharging that boils electrolyte, moisture and salt in the engine bay, and reactions with copper clamps. A loose battery hold-down makes it worse by letting the case rub and vent more.
Can I drive with corrosion on my battery?
It may still start, but it is risky. Corrosion raises resistance. You can lose power at any time, and you may damage the alternator from high resistance. Clean it as soon as you can.
Is baking soda safe for cleaning battery terminals?
Yes. Baking soda neutralizes acid. Mix it with water and apply to the crust. Rinse and dry after. Keep it out of the battery cells.
Which terminal do I disconnect first?
Always remove the negative (-) terminal first and reconnect it last. That reduces the chance of a short if your wrench touches metal.
How can I stop corrosion from coming back?
Keep the top of the battery dry, secure the hold-down, use felt washers, add a light coat of dielectric grease, and make sure the alternator charges in the normal range.
Does cold weather cause more corrosion?
Cold slows chemical reactions. But winter road salt pulls moisture and can speed corrosion on dirty batteries. Clean and protect before winter and after heavy storms.
When should I replace my battery?
Replace it if the case is cracked or swollen, if it fails a load test after a full charge, if it is over 3–5 years old and shows symptoms, or if corrosion keeps returning due to a leak.
Conclusion
Battery corrosion is common, but it is easy to beat. You now know what causes it, how to spot it, and how to fix it in simple steps. Clean with baking soda and water. Protect with a light coat of dielectric grease. Test your voltage before and after. If you see leaks, swelling, or overcharging, act fast and replace parts as needed. Check your battery each oil change. A few minutes of care can save you a tow, protect your alternator, and keep your car starting strong all year.