How to Fix Torn Car Seat Cover Fast and Easy
Learn how to fix torn car seat cover quickly using affordable, at-home solutions. Whether it’s a small rip or a large tear, this guide covers patching, gluing, and replacing seat covers with clear, easy steps.
Key Takeaways
- Assess the damage first: Determine if the tear is minor (can be patched) or major (may need full cover replacement).
- Use the right adhesive: Fabric glue or vinyl repair kits work best—avoid regular super glue to prevent cracking.
- Patch small tears with fabric or vinyl patches: Iron-on or adhesive-backed patches blend well and last long.
- For large rips, consider a seat cover replacement: Universal-fit covers are affordable and easy to install in under an hour.
- Clean the area before repairing: Dirt and grease weaken adhesives—always prep the surface for best results.
- Use a heat gun or hair dryer for vinyl repairs: Gentle heat helps reshape and seal cracks in synthetic materials.
- Maintain your seat covers: Regular cleaning and conditioning prevent future tears and extend lifespan.
How to Fix Torn Car Seat Cover Fast and Easy
Nothing ruins the look of your car’s interior faster than a torn seat cover. Whether it’s from daily wear, pets, or an accidental snag, ripped upholstery can make your vehicle feel old and neglected. But don’t worry—you don’t need to spend hundreds at a professional upholstery shop. With a few simple tools and a little time, you can fix a torn car seat cover fast and easy, right at home.
In this guide, we’ll walk you through everything you need to know to repair your car seat cover, from assessing the damage to choosing the best fix. Whether you’re dealing with a small tear in fabric or a large rip in vinyl, we’ve got practical, budget-friendly solutions. By the end, your seats will look refreshed, and your car will feel like new again.
Step 1: Assess the Damage
Before jumping into repairs, take a close look at the tear. The type and size of the damage will determine your best course of action. Here’s how to evaluate it:
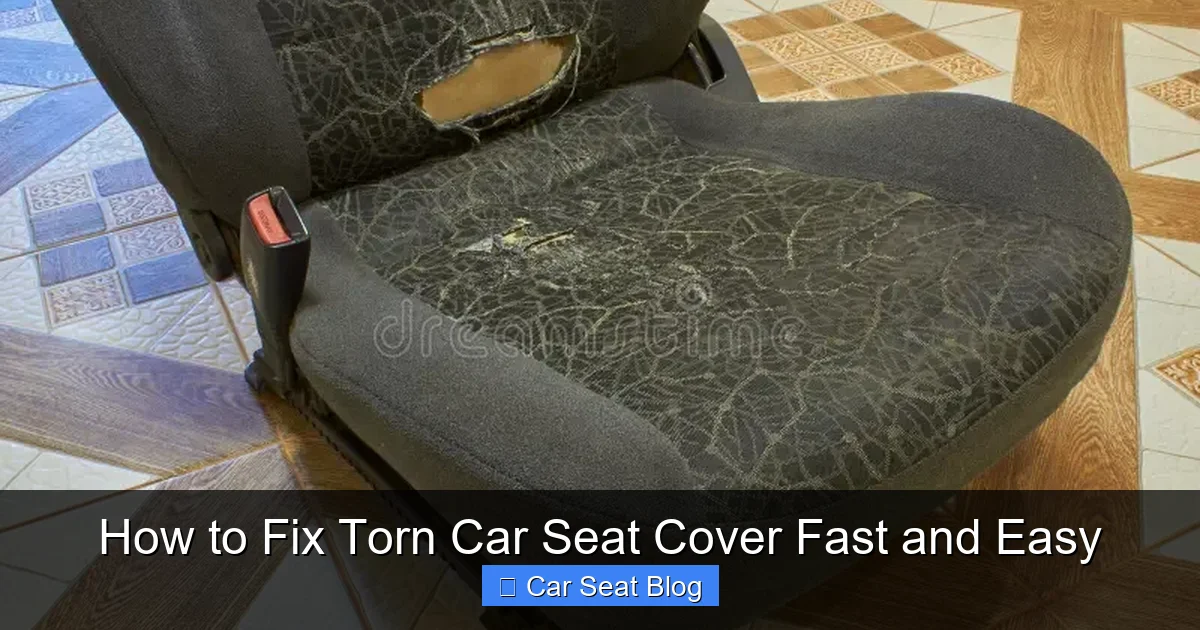
Visual guide about How to Fix Torn Car Seat Cover Fast and Easy
Image source: thumbs.dreamstime.com
Check the Material
Car seat covers are usually made of fabric, vinyl, or leather. Each material requires a different repair approach:
- Fabric: Often easier to patch with iron-on or adhesive fabric patches.
- Vinyl: Can be repaired with vinyl repair kits or heat-based methods.
- Leather: Best fixed with leather filler and color-matching dyes.
Measure the Tear
Use a ruler to measure the length and width of the tear. Small tears (under 2 inches) can usually be patched. Larger rips (over 4 inches) may need a full seat cover replacement for a clean, professional look.
Look for Underlying Damage
Sometimes the foam underneath is also damaged. If the seat feels lumpy or collapsed, you may need to repair or replace the foam padding before fixing the cover.
Step 2: Gather Your Tools and Materials
Having the right supplies makes all the difference. Here’s what you’ll need, depending on the repair method:
For Small Fabric Tears
- Fabric glue or upholstery adhesive
- Iron-on fabric patch (matching color)
- Scissors
- Clean cloth
- Rubbing alcohol (for cleaning)
For Vinyl or Leather Tears
- Vinyl/leather repair kit (includes filler, color dye, and applicator)
- Heat gun or hair dryer
- Sandpaper (fine grit, 220+)
- Cleaning solution
For Large Rips or Full Replacement
- Universal car seat cover (fabric or neoprene)
- Zip ties or hog rings (for securing)
- Seat cover installation tool (optional but helpful)
- Scissors or utility knife
Most of these items are available at auto parts stores, craft shops, or online. Kits often cost under $20, making this a very affordable fix.
Step 3: Clean the Area
Never repair a dirty seat. Dirt, oils, and debris can prevent adhesives from sticking and ruin the final look.
Wipe Down the Seat
Use a clean cloth dampened with rubbing alcohol or a mild upholstery cleaner. Gently scrub the torn area and let it dry completely. Avoid soaking the fabric—excess moisture can weaken the material.
Remove Loose Threads
Trim any frayed edges around the tear with small scissors. This helps the patch or adhesive lay flat and prevents further unraveling.
Step 4: Fix Small Fabric Tears
If you’re dealing with a small rip in fabric, a patch is your best bet. Here’s how to do it:
Apply Fabric Glue (Optional)
For extra strength, apply a thin layer of fabric glue along the edges of the tear. Press the fabric together and let it dry for 10–15 minutes. This step isn’t always necessary but helps reinforce the area.
Cut a Matching Patch
Cut a piece of iron-on or adhesive-backed fabric slightly larger than the tear. Choose a color that matches your seat. If you can’t find an exact match, go slightly darker—it’s less noticeable.
Apply the Patch
- Iron-on patches: Place the patch over the tear, adhesive side down. Cover with a thin cloth and press with a warm iron for 30 seconds. Let it cool.
- Adhesive patches: Peel off the backing and press firmly over the tear. Use a roller or spoon to smooth out air bubbles.
Let It Cure
Allow the patch to set for at least 1 hour before using the seat. Avoid heavy pressure during this time.
Step 5: Repair Vinyl or Leather Tears
Vinyl and leather require a different approach because they don’t absorb adhesives the same way fabric does. A repair kit is your best option.
Sand the Area (If Needed)
For deep cracks or rough edges, lightly sand the area with fine-grit sandpaper. This helps the filler adhere better. Wipe away dust with a clean cloth.
Apply the Filler
Use the applicator in your repair kit to fill the tear with the matching filler compound. Overfill slightly—it will shrink as it dries. Smooth it with the edge of the applicator or a plastic card.
Let It Dry
Follow the kit’s instructions—most fillers dry in 15–30 minutes. Avoid touching it during this time.
Color Match and Seal
Once dry, apply the color-matching dye using the included sponge or brush. Blend it into the surrounding area for a seamless look. Finish with a clear sealant if provided.
Use Heat for a Smooth Finish
For vinyl, gently heat the repaired area with a hair dryer or heat gun on low. This helps the material relax and blend with the rest of the seat. Be careful not to overheat—high heat can melt or warp the vinyl.
Step 6: Replace the Seat Cover (For Major Damage)
If the tear is too large or the cover is worn out, replacing the entire seat cover is the best long-term solution. Universal-fit covers are affordable, stylish, and easy to install.
Choose the Right Cover
Look for a cover that matches your car’s make, model, and seat type (bucket, bench, etc.). Popular materials include:
- Neoprene: Water-resistant, great for pets and kids.
- Polyester fabric: Breathable and affordable.
- Leatherette: Looks like real leather, easy to clean.
Remove the Old Cover
Carefully peel back the old cover. Use a flat tool (like a butter knife) to loosen clips or hog rings. Take photos as you go to remember how it was attached.
Install the New Cover
- Start by slipping the new cover over the seat.
- Use zip ties or hog rings to secure it at the base and sides.
- Tuck excess fabric into crevices for a snug fit.
- For headrests, remove them first, slide on the cover, then reattach.
Final Adjustments
Smooth out wrinkles and ensure the cover is tight. Trim any excess material if needed. Most installations take 20–40 minutes per seat.
Troubleshooting Common Issues
Even with careful work, problems can happen. Here’s how to fix them:
Patch Is Lifting
If your fabric patch is peeling, the surface may not have been clean. Remove the patch, clean the area again, and reapply with stronger adhesive.
Color Doesn’t Match
For vinyl or leather repairs, test the dye on a hidden area first. If it’s too light, apply a second coat. If too dark, gently sand and reapply.
Cover Wrinkles After Installation
This usually means the cover isn’t tight enough. Loosen the ties, reposition the fabric, and re-secure. Use a seat cover tool to tuck fabric into tight spaces.
Adhesive Smells Strong
Some glues and fillers have strong odors. Work in a well-ventilated area and allow time for fumes to dissipate before driving.
Maintenance Tips to Prevent Future Tears
Once your seat is fixed, keep it looking great with regular care:
- Clean weekly: Wipe down with a damp cloth to remove dust and spills.
- Condition leather/vinyl: Use a protectant every 3–6 months to prevent cracking.
- Use seat protectors: Especially with kids or pets, covers add an extra layer of defense.
- Avoid sharp objects: Keep keys, tools, and pet claws away from seats.
- Rotate seat cushions: If your seat has removable cushions, flip them occasionally to even out wear.
Conclusion
Fixing a torn car seat cover doesn’t have to be expensive or complicated. With the right tools and a little patience, you can restore your seats to like-new condition in under an hour. Whether you’re patching a small tear or replacing the entire cover, these fast and easy methods save money and boost your car’s interior appeal.
Remember: assess the damage, clean the area, choose the right repair method, and maintain your seats regularly. A little effort goes a long way in keeping your car looking sharp and comfortable for years to come.