This guide shows you how to fasten car seat covers the right way—without wrinkles, slipping, or frustration. Whether you’re a beginner or upgrading your ride, you’ll get a snug, pro-level fit in just minutes.
Key Takeaways
- Choose the right cover: Make sure your car seat covers are designed for your vehicle’s make, model, and seat type (bucket, bench, etc.).
- Clean your seats first: Dirt and debris can prevent a tight fit and damage both seats and covers over time.
- Start from the top: Begin fastening at the headrest and work your way down to avoid bunching or misalignment.
- Use all attachment points: Secure straps, hooks, and elastic bands properly—don’t skip any for a smooth, wrinkle-free finish.
- Tighten evenly: Pull straps gently and evenly to avoid uneven tension that causes sagging or tearing.
- Check for obstructions: Ensure seat belts, airbags, and adjustment levers aren’t blocked by the cover.
- Do a final inspection: Sit in the seat and adjust as needed to confirm comfort, safety, and a professional look.
How to Fasten Car Seat Covers in Minutes Like a Pro
Upgrading your car’s interior with new seat covers can transform the look and feel of your ride. But let’s be honest—no one wants to spend an hour wrestling with straps, elastic bands, and stubborn fabric. The good news? You don’t have to. With the right approach, you can fasten car seat covers quickly, securely, and like a true pro—no experience required.
Whether you’re protecting your seats from spills, pets, or daily wear, or just giving your cabin a fresh new style, this step-by-step guide will walk you through the entire process. From prep work to final checks, we’ll cover everything you need to know to get a snug, wrinkle-free fit in under 15 minutes.
Why Proper Installation Matters
Before we dive into the steps, let’s talk about why taking the time to fasten car seat covers correctly is so important. A poorly installed cover might look okay at first, but over time, it can slip, bunch up, or even interfere with seat functions like airbags or seat belts. Worse, loose fabric could become a safety hazard in an accident.
On the flip side, a properly fastened cover:
- Looks clean and professional
- Protects your original upholstery
- Lasts longer without stretching or tearing
- Ensures seat controls and safety features work as intended
Think of it like putting on a tailored suit versus throwing on a loose hoodie. One fits perfectly and moves with you; the other just hangs there. Your car seats deserve the tailored treatment.
Step 1: Gather Your Tools and Supplies
You don’t need a full toolbox, but having the right items on hand will make the job faster and easier.
What You’ll Need:
- Your new car seat covers (make sure they’re the right size!)
- Cleaning supplies (microfiber cloth, mild cleaner)
- Scissors (for trimming excess straps, if needed)
- A flathead screwdriver or plastic trim tool (optional, for tucking fabric)
- Patience and a positive attitude!
Pro tip: Read the manufacturer’s instructions that came with your covers. Some brands have unique fastening systems or special tips.
Step 2: Clean Your Seats Thoroughly
You wouldn’t paint a wall without cleaning it first, right? Same goes for your seats.
Why Cleaning Matters
Dirt, crumbs, and oils can get trapped under the cover, causing odors, wear, or even mold over time. Plus, a clean surface helps the cover grip better and prevents slipping.
How to Clean:
- Vacuum the seats to remove loose debris.
- Wipe down with a damp microfiber cloth and a mild cleaner (avoid harsh chemicals that could damage upholstery).
- Let the seats dry completely before installing the covers.
If you have leather seats, use a leather-safe cleaner. For fabric, a simple mix of water and mild dish soap works great.
Step 3: Remove Headrests (If Needed)
Most seat covers are designed to go over the headrest, but some require you to remove it first for a cleaner fit.
Check Your Cover Design
Look at the top of the cover—does it have a hole for the headrest post? If yes, you’ll likely need to remove the headrest.
How to Remove Headrests:
- Locate the release button or lever on the headrest post (usually on the side or back).
- Press or pull it while gently lifting the headrest upward.
- Set the headrest aside in a safe place.
Don’t force it—most headrests pop out easily once the mechanism is released. If you’re unsure, check your car’s manual.
Step 4: Position the Cover Correctly
Now it’s time to put the cover on. This step sets the foundation for a smooth installation.
Start at the Top
Begin by draping the cover over the seat, starting from the headrest area. Make sure the front and back are aligned—most covers have labels like “front” or “back” to help.
Check for Seat Features
Look for openings or cutouts in the cover that match:
- Seat belt buckles
- Airbag seams (usually marked with “SRS” or a label)
- Adjustment levers or buttons
Never cover or block airbags—this is a serious safety risk. If your cover doesn’t have proper airbag slits, don’t use it.
Tuck Excess Fabric
Gently tuck any loose fabric under the seat or into crevices using your hands or a plastic trim tool. Avoid sharp objects that could tear the material.
Step 5: Fasten the Straps and Hooks
This is where the magic happens. Most covers use a combination of elastic bands, straps, and hooks to stay in place.
Types of Fasteners You’ll Encounter:
- Elastic bands: Stretch around the seat base or backrest for a snug fit.
- Hook-and-loop straps: Velcro-style straps that attach under the seat.
- Metal or plastic hooks: Clip onto seat frames or existing anchor points.
- Buckle straps: Adjustable straps with clips for extra security.
Step-by-Step Fastening:
- Start with the backrest: Pull the top elastic or strap down and secure it under the seat or around the frame.
- Move to the seat base: Attach any bottom straps or hooks, pulling gently to avoid over-tightening.
- Secure side straps: These help prevent the cover from shifting when you get in and out.
- Use all attachment points: Don’t skip any—even small straps contribute to a stable fit.
Pro tip: Work from the center outward to prevent wrinkles. If a strap feels too tight, loosen it slightly and reposition.
Step 6: Reinstall the Headrest
Once the cover is secure, it’s time to put the headrest back.
How to Reinstall:
- Align the headrest posts with the seat holes.
- Push down firmly until you hear a click or feel it lock in place.
- Give it a gentle tug to confirm it’s secure.
Make sure the headrest doesn’t pull or distort the cover. If it does, adjust the fabric around the posts before reinserting.
Step 7: Adjust and Smooth Out Wrinkles
Even with careful installation, some wrinkling is normal—especially with stretchy materials.
How to Fix Wrinkles:
- Use your hands to smooth out fabric from the center toward the edges.
- For stubborn wrinkles, lift the cover slightly and reposition.
- Use a hairdryer on low heat (hold 6+ inches away) to relax tight fabric—only if the material is heat-safe.
Avoid over-stretching, which can weaken the material or cause tears.
Step 8: Final Safety and Comfort Check
Before you call it a day, do a quick safety and comfort inspection.
What to Check:
- Seat belts: Make sure they retract and buckle properly.
- Airbags: Confirm no fabric is blocking deployment zones.
- Adjustment levers: Test seat controls to ensure they’re not obstructed.
- Comfort: Sit in the seat and move around. Does it feel secure? Is there any pinching or slipping?
If everything checks out, you’re good to go!
Troubleshooting Common Issues
Even pros run into hiccups. Here’s how to fix the most common problems.
Problem: Cover Keeps Slipping
Solution: Double-check all straps and hooks. Make sure elastic bands are stretched around stable anchor points. If your seat has a smooth surface, consider using non-slip seat cover pads underneath.
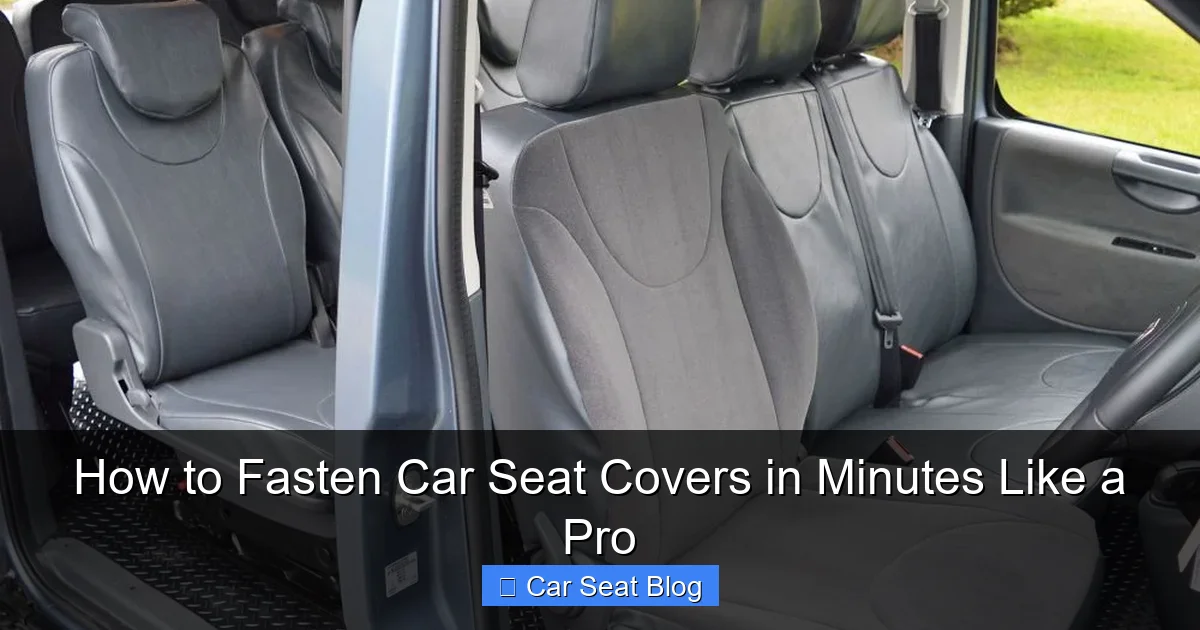
Visual guide about How to Fasten Car Seat Covers in Minutes Like a Pro
Image source: carseatcoversdirect.com
Problem: Wrinkles or Bunching
Solution: Loosen the cover, smooth it out from the center, and re-tighten evenly. Avoid pulling too hard on one side.
Problem: Straps Are Too Short or Too Long
Solution: Most straps are adjustable. If not, contact the manufacturer—some brands offer extension kits. Never tie knots in straps, as this can damage the cover or seat.
Problem: Cover Blocks Seat Controls
Solution: Reposition the cover or trim excess fabric (only if safe and allowed by the manufacturer). Never cover airbag indicators or seat belt buckles.
Tips for Long-Lasting Results
To keep your seat covers looking great for years:
- Vacuum them monthly to remove dust and debris.
- Spot-clean spills immediately with a damp cloth.
- Avoid direct sunlight for long periods, which can fade colors.
- Rotate or flip covers occasionally if they’re reversible.
- Replace worn or torn covers promptly to protect your original seats.
Conclusion
Fastening car seat covers doesn’t have to be a chore. With the right prep, a little patience, and this step-by-step guide, you can achieve a clean, secure, and professional-looking installation in just minutes. Remember: a well-fitted cover isn’t just about looks—it’s about safety, comfort, and protecting your investment.
So grab your covers, follow these tips, and enjoy your refreshed ride. Whether you’re driving to work, road-tripping with the family, or just cruising around town, your seats will look and feel better than ever.
Now go forth and fasten like a pro!

