Wiring a car stereo without a harness may seem daunting, but with the right tools and guidance, it’s totally doable. This guide walks you through each step—from identifying wires to securing connections—so you can install your new stereo safely and correctly.
Key Takeaways
- Identify wire functions: Use a multimeter or wiring diagram to match colors and test connections before splicing.
- Use proper tools: Wire strippers, crimpers, soldering iron, and heat shrink tubing are essential for safe, lasting connections.
- Solder and seal joints: Soldering ensures strong connections; heat shrink tubing prevents shorts and corrosion.
- Test before finalizing: Always power on the stereo temporarily to check sound, power, and functionality before reassembling the dashboard.
- Follow safety steps: Disconnect the car battery before starting to avoid electrical shocks or damage.
- Label everything: Mark wires during removal to avoid confusion when reconnecting.
- Know when to use a harness: While wiring without one saves money, a harness simplifies future upgrades and reduces risk.
Introduction: Why Wire a Car Stereo Without a Harness?
Upgrading your car stereo can dramatically improve your driving experience—better sound, Bluetooth connectivity, and modern features like Apple CarPlay. But when you’re on a budget or working with an older vehicle, you might not have access to a pre-made wiring harness. That’s where learning how to wire car stereo without harness comes in handy.
Don’t worry—you don’t need to be an electrician. With basic tools, patience, and this step-by-step guide, you can safely connect your new stereo directly to your car’s wiring. This method saves money and gives you full control over the installation. Just remember: safety first, and always double-check your work.
Tools and Materials You’ll Need
Before you start, gather these essentials to make the process smooth and safe:
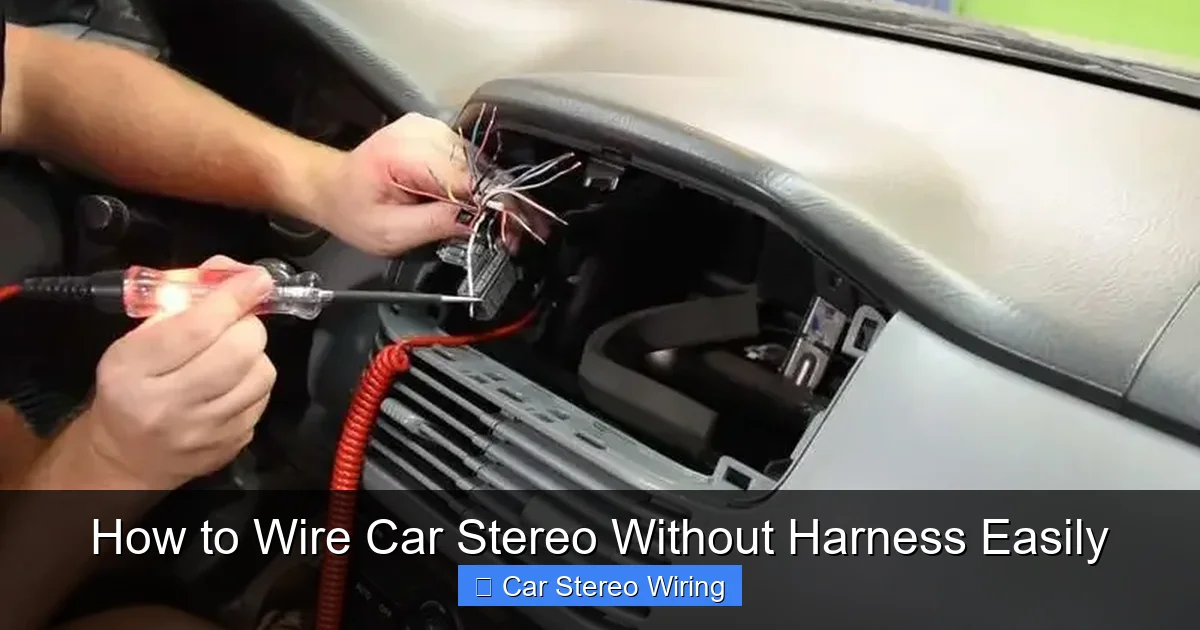
Visual guide about How to Wire Car Stereo Without Harness Easily
Image source: autostereoguide.com
- Wire strippers
- Wire crimpers
- Soldering iron and solder
- Heat shrink tubing (various sizes)
- Electrical tape
- Multimeter (for testing)
- Wire connectors (butt splices, spade terminals)
- Panel removal tools (plastic pry tools)
- Zip ties or wire loom (for organization)
- Owner’s manual for your car and stereo
Having the right tools prevents mistakes and ensures durable connections. A multimeter is especially important—it helps you confirm which wires carry power, ground, and audio signals.
Step 1: Disconnect the Car Battery
Safety is critical when working with car electronics. The first thing you must do is disconnect the negative terminal of your car battery. This prevents accidental shorts, electrical shocks, or damage to your stereo or car’s electrical system.
How to Disconnect the Battery
- Open the hood and locate the battery.
- Use a wrench to loosen the nut on the negative (black) terminal.
- Remove the cable and tuck it away so it doesn’t touch the terminal.
- Wait at least 5 minutes before starting work—this lets residual power drain.
Never skip this step. Even a small spark can fry your new stereo or cause a fire.
Step 2: Remove the Old Stereo
Now it’s time to take out the factory or old aftermarket stereo. The process varies slightly by car model, but here’s a general approach.
Using Panel Removal Tools
- Start by removing the trim panel around the stereo. Use a plastic pry tool to avoid scratching the dashboard.
- Look for screws or clips holding the stereo in place. Some cars have hidden screws behind knobs or covers.
- Once the panel is off, unscrew the stereo mounting brackets.
- Gently pull the stereo out and disconnect the wiring and antenna cable.
Label the Wires
Before disconnecting anything, label each wire with tape and a marker. Write down what each one does (e.g., “front left speaker +”, “constant 12V”). This saves time and prevents confusion later.
If your old stereo had a harness, note the wire colors and their functions. Even without a harness, most cars follow standard color codes—but always verify.
Step 3: Identify the Wiring Functions
This is the most important step. You need to know what each wire does so you can connect it correctly to your new stereo.
Common Car Stereo Wire Colors
While colors can vary by manufacturer, these are the most common standards:
- Yellow: Constant 12V (battery power—keeps memory alive)
- Red: Switched 12V (ignition power—turns stereo on/off with key)
- Black: Ground (connects to chassis)
- Orange: Illumination (dashboard lights)
- Blue/White: Remote turn-on (for amplifiers or antennas)
- White/White with stripe: Front left speaker (+ and -)
- Gray/Gray with stripe: Front right speaker (+ and -)
- Green/Green with stripe: Rear left speaker (+ and -)
- Purple/Purple with stripe: Rear right speaker (+ and -)
Use a Multimeter to Confirm
Don’t rely solely on color. Use a multimeter to test each wire:
- Set the multimeter to DC voltage.
- Reconnect the battery temporarily (just for testing).
- Touch the black probe to a metal part of the car (ground) and the red probe to each wire.
- The yellow wire should show ~12V even when the car is off (constant power).
- The red wire should show ~12V only when the ignition is on.
- Speaker wires won’t show voltage but will carry audio signals.
Once confirmed, disconnect the battery again before proceeding.
Step 4: Prepare the New Stereo Wires
Your new stereo will come with a set of wires. Match them to the car’s wires based on function. Most aftermarket stereos follow the same color coding, but always check the manual.
Strip and Match the Wires
- Use wire strippers to remove about 1/2 inch of insulation from each wire end.
- Match the stereo wires to the car wires by function (e.g., yellow to yellow, white to white).
- Twist the exposed copper strands to prevent fraying.
Pro tip: Group wires by type—power, ground, speakers—to stay organized.
Step 5: Connect the Wires
Now it’s time to make the connections. There are two main methods: soldering and crimping. Soldering is stronger and more reliable, so we recommend it.
Soldering the Connections
- Hold the two matching wires together (e.g., car’s yellow to stereo’s yellow).
- Apply heat with the soldering iron and melt solder into the joint until it’s shiny and solid.
- Let it cool for a few seconds.
- Slide a piece of heat shrink tubing over the joint and use a heat gun (or lighter) to shrink it tight.
Soldering creates a permanent, low-resistance connection that won’t loosen over time.
Using Crimp Connectors (Alternative)
If you don’t have a soldering iron, use butt splice connectors:
- Insert each wire end into the connector.
- Crimp firmly with a crimping tool.
- Wrap the joint with electrical tape for extra protection.
Crimping is faster but less durable than soldering. Avoid it for high-current wires like power and ground.
Special Connections
Some wires need extra attention:
- Ground (black): Connect to a solid metal part of the car’s chassis using a ring terminal and screw. Sand the area first to ensure good contact.
- Remote turn-on (blue/white): Connect to the antenna or amplifier if you have one. If not, cap it with a wire nut.
- Illumination (orange): Connect to a dashboard light wire so your stereo dims at night.
Step 6: Secure and Organize the Wiring
Loose wires can rattle, short out, or get damaged. Keep everything tidy and secure.
Bundling and Routing
- Use zip ties to bundle wires together.
- Route wires away from moving parts, sharp edges, and heat sources.
- If possible, use wire loom to protect the entire harness.
Test Fit Before Final Assembly
Before putting everything back, do a quick test:
- Reconnect the battery.
- Turn on the ignition and check if the stereo powers up.
- Test all speakers, volume, and features.
- If something doesn’t work, disconnect the battery and recheck connections.
If all is good, disconnect the battery again and proceed to final installation.
Step 7: Reinstall the Stereo and Dashboard
Now that everything is wired and tested, it’s time to put your car back together.
Mount the Stereo
- Slide the new stereo into the dash.
- Secure it with the mounting brackets or screws.
- Reattach the trim panel carefully.
Final Checks
- Ensure no wires are pinched or loose.
- Double-check that the ground connection is tight.
- Reconnect the battery.
- Turn on the car and enjoy your new stereo!
Troubleshooting Common Issues
Even with careful work, problems can happen. Here’s how to fix the most common ones:
No Power to the Stereo
- Check if the red (switched) and yellow (constant) wires are connected.
- Test the fuse in the stereo or car’s fuse box.
- Verify the ground connection is secure.
No Sound from Speakers
- Confirm speaker wires are connected to the correct terminals.
- Check polarity—positive to positive, negative to negative.
- Test each speaker individually with a 9V battery (brief touch to wires should make a pop).
Static or Poor Sound Quality
- Loose or frayed wires can cause interference.
- Ensure all connections are soldered and sealed.
- Keep audio wires away from power wires to reduce noise.
Stereo Resets When Car Is Off
- The yellow (constant) wire may not be connected.
- This wire keeps the clock and presets alive.
Conclusion: You’ve Done It!
Congratulations! You’ve successfully learned how to wire car stereo without harness. It might have taken a few hours, but you’ve saved money, gained valuable skills, and customized your ride just the way you like it.
Remember, while wiring without a harness is possible, using one in the future can make upgrades easier and safer. But for now, enjoy your crisp new sound, Bluetooth calls, and maybe even a touchscreen interface—all thanks to your DIY effort.
Drive safe, and turn up the volume!
🎥 Related Video: How To Install A Radio Without A Wiring Harness Adapter
📺 Do It Yourself Bri
Diy Bri gives you in-depth instructions and tips to successfully wire a radio into any vehicle without a wiring harness adapter.

