This guide walks you through how to wire car stereo systems like a pro, whether you’re upgrading or replacing your head unit. You’ll learn essential tools, wiring basics, and safety tips to ensure a clean, functional setup.
Key Takeaways
- Use the right tools: A wiring harness adapter, wire strippers, and electrical tape make the job easier and safer.
- Match wire colors correctly: Standard color codes help connect power, ground, speakers, and accessories without confusion.
- Disconnect the battery first: Always remove the negative terminal to prevent short circuits or electrical damage.
- Test connections before finalizing: Power up the stereo temporarily to check sound and function before securing everything.
- Secure all wires properly: Use zip ties and loom to prevent rattling and protect against wear.
- Follow your vehicle’s manual: Some cars have unique wiring setups—always double-check factory diagrams.
- Upgrade safely: If adding amplifiers or subwoofers, ensure your wiring and power supply can handle the load.
How to Wire Car Stereo Step by Step Guide
Upgrading your car stereo can dramatically improve your driving experience—better sound, Bluetooth connectivity, navigation, and more. But before you enjoy those features, you need to know how to wire car stereo systems correctly. Whether you’re replacing an old unit or installing a brand-new one, proper wiring is essential for safety, performance, and longevity.
This guide will walk you through the entire process, from gathering tools to testing your final setup. We’ll cover everything you need to know, including wire color codes, harness adapters, and common pitfalls to avoid. By the end, you’ll have a clean, professional-looking installation that works flawlessly.
What You’ll Need
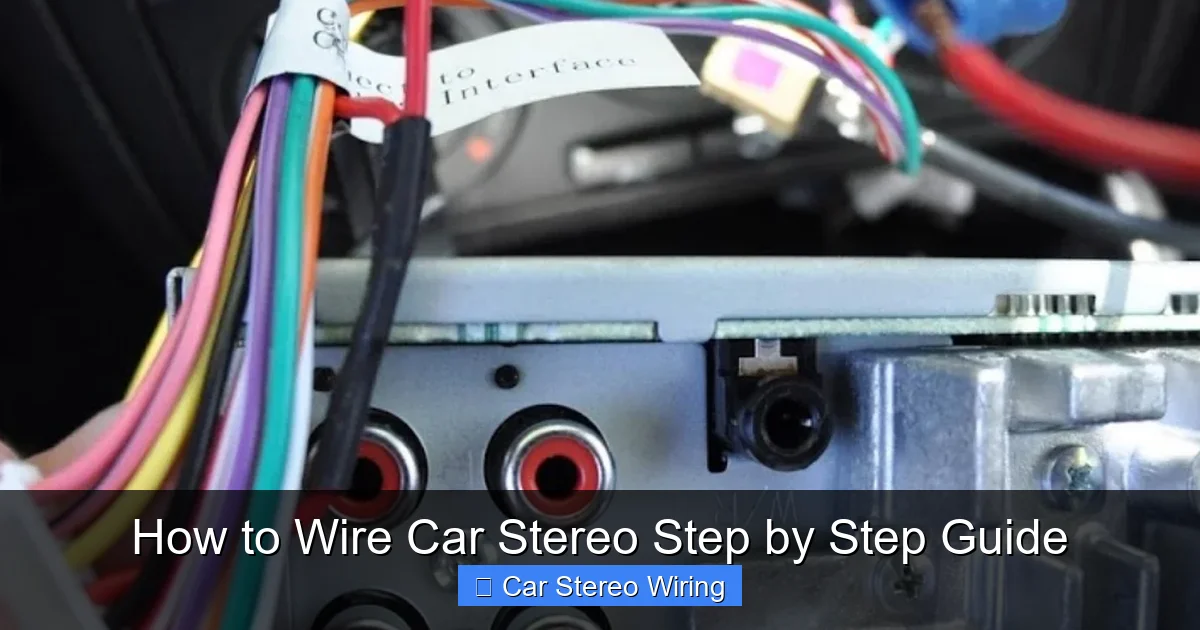
Visual guide about How to Wire Car Stereo Step by Step Guide
Image source: i.pinimg.com
Before you start, make sure you have the right tools and materials. Having everything ready will save time and reduce frustration.
Essential Tools
- Wire strippers
- Crimping tool
- Electrical tape or heat shrink tubing
- Zip ties
- Screwdrivers (Phillips and flathead)
- Panel removal tools (plastic pry tools)
- Multimeter (optional but helpful)
Required Materials
- Aftermarket car stereo
- Wiring harness adapter (specific to your car and stereo)
- Antenna adapter (if needed)
- Dash kit (to fit the new stereo in your dashboard)
- Electrical tape or heat shrink tubing
- Fuse tap (if adding accessories like amplifiers)
Safety Gear
- Gloves (to protect hands)
- Safety glasses (to protect eyes from debris)
Step 1: Disconnect the Car Battery
Safety first! Before touching any wires, disconnect the negative terminal of your car battery. This prevents accidental short circuits, electrical shocks, or damage to your stereo or vehicle’s electrical system.
How to Disconnect the Battery
- Open the hood and locate the battery.
- Use a wrench to loosen the nut on the negative terminal (marked with a “-” or black cover).
- Remove the cable and tuck it away so it doesn’t touch the terminal.
- Wait at least 5 minutes to let the car’s computer reset.
Tip: Take a photo of the battery connections before disconnecting, just in case you need to reference them later.
Step 2: Remove the Old Stereo
Now it’s time to take out the factory stereo. The method varies by vehicle, but most use a combination of screws and clips.
Using a Panel Removal Tool
- Start by removing any trim panels around the stereo. Use a plastic pry tool to avoid scratching the dashboard.
- Look for hidden screws behind knobs or in storage compartments.
- Once screws are out, gently pull the stereo faceplate or entire unit forward.
Using a DIN Removal Tool
- Insert the DIN tool into the small holes on the sides of the stereo.
- Push inward until you hear a click, then pull the tool outward to release the unit.
- Carefully slide the stereo out of the dashboard.
Note: Some cars have double-DIN stereos, which are taller. Make sure your replacement fits the space.
Step 3: Identify and Prepare the Wiring Harness
The wiring harness is the key to a clean installation. Instead of cutting factory wires, use a harness adapter that plugs into your car’s original connector.
Why Use a Harness Adapter?
- Preserves your car’s factory wiring.
- Makes future upgrades or resale easier.
- Reduces the risk of incorrect connections.
Matching the Harness
- Buy a harness adapter that matches your car’s make, model, and year.
- Also get one that matches your new stereo’s brand (e.g., Metra, Scosche, or PAC).
- Most adapters have color-coded wires that match standard stereo wiring.
Preparing the Wires
- Strip about 1/2 inch of insulation from each wire using wire strippers.
- Twist the exposed copper strands to prevent fraying.
- Match wires by color between the harness and the stereo’s wiring diagram.
Example: Red wire (ignition/switched power) on the harness connects to red on the stereo.
Step 4: Connect the Wires
Now comes the core of how to wire car stereo systems—making the right connections. Follow the standard color codes below:
Standard Car Stereo Wire Colors
- Yellow: Constant 12V power (battery) – keeps memory settings.
- Red: Switched 12V power (ignition) – turns stereo on with the key.
- Black: Ground – connects to car chassis.
- Orange: Illumination – dims display with headlights.
- Blue/White: Remote turn-on – powers amplifiers or antennas.
- Speaker wires: Typically white, gray, green, purple (with stripes for negative).
How to Connect the Wires
- Match each wire from the harness to the corresponding wire on the stereo.
- Twist the exposed copper ends together tightly.
- Use crimp connectors or solder the wires for a secure connection.
- Cover each connection with electrical tape or heat shrink tubing.
- Use zip ties to bundle wires neatly and prevent movement.
Tip: Use a multimeter to test for power and ground if you’re unsure. Set it to DC voltage and touch the probes to the wires.
Step 5: Install the Dash Kit and Antenna
Once the wiring is done, it’s time to secure the stereo in place.
Using a Dash Kit
- The dash kit holds your new stereo in the factory opening.
- Attach the mounting brackets to the stereo using screws.
- Slide the stereo into the dash kit and secure it with screws or clips.
- Make sure it sits flush and doesn’t wobble.
Connecting the Antenna
- Plug the factory antenna into the stereo’s antenna port.
- If your car uses a different connector, use an antenna adapter.
- Ensure the connection is tight to avoid static or poor reception.
Step 6: Reconnect the Battery and Test
With everything connected, it’s time to power up and test.
Reconnecting the Battery
- Reattach the negative terminal to the battery.
- Tighten the nut securely with a wrench.
Testing the Stereo
- Turn the ignition to “ACC” or “ON.”
- The stereo should power on. If not, check the red and yellow wires.
- Test all functions: volume, radio, Bluetooth, USB, etc.
- Check each speaker by playing music and adjusting balance/fade.
- Turn on the headlights to test the illumination wire.
If a speaker doesn’t work, double-check the wiring and polarity (positive to positive, negative to negative).
Step 7: Secure and Tidy Up
A clean installation looks professional and prevents future issues.
Securing Wires
- Use zip ties to bundle wires behind the stereo.
- Route wires away from moving parts (like the steering column).
- Use wire loom or spiral wrap for extra protection.
Reinstalling Trim Panels
- Snap or screw the dashboard trim back into place.
- Make sure no wires are pinched or exposed.
- Test all buttons and knobs to ensure they work smoothly.
Troubleshooting Common Issues
Even with careful wiring, problems can happen. Here’s how to fix the most common ones.
Stereo Won’t Turn On
- Check if the red (switched power) and yellow (constant power) wires are connected.
- Test the fuse in the stereo or the car’s fuse box.
- Ensure the ground wire is securely attached to bare metal.
No Sound from Speakers
- Verify speaker wire connections and polarity.
- Check if the stereo is set to the correct audio source.
- Test each speaker individually with a 9V battery (listen for a pop).
Static or Poor Reception
- Ensure the antenna is fully plugged in.
- Check for loose or corroded connections.
- Move the antenna away from power wires if possible.
Battery Drains Overnight
- This usually means a constant power wire is shorted or drawing too much.
- Double-check the yellow wire and ensure no other devices are left on.
Final Tips for a Professional Installation
- Always refer to your car’s service manual and stereo manual for specific instructions.
- Take photos during disassembly to help with reassembly.
- Label wires if you’re unsure—use tape and a marker.
- Don’t rush—double-check every connection before closing everything up.
- Consider upgrading your speakers or adding a subwoofer for even better sound.
Conclusion
Learning how to wire car stereo systems doesn’t have to be intimidating. With the right tools, a good harness adapter, and careful attention to wire colors, you can upgrade your audio system safely and effectively. By following this step-by-step guide, you’ll avoid common mistakes and enjoy a clean, reliable installation.
Remember: safety comes first—always disconnect the battery. Take your time, test everything, and don’t hesitate to consult a professional if you’re unsure. Once your new stereo is wired and working, you’ll wonder why you waited so long to upgrade.
Now turn up the volume and enjoy the ride!
🎥 Related Video: car sterio wiring diagram #sony #music#xplod #youtube #android #speaker #cars #Dolby #wiring
📺 Kunal Auto

