Installing car seat covers correctly ensures a snug, professional look and long-lasting protection. This guide walks you through every step—from prep to final adjustments—so your seats stay clean, stylish, and secure.
Key Takeaways
- Clean your seats first: Remove dirt and debris to prevent scratches and ensure a smooth fit.
- Choose the right cover type: Universal, semi-custom, or custom-fit covers each have unique installation needs.
- Follow the manufacturer’s instructions: Always refer to the included guide for specific steps and safety tips.
- Use straps and hooks properly: Secure all attachment points to prevent slipping or bunching.
- Adjust for headrests and armrests: Remove or reposition these parts as needed for a seamless fit.
- Smooth out wrinkles carefully: Use your hands or a soft cloth to avoid damaging the material.
- Check for airbag compatibility: Never cover or obstruct side airbags—safety first!
How to Properly Put On Car Seat Covers for a Perfect Fit
So, you’ve bought a fresh set of car seat covers—maybe to protect your seats from spills, pets, or daily wear, or maybe just to give your interior a stylish upgrade. But now comes the tricky part: actually putting them on. If you’ve ever struggled with loose fabric, twisted straps, or covers that just won’t stay in place, you’re not alone.
The good news? With the right approach, installing car seat covers can be quick, easy, and result in a clean, custom look that lasts. In this guide, we’ll walk you through every step of how to properly put on car seat covers—whether you’re working with universal-fit covers or a custom set. You’ll learn how to prepare your seats, install the covers correctly, troubleshoot common issues, and maintain them for long-term use.
By the end, your car’s interior will look sharp, feel comfortable, and stay protected for miles to come.
Step 1: Choose the Right Seat Covers
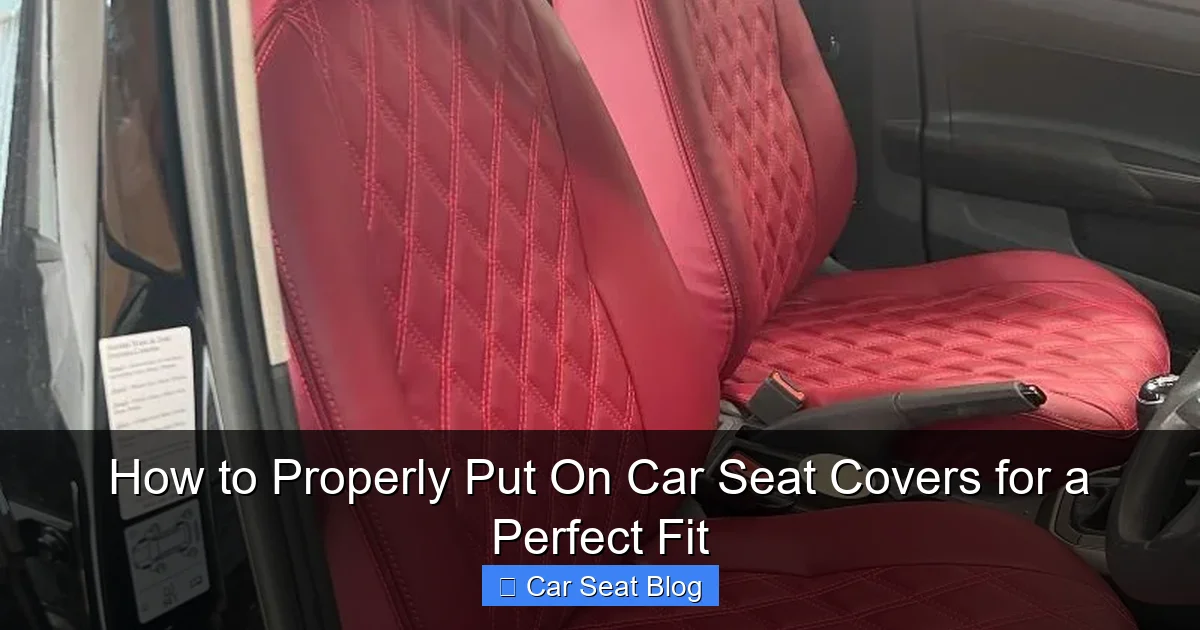
Visual guide about How to Properly Put On Car Seat Covers for a Perfect Fit
Image source: superiorautoseatcovers.co.uk
Before you even think about installation, make sure you’ve picked the right type of seat cover for your vehicle. Not all covers are created equal, and choosing the wrong kind can lead to a poor fit or even safety hazards.
There are three main types of car seat covers:
Universal Fit
These are designed to fit a wide range of vehicles and are usually the most affordable. They come in standard sizes (like small, medium, large) and often use elastic bands and adjustable straps to secure them. While convenient, universal covers may not hug your seats as tightly as you’d like—especially if your seats have unique contours or features like built-in heaters.
Semi-Custom Fit
These are made for specific vehicle models or seat types (e.g., “fits Honda Civic 2018–2022 front bucket seats”). They offer a better fit than universal covers and often include pre-cut openings for armrests, seat belts, and airbags. If you want a balance between affordability and a snug fit, semi-custom is a great choice.
Custom Fit
Tailored specifically to your car’s make, model, year, and seat configuration, custom covers deliver the best fit and finish. They’re usually more expensive but worth it if you want a factory-installed look. These often come with detailed instructions and may require professional installation for complex setups.
Pro Tip: Always check the product description to confirm compatibility with your vehicle. Look for mentions of side airbags, heated seats, or power adjustments—these features affect how the cover should be installed.
Step 2: Prepare Your Car Seats
A clean, dry seat is essential for a smooth installation. Dirt, crumbs, or moisture can cause the cover to shift, wrinkle, or even damage your original upholstery over time.
Remove Loose Items
Start by clearing out anything stuck in the seat crevices—coins, wrappers, pet hair, or forgotten toys. Use a vacuum with a crevice tool to get into tight spaces between the seat and backrest.
Wipe Down the Seats
Use a microfiber cloth and a mild cleaner (like diluted upholstery cleaner or soapy water) to wipe down the entire seat surface. Pay extra attention to areas that touch the cover, like the seat base and backrest. Let the seats dry completely before moving on.
Detach Removable Parts
Some seat covers require you to remove headrests, armrests, or seat belt buckles for proper installation. Check your cover’s instructions—many include Velcro or zippers that need access to these components.
For headrests: Most have a release button or lever underneath. Press it and gently pull the headrest straight up. Keep the pins or posts safe—you’ll need them later.
For armrests: Some fold down and can be removed by unscrewing a bolt or pulling a release tab. If you’re unsure, consult your vehicle’s manual.
Pro Tip: Take a photo of your seat before disassembling anything. It’ll help you remember how everything goes back together.
Step 3: Unpack and Inspect the Seat Covers
Once your seats are ready, it’s time to unpack the new covers. Don’t rush this step—take a moment to inspect the product and understand its design.
Check for All Components
Most seat cover sets include:
– Seat base cover
– Seat backrest cover
– Headrest covers (if applicable)
– Straps, hooks, or elastic bands
– Installation instructions
Make sure nothing is missing or damaged. If you find a defect, contact the seller immediately—most reputable brands offer replacements or refunds.
Identify Front and Back
Some covers are reversible, but most have a designated front and back. Look for labels, stitching patterns, or pre-cut openings that indicate orientation.
Test the Material
Gently stretch the fabric to see how flexible it is. Neoprene, leather, and polyester blends behave differently—some are more forgiving during installation than others.
Pro Tip: If your covers are wrinkled from packaging, lay them flat in a warm (not hot) area for a few hours. Avoid using a dryer or direct heat, which can damage the material.
Step 4: Install the Seat Base Cover
Now for the main event—putting the cover on. Start with the seat base (the part you sit on), as it’s usually the easiest to handle.
Position the Cover
Drape the cover over the seat base, aligning it with the edges. Make sure the front of the cover matches the front of the seat. If your cover has a logo or design, ensure it’s facing the right way.
Secure the Straps
Most covers come with straps that go underneath the seat to hold the cover in place. Feed these straps through the gaps between the seat base and backrest, or under the seat frame.
Attach the straps to the hooks or buckles provided. Pull them tight—but not so tight that they warp the seat shape. The goal is a snug fit without stretching the fabric excessively.
Tuck and Smooth
Use your hands to tuck excess fabric into the crevices between the seat and backrest. This prevents bunching and gives a cleaner look. Smooth out any wrinkles from the center outward.
Pro Tip: If your seat has a center console or fold-down armrest, make sure the cover doesn’t interfere with its movement. Adjust the fabric so the armrest can still function properly.
Step 5: Install the Backrest Cover
The backrest is often trickier due to its shape and attachment points. Take your time here.
Slide the Cover Over the Backrest
Start at the top and work your way down. If your cover has a zipper or Velcro opening, align it with the seat’s center seam.
For bucket seats, you may need to stretch the cover slightly to get it over the sides. Go slowly to avoid tearing.
Attach the Straps
Like the base, the backrest cover usually has straps that go around the seat frame or through gaps in the seat structure. Connect them securely, but avoid over-tightening.
Some covers use elastic bands or drawstrings at the bottom. Pull these snugly to keep the cover from riding up.
Adjust for Headrest and Armrest Openings
If your cover has pre-cut holes for headrests or armrests, make sure they align perfectly. Slide the headrest posts through the openings and reattach the headrest.
For armrests, ensure the cover doesn’t block the mechanism. You may need to fold or tuck fabric around the base.
Pro Tip: If the cover feels loose around the shoulders or sides, look for hidden straps or clips that secure the upper portion. These are often tucked inside the fabric.
Step 6: Reattach Removed Parts
Once the covers are in place, it’s time to put everything back together.
Reinstall Headrests
Align the headrest posts with the seat holes and push down until you hear a click. Give it a gentle tug to make sure it’s secure.
Reconnect Armrests and Seat Belts
If you removed any components, reattach them according to your vehicle’s manual. Make sure seat belt buckles are accessible and function properly.
Test All Functions
Slide the seat forward and back, recline the backrest, and test any power adjustments. The cover shouldn’t restrict movement or get caught in the mechanisms.
Pro Tip: If your seat has side airbags (usually marked with “SRS” or “Airbag” labels), double-check that the cover doesn’t block the deployment path. Most quality covers have special stitching or breakaway seams for this purpose—never tape or sew over these areas.
Step 7: Final Adjustments and Smoothing
Even the best installation might leave a few wrinkles or loose spots. Here’s how to fix them.
Smooth Out Wrinkles
Use your hands or a soft cloth to gently stretch and smooth the fabric. Work from the center outward to avoid creating new wrinkles.
For stubborn creases, try sitting in the seat and shifting your weight to help the cover settle.
Check Strap Tension
After a few minutes of use, straps may loosen. Re-tighten them as needed, but avoid over-tightening, which can cause tearing.
Trim Excess Material (If Allowed)
Some universal covers come with extra fabric that can be trimmed. Only do this if the manufacturer explicitly permits it—cutting the wrong part can ruin the cover or void the warranty.
Pro Tip: Take a step back and look at the seat from different angles. A well-installed cover should look taut, wrinkle-free, and blend naturally with the seat shape.
Troubleshooting Common Issues
Even with careful installation, problems can arise. Here’s how to fix the most common ones.
Cover Keeps Slipping
Cause: Loose straps or insufficient tension.
Solution: Re-secure all straps and hooks. If the cover still moves, consider using non-slip seat cover pads underneath for extra grip.
Wrinkles or Bunching
Cause: Fabric not stretched properly or incorrect size.
Solution: Remove the cover and reinstall, smoothing as you go. If the cover is too large, contact the seller—you may need a smaller size.
Headrest Won’t Stay On
Cause: Misaligned holes or loose posts.
Solution: Double-check that the headrest posts are fully inserted and the cover isn’t pulling them out. Adjust the cover’s tension around the headrest area.
Cover Blocks Seat Belt or Airbag
Cause: Improper installation or incompatible design.
Solution: Never use a cover that obstructs safety features. Remove it immediately and choose a model designed for your vehicle’s safety systems.
Maintaining Your Seat Covers
Once installed, proper care keeps your covers looking great.
– Vacuum regularly to remove dust and debris.
– Spot-clean spills immediately with a damp cloth and mild cleaner.
– Avoid harsh chemicals or bleach, which can fade or damage the material.
– For machine-washable covers, follow the care label instructions.
– Re-tighten straps every few months as the fabric settles.
Conclusion
Putting on car seat covers doesn’t have to be a frustrating chore. With the right preparation, attention to detail, and a little patience, you can achieve a professional-looking fit that protects your seats and enhances your car’s interior.
Remember: clean your seats first, choose the right cover type, follow the instructions, and never compromise on safety—especially when it comes to airbags and seat belts.
Now that you know how to properly put on car seat covers, you’re ready to enjoy a cleaner, more comfortable ride. Whether you’re shielding your seats from kids, pets, or daily wear, a well-installed cover makes all the difference.
So go ahead—give your car the upgrade it deserves. Your seats will thank you.

