Direct answer phrase: Use a clay bar safely by starting with a clean, cool car, using plenty of lubricant, and working in small sections with light pressure. If the clay feels grabby or the paint is delicate, stop and reassess before continuing.
Clay barring can make paint feel dramatically smoother, but only if you use the tool the right way. Done carelessly, it can leave haze, marring, or even worsen existing damage. This guide from AAutomotives explains How to Use a Clay Bar Safely so you can decontaminate paint without creating avoidable problems.
Use a clay bar only on a clean, well-lubricated surface with light pressure and small sections. If the paint is hot, damaged, freshly painted, or coated with a sensitive finish, stop and assess first.
- Preparation matters: Wash and dry first so loose grit does not get dragged across the paint.
- Lubrication is critical: A slick surface prevents clay marring better than extra pressure.
- Use gentle technique: Small sections and straight-line passes give you more control.
- Inspect often: Fold or replace clay when it gets dirty and check for haze after each panel.
- Protect after claying: Wax, sealant, or ceramic spray helps keep the finish smoother longer.
This AAutomotives guide is written to help readers understand How to Use a Clay Bar Safely with clear, practical advice. Before publishing, review model-specific facts, dates, prices, safety points, and source links so the final article stays accurate and trustworthy.
- What a Clay Bar Does and Why Safe Use Matters for Modern Paint
- When You Actually Need to Clay Bar a Car
- Tools, Products, and Prep Steps for a Safe Clay Bar Job
- How to Use a Clay Bar Safely Step by Step
- Common Mistakes That Damage Paint or Waste Product
- Expert Warnings and Safety Checks Before You Start
- After-Clay Finishing: Protecting the Paint You Just Cleaned
- Cost, Time, and Product Comparison for DIY Car Detailing in 2025
- Final Recap: Safe Clay Bar Technique for a Smooth, Glossy Result
What a Clay Bar Does and Why Safe Use Matters for Modern Paint
A clay bar removes bonded contamination that washing alone usually cannot lift. Things like rail dust, tar mist, industrial fallout, and overspray can sit on top of the clear coat and make the surface feel rough even after a proper wash.
The important point is that clay does not “clean” by dissolving contamination. It works by gliding across lubricated paint and grabbing particles that are stuck to the surface. That makes it useful, but it also means technique matters a lot.
How clay bar decontamination removes bonded contaminants without cutting clear coat
A clay bar is designed to shear off contamination sitting on the surface, not to sand down paint like an abrasive compound would. When used correctly, it should glide with very little pressure and leave the clear coat intact.
That said, if the panel is dirty, dry, or overworked, the clay can drag grit across the finish and create fine marring. This is why safe clay bar use starts with preparation, lubrication, and patience rather than force.
Why 2025 paint systems, ceramic coatings, and softer clear coats need extra care
Many modern vehicles use clear coats that can be softer than older finishes, while some repainted panels may behave differently from factory paint. Ceramic coatings and paint protection films can also change how contamination sits on the surface and how aggressive a clay product feels.
That does not mean clay is off-limits, but it does mean you should choose the least aggressive method that gets the job done. If the vehicle has a delicate finish, start with a fine clay or a clay alternative and inspect the result before moving on.
When You Actually Need to Clay Bar a Car
Not every vehicle needs claying on every detail. If the paint already feels smooth, beads water well, and has no visible fallout or bonded grime, claying may be unnecessary.
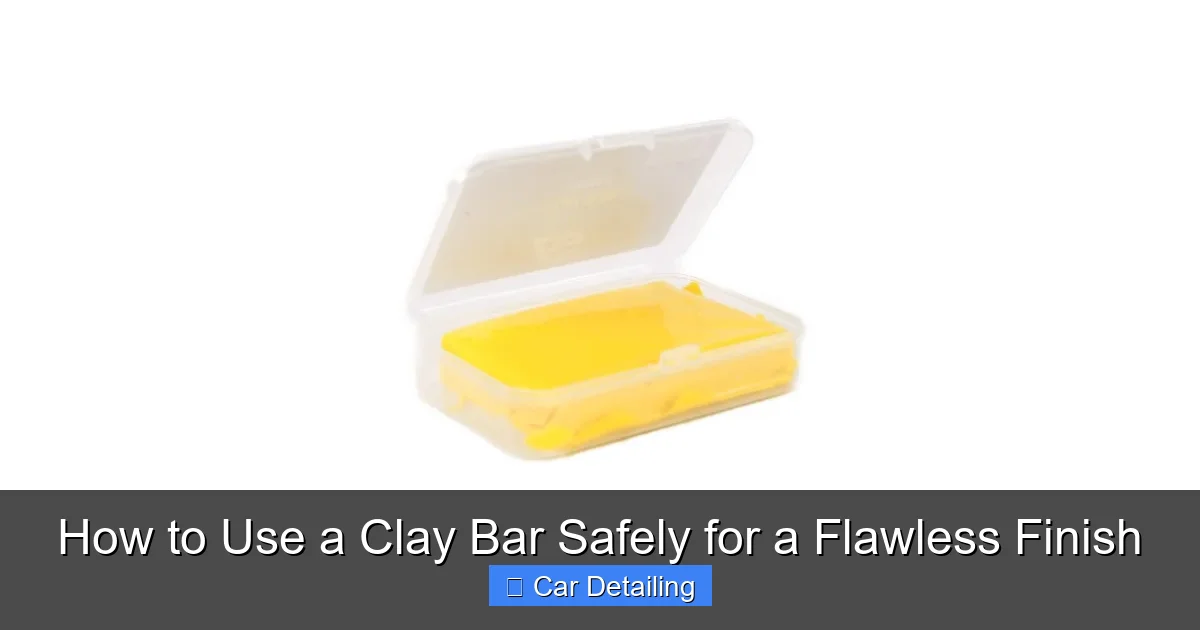
Visual guide about How to Use a Clay Bar Safely for a Flawless Finish
Image source: flawlessfinish.eu
For many owners, claying is a periodic decontamination step after washing and before polishing or applying protection. If you are also learning safer wash habits, it helps to review a solid hand washing car safely routine first so you do not trap dirt before the clay step.
Common signs of contamination: rough paint, tar spots, brake dust fallout, and overspray
The most common clue is texture. After washing, the paint may still feel gritty or bumpy when you gently glide a clean hand inside a plastic bag over the surface.
You may also notice dark tar specks near the lower panels, orange-brown fallout on horizontal surfaces, or a dusty film that returns quickly after washing. Overspray can appear as tiny dots or a slightly dull, uneven feel across certain panels.
Simple touch test and visual checks to confirm the surface needs claying
Use a clean hand, a thin plastic bag over your fingers, or bright inspection lighting to check for roughness. The plastic-bag method makes bonded contamination easier to feel without pressing directly on the paint.
Look at the paint from different angles in good light. If the surface looks clean but still feels rough, claying is often the right next step.
When not to clay: fresh paint, damaged clear coat, or heavily oxidized panels
Fresh paint should usually be left alone until it has fully cured according to the body shop or paint manufacturer guidance. Claying too soon can interfere with the finish or create unnecessary marks.
Avoid claying panels with peeling clear coat, deep scratches, or heavy oxidation unless a professional has confirmed it is safe. In those cases, the paint may already be weak, and clay can make the condition more obvious or more difficult to correct.
Tools, Products, and Prep Steps for a Safe Clay Bar Job
Safe claying begins before the clay ever touches the car. The right tools reduce friction, help you see what is happening, and make it easier to stop before a problem starts.
Choosing the right clay type: fine, medium, or heavy duty for the job
Fine clay is usually the safest starting point for lightly contaminated or well-maintained paint. Medium clay is more effective on stubborn contamination but can leave more haze if used carelessly.
Heavy-duty clay is best reserved for specific situations like strong fallout or neglected surfaces, and even then it should be used with caution. If you are unsure, start mild and only step up if the surface still feels contaminated after a test patch.
Why proper clay lubricant matters more than pressure
Lubricant creates the slick film that lets the clay move over the paint without grabbing. Using enough lubricant is often more important than pressing harder, because pressure increases the chance of marring.
Dedicated clay lube is ideal, but some detailing sprays may work if they provide enough slickness. If the clay starts sticking, the surface is not lubricated enough and you should stop to reapply product.
Wash, rinse, and dry prep to prevent dragging grit across the paint
Never clay a dirty car. Wash the vehicle first to remove loose dirt, road film, and dust that could be pulled into the clay and dragged across the finish.
After washing, rinse thoroughly and dry the vehicle with a clean microfiber towel. If you are still refining your wash process, this when to wash your car without mistakes guide can help reduce contamination before claying.
Useful add-ons: microfiber towels, inspection lighting, and clean kneeling pads
Microfiber towels help you wipe away lubricant and check the surface as you go. Good lighting makes it easier to spot residue, missed contamination, and any haze the clay may leave behind.
A clean kneeling pad or stool can make the job more controlled and less rushed, especially on lower panels. Comfort matters because a rushed detail is where many clay mistakes happen.
- Wash and dry the vehicle first
- Choose the least aggressive clay that fits the job
- Use plenty of lubricant
- Work in small sections
- Inspect the paint after each panel
How to Use a Clay Bar Safely Step by Step
The safest method is slow, small, and controlled. If you are new to the process, it helps to treat the first panel as a test rather than trying to finish the whole vehicle quickly.
Use a small piece of clay rather than the entire bar. Flatten it into a patty and knead it often so fresh clay is always touching the paint.
Divide each panel into manageable areas, such as a half-door or a small section of hood. Smaller areas make it easier to keep the surface wet and notice problems early.
Move the clay gently in short, straight passes. If the clay is doing its job, you should not need to press hard or scrub in circles.
Spray lubricant often enough that the clay glides freely. If the sound changes from smooth to grabby, add more lubricant before continuing.
Any visible contamination embedded in the clay means it needs to be folded to a clean side. If it falls on the ground, discard it immediately rather than risking paint damage.
A practical approach is to keep one hand on the spray bottle and the other moving the clay gently across the panel. If the surface suddenly feels rough again, stop and re-lubricate instead of forcing the clay through it.
Common Mistakes That Damage Paint or Waste Product
Most clay bar damage comes from rushing, not from the clay itself. The good news is that the common mistakes are easy to avoid once you know what to look for.
Using too little lubricant and creating clay marring
Dry claying is one of the fastest ways to leave fine scratches or haze. The clay should glide, not chatter or stick.
If you see faint streaking after a pass, it may be because the lubricant film is too thin. Add more product and reduce pressure before continuing.
Dragging contaminated clay after it has been dropped
Once clay hits the ground, it can pick up sand, grit, or other abrasive debris you cannot always see. Using it again is a gamble with your paint.
This is one of the most important safety rules in detailing: drop it, replace it. Saving a few dollars is not worth the risk of scratching the panel.
Claying in direct sun or on hot panels
Heat causes lubricant to flash off faster, which reduces the slick barrier between the clay and paint. That makes the clay more likely to drag and leave marks.
Whenever possible, work in shade or on a cool surface. If the panel is too hot to comfortably touch, it is usually too hot to clay safely.
Skipping the wash before claying and trapping loose grit
Clay is not a substitute for washing. If loose dirt is still on the car, the clay can trap it and pull it across the finish.
If your wash routine is inconsistent, it is worth revisiting a safer process before moving into decontamination. A structured clay bar mistakes to avoid guide can also help you spot where things usually go wrong.
Using one clay piece on the entire vehicle without checking contamination levels
Different panels often carry different contamination loads. The lower doors may be dirtier than the roof, and rear panels may collect more fallout than the hood.
Check each section as you go. If one area loads the clay quickly, fold to a clean surface more often and consider whether a more targeted approach is needed.
Expert Warnings and Safety Checks Before You Start
Clay bar work is usually a DIY-friendly task, but it is not the right answer for every paint problem. A careful inspection can save you from making a bad condition worse.
When to stop and seek professional help for deep scratches, oxidation, or repainted panels
If the paint has deep scratches, peeling clear coat, or heavy oxidation, claying may not be the best first step. Those issues often need correction, repair, or a different detailing plan.
Repainted panels can also behave unpredictably, especially if you do not know how long ago the work was done. When in doubt, ask a professional detailer or body shop before touching the surface.
How to test an inconspicuous area before treating the full vehicle
Always test a small hidden area first, such as the lower rear quarter or a less visible section of the bumper. This helps you see whether the clay is leaving haze or if the finish is unusually soft.
If the test area looks good and feels smoother, continue with the rest of the car. If it dulls quickly or shows marks, stop and reassess your product choice and technique.
Why ceramic-coated, matte, or wrapped surfaces need special caution
Ceramic-coated surfaces may not need traditional clay at all, depending on the coating type and the contamination level. In some cases, a coating-safe decontamination method is a better choice.
Matte paint and vinyl wraps are especially sensitive because gloss changes or visible abrasion can be difficult to fix. If the vehicle has one of these finishes, check the manufacturer guidance before using clay.
Signs the clay bar is too aggressive for your paint finish
If the paint turns dull, hazy, or streaky after only a few passes, the clay may be too aggressive for that surface. Another sign is that the clay keeps grabbing even when the panel is well lubricated.
That usually means you should switch to a finer product, reduce pressure, or stop altogether. A less aggressive method is safer than trying to force one product to work everywhere.
Do not clay over fresh paint, hot panels, or dirty surfaces. If the clay drops on the ground, discard it immediately to avoid scratching the finish.
After-Clay Finishing: Protecting the Paint You Just Cleaned
Claying leaves the paint clean and ready for protection, but it may also expose minor defects that were hidden by contamination. That is normal and useful, because it shows you the true condition of the finish.
Why clayed paint may need polishing if light haze or marring appears
Even careful claying can leave faint haze on softer paint. If that happens, a light polish may be needed to restore clarity before applying protection.
Do not assume every haze mark means damage. Sometimes it is just light surface marring that corrects easily, but if you are unsure, inspect first and test on a small area.
Applying wax, sealant, or ceramic spray for lasting protection
Once the surface is clean and smooth, it is a good time to apply wax, sealant, or a ceramic spray product. Protection helps reduce how quickly new contamination bonds to the paint.
Choose a product that matches your maintenance habits. A simple spray sealant may be enough for many weekend detailers, while others may prefer a longer-lasting coating-friendly option.
How to inspect the finish under proper lighting for missed contamination
Use bright, angled lighting to check for residue, missed spots, or remaining rough patches. Sunlight can help, but a controlled inspection light often reveals more detail.
Run the touch test again after wiping the panel. If it still feels gritty, that section may need another careful pass rather than a heavy-handed repeat.
Cost, Time, and Product Comparison for DIY Car Detailing in 2025
For many owners, claying is a moderate-cost DIY task, but the final cost depends on the products you choose and whether you already own wash supplies. Professional pricing varies widely by region, vehicle size, and paint condition, so it is best to compare local options rather than assume a fixed rate.
DIY kits often include clay and lubricant, while professional detailing may bundle claying with washing, polishing, and protection. Prices vary by market and vehicle condition, so use local quotes for a realistic comparison.
DIY clay bar kit cost versus professional detailing service pricing
A DIY kit is usually the lower upfront-cost option if you already own towels, wash soap, and drying supplies. The tradeoff is that you need to provide the labor and accept a learning curve.
Professional service can be worth it if the paint is delicate, the contamination is heavy, or you want claying combined with polishing and protection in one visit. If you are already learning other safe maintenance habits, the same careful mindset used in claying without a pressure washer can help you choose a simpler DIY workflow.
Time estimate for a sedan, SUV, or heavily contaminated vehicle
A clean sedan may only take a modest amount of time if the contamination is light and the surface is easy to work. A larger SUV will usually take longer simply because there is more paint to cover.
Heavily contaminated vehicles can take much longer because you need more frequent folding, more lubricant, and more inspection. If you are new to the process, plan extra time so you do not rush the job.
Clay bar vs clay mitt vs clay towel: which option fits a safe beginner workflow
| Option | Best For | Limit |
|---|---|---|
| Traditional clay bar | Careful beginners who want maximum control on small sections | Can be slower and needs frequent folding |
| Clay mitt | Faster coverage on larger panels | May feel less precise on delicate paint |
| Clay towel | Maintenance decon and efficient panel work | Can still mar paint if pressure or lubrication is poor |
For a beginner, the traditional clay bar is often the easiest way to control pressure and notice contamination changes. Mitts and towels can be efficient, but they reward good technique and steady lubrication just as much as the bar does.
- Good control on small areas
- Easy to knead to a clean surface
- Helpful for learning safe technique
- Slower than mitts or towels
- Can leave haze if overworked
- Must be discarded if dropped
Best value choice for weekend detailers seeking a flawless finish
If your priority is a safe, polished result rather than speed, a fine clay bar plus quality lubricant is usually the best value. It gives you the most feedback in your hands and makes it easier to stop before damage occurs.
Weekend detailers who want convenience may prefer a clay towel or mitt, but those tools are less forgiving if you move too fast. For a first-time user, control usually matters more than speed.
Final Recap: Safe Clay Bar Technique for a Smooth, Glossy Result
Clay bar work is simple in concept but sensitive in practice. The safest results come from clean prep, generous lubrication, light pressure, and constant inspection.
Key takeaways on preparation, lubrication, pressure control, and post-clay protection
Wash first, clay only on cool paint, and work in small sections. Keep the clay clean, use enough lubricant to prevent sticking, and protect the finish afterward with wax, sealant, or a ceramic spray.
If light haze appears, polishing may be needed before protection goes on. That is not unusual, especially on softer clear coats.
Quick reminder on when to DIY and when to call a detailing professional
DIY claying is a good fit for well-maintained paint with light to moderate contamination. If the vehicle has fresh paint, heavy oxidation, unknown repaint work, or sensitive finishes like matte or wrap, professional help is the safer choice.
When in doubt, test a small area first and stop if the finish reacts poorly. A careful approach is the best way to get the smooth, glossy result you want without creating extra work.
- Prep the paint with a proper wash and dry first.
- Use plenty of lubricant and very light pressure.
- Fold or replace contaminated clay immediately.
- Inspect for haze and protect the finish after claying.
🎥 Related Video: How To Clay Bar Your Car – Chemical Guys Auto Detailing
📺 Chemical Guys
NEW UPDATED VIDEO: https://www.youtube.com/watch?v=T8LyHX0eHl8 Auto detailing clay is the detailer’s secret for …
Frequently Asked Questions
There is no universal schedule because contamination depends on where you drive and how the car is stored. Most owners clay only when the paint feels rough or before polishing and reapplying protection.
It can if the surface is dirty, the clay is dropped, or too little lubricant is used. On a properly washed and lubricated panel, the risk is much lower.
Not always. If the paint looks clear and smooth, you may go straight to protection, but light haze or marring means a polish may be needed first.
Not automatically. A clay mitt can be efficient, but safe use still depends on lubrication, pressure, and clean technique.

