How to Fit Car Seat Covers Properly for a Perfect Look
Fitting car seat covers properly ensures a sleek, professional appearance and long-lasting protection. This guide walks you through each step—from preparation to final adjustments—so your seats look factory-fresh. Follow these tips for a snug, wrinkle-free fit that enhances comfort and style.
Key Takeaways
- Measure your seats first: Always check your car’s seat dimensions before buying covers to ensure compatibility and avoid loose or tight fits.
- Clean seats before installation: Remove dirt, crumbs, and debris so the covers sit flat and don’t trap grime underneath.
- Start with headrests and armrests: These parts often have unique shapes—install them first to avoid misalignment later.
- Use built-in straps and hooks: Most quality covers come with attachment points—secure them tightly to prevent shifting while driving.
- Smooth out wrinkles as you go: Work from the center outward to eliminate bunching and create a clean, tailored look.
- Allow time for adjustment: Some covers may need a day or two to settle into place—don’t rush the process.
- Maintain regularly: Vacuum and spot-clean covers monthly to keep them looking sharp and extend their lifespan.
How to Fit Car Seat Covers Properly for a Perfect Look
Upgrading your car’s interior with new seat covers is one of the easiest ways to refresh your ride. Whether you’re protecting factory upholstery from spills and pets or simply giving your cabin a style boost, a well-fitted seat cover makes all the difference. But here’s the catch: even the best covers look sloppy if they’re not installed correctly.
In this guide, we’ll walk you through every step of fitting car seat covers properly—so they look sleek, stay in place, and last for years. From prepping your seats to securing straps and smoothing out wrinkles, you’ll learn how to achieve that custom, factory-finish appearance without a professional installer.
Let’s get started!
Step 1: Choose the Right Seat Covers
Before you even think about installation, make sure you’ve picked the right product. Not all seat covers are created equal, and a poor fit starts with the wrong choice.
Check Compatibility
Start by confirming that the seat covers are designed for your specific car make, model, and year. Many manufacturers offer custom-fit options that match your seat contours exactly. Universal covers can work, but they often require more effort to look good and may not fit snugly around side airbags or seat controls.
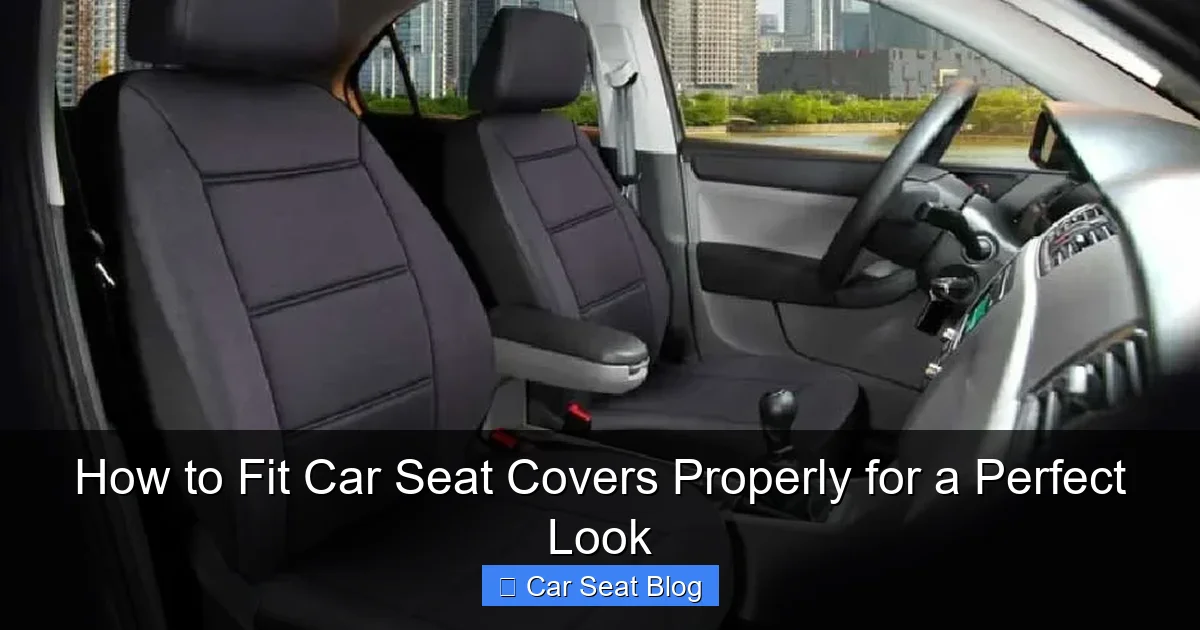
Visual guide about How to Fit Car Seat Covers Properly for a Perfect Look
Image source: upbeatgeek.com
Consider Material and Features
Leather, neoprene, polyester, and canvas each have pros and cons. Neoprene is water-resistant and great for active lifestyles, while leather-look vinyl adds a premium feel. Look for features like:
- Built-in straps and buckles
- Airbag-compatible stitching
- Anti-slip backing
- Easy-clean surfaces
These details make installation easier and improve long-term performance.
Measure Your Seats
If you’re unsure about fit, measure your seat width, depth, and height. Compare these to the product specs. A few extra minutes here can save you hours of frustration later.
Step 2: Prepare Your Car Interior
A clean workspace is key to a flawless installation. You don’t want dirt or crumbs trapped under your new covers—this can cause bulges, odors, and premature wear.
Remove Loose Items
Clear out everything from the seats: phone chargers, tissues, snacks, and pet toys. Don’t forget to check under the seats and in the seat tracks.
Vacuum Thoroughly
Use a vacuum with a crevice tool to clean between seat cushions, around headrests, and along the sides. Pay extra attention to areas where debris collects, like the seat base and backrest junction.
Wipe Down Surfaces
Use a damp microfiber cloth to wipe away dust and sticky residues. Let the seats dry completely before installing covers—moisture can lead to mold or unpleasant smells over time.
Step 3: Install the Headrests First
Headrests are often the trickiest part of the seat, so tackle them early while you’re still fresh and focused.
Remove the Headrest (If Possible)
Most headrests pop out with a button or lever on the side. Check your owner’s manual if you’re unsure. Removing it makes installation much easier and ensures the cover fits snugly around the posts.
Slide the Cover Over the Headrest
Pull the headrest cover over the top and work it down evenly. Make sure any logos or patterns are centered. If the cover has elastic edges, stretch them gently to avoid tearing.
Reinsert the Headrest
Once the cover is on, reinsert the headrest into the seat. Push it all the way down until it clicks into place. The cover should sit flat with no twisting or bunching.
Step 4: Fit the Seat Back Cover
Now it’s time to dress the main part of the seat—the backrest.
Align the Cover Correctly
Start by draping the cover over the seat back. Match any labels or tags to the correct side (left or right). Look for cutouts that align with seat controls, air vents, or side airbags.
Secure the Top First
Most covers have elastic straps or hooks at the top. Attach these to the seat frame or headrest posts. Pull gently to remove slack, but don’t overtighten—this can warp the fabric.
Work Your Way Down
Smooth the cover downward from the top, using your hands to eliminate wrinkles. Focus on the center first, then work toward the sides. If your cover has side zippers or Velcro, fasten them now.
Attach Bottom Straps
Flip the seat cover inside out at the bottom to access hidden straps. Hook them under the seat or to the frame. These anchors are crucial for preventing the cover from riding up while driving.
Step 5: Install the Seat Bottom Cover
The seat base often gets the most wear, so a secure fit here is essential for comfort and durability.
Position the Cover
Place the bottom cover on the seat, aligning it with the edges. Make sure it’s centered and not twisted. If your cover has a non-slip backing, ensure it’s facing down.
Secure the Front
Many covers have straps that loop under the front of the seat. Reach underneath and fasten them to the hooks or buckles. Pull tight to remove slack.
Tuck Excess Fabric
Use the “tuck and smooth” method: push extra fabric into the gaps between the seat base and backrest. This creates a clean line and prevents bunching. Some covers include foam inserts or Velcro strips to help with this.
Attach Rear Straps
Flip the seat forward (if possible) and secure any rear straps to the seat frame. This step is often overlooked but makes a big difference in long-term fit.
Step 6: Reattach Armrests and Cup Holders
If your seat has an integrated armrest or cup holder, don’t forget to cover it.
Remove the Armrest (If Needed)
Some armrests unscrew or pop off. Check your car manual. If it’s removable, take it off before installing the cover.
Slide on the Armrest Cover
Pull the small cover over the armrest, smoothing out any wrinkles. Reattach it to the seat and secure with screws or clips if required.
Test Functionality
Make sure the armrest still moves up and down smoothly and that cup holders open and close without obstruction.
Step 7: Final Adjustments and Smoothing
You’re almost done! Now it’s time to fine-tune the fit.
Check for Wrinkles and Bunching
Sit in the seat and look for loose areas. Use your hands to smooth out any creases, working from the center outward. Pay attention to the sides and corners.
Tighten All Straps
Go back and double-check every strap, hook, and buckle. Give them a gentle tug to ensure they’re secure. Loose straps can cause the cover to shift over time.
Trim Excess Material (If Safe)
Some universal covers come with extra fabric. Only trim if the manufacturer allows it—never cut near seams or airbag zones. Use sharp scissors and leave a small margin.
Troubleshooting Common Issues
Even with careful installation, you might run into a few hiccups. Here’s how to fix them:
Cover Keeps Sliding
If your seat cover shifts while driving, the straps may not be tight enough. Reattach them and pull firmly. Consider adding non-slip pads or double-sided tape (use sparingly and avoid adhesive on fabric).
Wrinkles Won’t Smooth Out
Some materials need time to relax. Drive around for a day or two—heat and movement will help the fabric settle. You can also use a fabric steamer on low heat to gently remove stubborn creases.
Cutouts Don’t Align
If airbag flaps or seat controls don’t line up, don’t force it. Remove the cover and reposition it. Custom-fit covers should match perfectly—if not, contact the seller for a replacement.
Headrest Won’t Stay On
Make sure the headrest posts are fully inserted and the cover isn’t too tight. If the cover slips, try wrapping the posts with a thin layer of electrical tape for a snugger fit (only if safe and allowed).
Maintenance Tips for Long-Lasting Looks
Once your seat covers are perfectly fitted, keep them that way with regular care.
Vacuum Monthly
Use a soft brush attachment to remove dust and crumbs. This prevents buildup and keeps the fabric looking fresh.
Spot Clean Spills Immediately
Blot (don’t rub) spills with a damp cloth and mild soap. For tough stains, use a cleaner recommended for your cover’s material.
Avoid Harsh Chemicals
Bleach and ammonia can fade colors and weaken fibers. Stick to gentle, pH-neutral cleaners.
Protect from Sun Damage
UV rays can fade and crack materials over time. Use sunshades or park in the shade when possible.
Conclusion
Fitting car seat covers properly isn’t just about aesthetics—it’s about safety, comfort, and longevity. A well-installed cover protects your original upholstery, enhances your driving experience, and gives your car a polished, custom look.
By following these steps—choosing the right covers, prepping your seats, installing methodically, and maintaining regularly—you’ll achieve a professional-grade finish that turns heads and stands the test of time.
Remember: take your time, follow the instructions, and don’t skip the small details. The result? A car interior that looks like it rolled straight out of the showroom.
Now go enjoy your refreshed ride—you’ve earned it!