Can You Remove Car Seat Covers Easily at Home
Removing car seat covers at home is easier than you think—with the right tools and techniques, you can do it safely in under an hour. This guide walks you through the process, whether you’re cleaning, replacing, or upgrading your seats.
Quick Answers to Common Questions
Tip/Question?
Can I remove seat covers without taking the seat out?
Yes, in many cases. If the cover is slip-on or clip-on, you can remove it while the seat is in the car. Only remove the seat if access is too tight or wiring needs checking.
Tip/Question?
What if my seat cover is sewn in?
Use a seam ripper to carefully cut the stitches. Work slowly to avoid damaging the foam. You may need to re-stitch or use adhesive when reinstalling.
Tip/Question?
How do I know if my seat has airbags?
Check for labels on the seat side that say “SRS Airbag” or look for seams that look different. When in doubt, consult your owner’s manual.
Tip/Question?
Can I wash my seat cover in a machine?
Only if the manufacturer says so. Most fabric covers can be hand-washed or spot-cleaned. Machine washing may shrink or damage the material.
Tip/Question?
How often should I remove and clean seat covers?
Every 6–12 months is ideal, or after spills, pets, or long trips. Regular cleaning prevents odors and extends cover life.
Can You Remove Car Seat Covers Easily at Home?
If you’ve ever spilled coffee, tracked in mud, or just wanted a fresh look inside your car, you’ve probably wondered: Can you remove car seat covers easily at home? The short answer is yes—most car seat covers can be taken off without a trip to the mechanic. Whether you’re deep-cleaning, replacing worn fabric, or installing custom covers, this guide will show you exactly how to do it safely and efficiently.
In this step-by-step guide, you’ll learn how to identify your seat cover type, gather the right tools, and carefully remove covers without damaging your seats or vehicle. We’ll also cover troubleshooting tips and best practices for reinstallation. By the end, you’ll feel confident tackling this DIY project like a pro.
Why Remove Car Seat Covers?
There are several great reasons to remove your car seat covers:

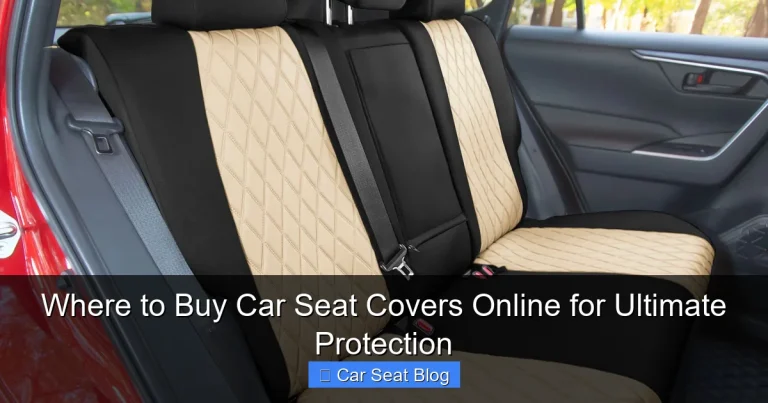
Visual guide about Can You Remove Car Seat Covers Easily at Home
Image source: dirtroads.com.au
- Deep cleaning: Over time, dirt, crumbs, and odors build up beneath the fabric. Removing the cover lets you clean thoroughly.
- Replacing damaged fabric: Rips, stains, or fading can make your interior look worn. Swapping out the cover refreshes your car’s look.
- Upgrading style: Want leather, neoprene, or custom colors? Removing the old cover is the first step.
- Repairing underneath: Sometimes foam padding or springs need attention—removing the cover gives you access.
Whatever your reason, knowing how to remove seat covers properly saves time and money.
Tools You’ll Need
Before you start, gather these basic tools. Most are likely already in your garage or kitchen drawer:
- Flathead screwdriver (preferably plastic-tipped to avoid scratches)
- Needle-nose pliers
- Seam ripper or small utility knife (for stitched covers)
- Flashlight (to see hidden clips and hooks)
- Zip ties or tape (to label parts)
- Camera or smartphone (to take reference photos)
Having the right tools makes the job faster and reduces the risk of damage.
Step 1: Identify Your Seat Cover Type
Not all seat covers are created equal. The removal method depends on how they’re attached. Here are the most common types:
Snap-On or Clip-On Covers
These are the easiest to remove. They attach with plastic clips or snaps along the edges. Common on older vehicles or aftermarket covers. Look for small plastic tabs along the seat base and back.
Elastic or Stretch-Fit Covers
Made from flexible fabric, these slip over the seat like a glove. They often have elastic bands that hook underneath. Great for quick removal but may require some tugging.
Stitched or Factory-Fitted Covers
Found in most modern cars, these are sewn into the seat and may be attached with hog rings, Velcro, or hidden clips. These require more care and sometimes partial disassembly.
Custom or Aftermarket Slip-On Covers
Designed for easy installation and removal, these usually have zippers, straps, or Velcro closures. Check the manufacturer’s instructions for guidance.
Knowing your type helps you choose the right removal strategy.
Step 2: Prepare Your Workspace
Set yourself up for success:
- Park your car on a flat surface and turn off the engine.
- Remove floor mats and any loose items from the seats.
- Open all doors for better access and lighting.
- Use a flashlight to inspect the seat edges and underside.
Good lighting and space make a big difference when working on small parts.
Step 3: Remove the Seat (If Necessary)
In some cases, especially with factory-fitted covers, you may need to remove the entire seat. This gives you full access and reduces strain.
Check for Airbags and Wiring
Modern seats often have side airbags, seatbelt sensors, or heating elements. Never disconnect electrical components without consulting your owner’s manual. If you’re unsure, skip seat removal and work around it.
Unbolt the Seat
Most seats are held by four bolts—two at the front, two at the back. Use a socket wrench to loosen them. Have a helper lift the seat out, as they can be heavy (40–60 lbs).
Label and Disconnect Wires
If your seat has wiring, take a photo before disconnecting. Label connectors with tape so you remember where they go. Gently unplug them.
Once the seat is out, place it on a clean, flat surface like a towel or cardboard.
Step 4: Remove the Seat Cover
Now for the main event. Follow these steps based on your cover type.
For Snap-On or Clip-On Covers
Start at the front edge of the seat base. Use a flathead screwdriver (wrapped in tape to prevent scratches) to gently pry up the clips. Work your way around the seat, releasing each clip. Once all are free, lift the cover off.
For Elastic or Stretch-Fit Covers
Grab the edge of the cover and pull it upward. It may take some effort. Use pliers to grip the fabric if needed, but avoid tearing. If it’s stuck, check for hidden hooks underneath.
For Stitched or Factory-Fitted Covers
This is the trickiest type. You’ll likely need to:
- Use a seam ripper to carefully cut stitches along the seams.
- Look for hog rings (metal fasteners) holding the fabric to the seat frame. Use pliers to bend and remove them.
- Detach any Velcro strips or plastic retainers along the edges.
Take your time. Rushing can tear the fabric or damage the foam underneath.
For Custom Slip-On Covers
Unzip zippers, unbuckle straps, or peel back Velcro. These are designed for easy removal, so follow the manufacturer’s instructions.
As you remove the cover, take photos of how it was attached. This will help when reinstalling.
Step 5: Clean or Replace the Cover
With the cover off, you can now clean or replace it.
Cleaning the Cover
If you’re reusing the cover, shake it out to remove loose dirt. For fabric covers, use a upholstery cleaner and soft brush. For leather, use a leather cleaner and conditioner. Let it dry completely before reinstalling.
Cleaning the Seat Base
Vacuum the seat frame and foam. Wipe down with a damp cloth. Check for mold, pests, or damage. Let it dry fully.
Replacing the Cover
If installing a new cover, ensure it’s the correct size and model for your seat. Follow the manufacturer’s installation guide. Most slip-on covers go on like the original—just reverse the removal steps.
Step 6: Reinstall the Seat Cover
Reassembly is the reverse of removal—but take care to avoid mistakes.
For Snap-On or Clip-On Covers
Align the cover with the seat and press the clips back into place. Start at the front and work your way back. Make sure all clips are secure.
For Elastic or Stretch-Fit Covers
Stretch the cover over the seat, starting at the top. Hook the elastic bands underneath. Smooth out wrinkles as you go.
For Stitched or Factory-Fitted Covers
If you removed hog rings, reattach them with new ones and pliers. Re-stitch any seams if necessary. Reattach Velcro or clips carefully.
For Custom Slip-On Covers
Slide the cover on, zip or buckle it, and secure all straps. Ensure it fits snugly without bunching.
Double-check that the cover is smooth and secure. Loose fabric can be a safety hazard.
Step 7: Reinstall the Seat (If Removed)
If you removed the seat, now’s the time to put it back.
Reconnect Wiring
Plug in all electrical connectors. Refer to your photos and labels. Make sure they’re fully seated.
Bolt the Seat Back In
Carefully lift the seat into place. Align the bolt holes and hand-tighten the bolts first. Then use a wrench to secure them. Don’t overtighten—this can strip the threads.
Test the Seat
Adjust the seat forward and back. Test seatbelt function and any electronic features (heating, lumbar support). Make sure everything works.
Troubleshooting Common Issues
Even with care, problems can happen. Here’s how to fix them:
Cover Won’t Come Off
If a cover is stuck, don’t force it. Look for hidden clips, screws, or stitches. Use a flashlight to inspect seams and edges. Sometimes a second pair of hands helps.
Broken Clips or Fasteners
Replace broken plastic clips with universal seat cover clips (available at auto parts stores). For hog rings, use a hog ring plier and new rings.
Wrinkles or Bunching After Reinstallation
This means the cover isn’t stretched properly. Remove it and reinstall, pulling tightly as you go. Use a hair dryer on low heat to help stretch fabric slightly.
Seat Functions Not Working
Check wiring connections. Ensure all plugs are secure. If the issue persists, consult a professional—don’t risk airbag or sensor failure.
Safety Tips to Remember
Your safety comes first. Keep these in mind:
- Never disable airbags. If your seat has side airbags, avoid cutting near them.
- Don’t use sharp tools near wiring. A slipped knife can damage critical systems.
- Wear gloves to protect your hands from sharp edges or rust.
- Work in a well-ventilated area if using cleaning chemicals.
- If in doubt, consult a professional. Some seats are complex and best left to experts.
Final Thoughts
So, can you remove car seat covers easily at home? Absolutely—with the right approach, it’s a manageable DIY task that saves money and gives you control over your car’s interior. Whether you’re cleaning, repairing, or upgrading, taking the time to do it right ensures a professional-looking result.
Remember: patience, preparation, and photos are your best friends. Start slow, use the right tools, and don’t rush. Your car—and your backseat passengers—will thank you.