Transform your car stereo into a powerful boombox for home use with this easy DIY guide. You’ll learn how to power it safely, connect speakers, and build a portable case—no advanced skills needed.
How to Build a Boombox with Car Stereo Easily
Have you ever loved the sound of your car stereo but wished you could enjoy it at home? Maybe you’ve got an old car head unit lying around, or you just want a powerful, portable speaker system without spending hundreds on commercial gear. The good news? You can build a boombox with a car stereo—easily and affordably.
This guide walks you through every step: from gathering parts to wiring, testing, and final assembly. No engineering degree required. Just basic tools, a little patience, and this step-by-step plan. By the end, you’ll have a custom boombox that delivers rich, room-filling sound—perfect for backyard parties, garage workouts, or just chilling at home.
What You’ll Need
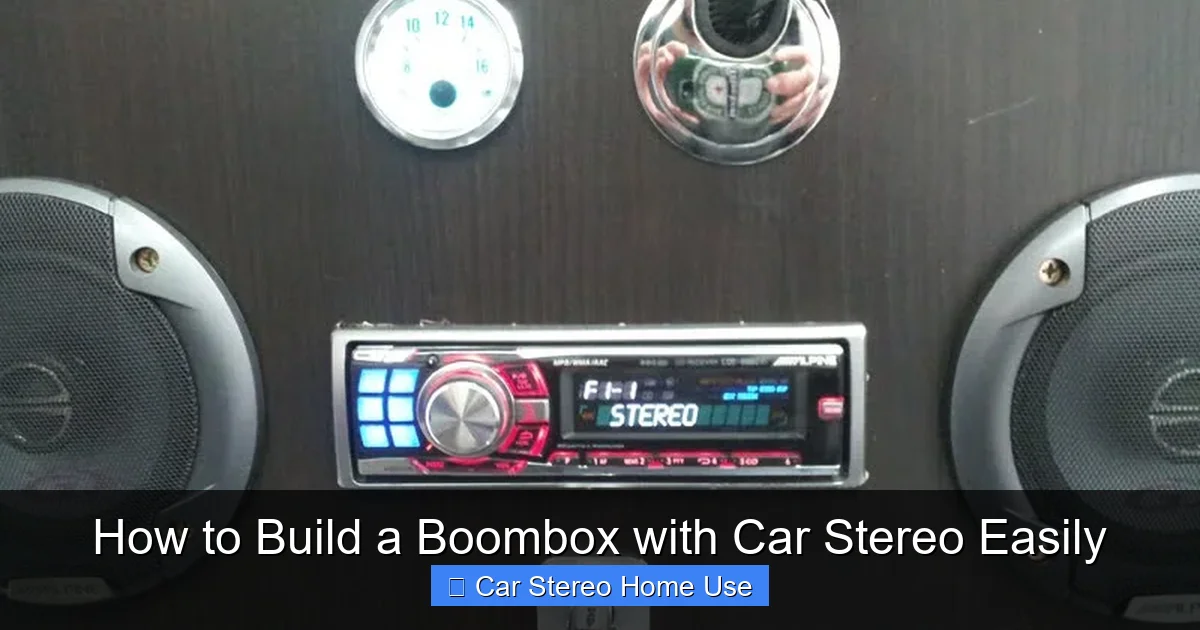
Visual guide about How to Build a Boombox with Car Stereo Easily
Image source: ikeahackers.net
Before we start, let’s make sure you have everything. Most items are easy to find online or at electronics stores.
Essential Components
- Car stereo (head unit): Any standard single-DIN or double-DIN model with built-in amplifier works best.
- 12V DC power supply: Look for one that delivers at least 5–10 amps (50–120 watts). A used laptop charger or a dedicated 12V transformer from an electronics store is perfect.
- Speakers: Two 4-ohm or 8-ohm speakers (6.5″ or 8″ work great). Avoid 2-ohm speakers—they can overload the stereo.
- Enclosure/box: Wood, plastic, or even a sturdy plastic storage bin. Size should fit the stereo and speakers comfortably.
- Speaker wire: 16–18 gauge is ideal for short runs.
- Power wires and connectors: Include spade connectors, ring terminals, or solder directly for secure connections.
- Fuse holder and fuse (10A recommended): Safety first! Protects against short circuits.
Tools You’ll Need
- Screwdrivers (Phillips and flathead)
- Wire strippers
- Drill with bits (for mounting speakers and vents)
- Hot glue gun or epoxy (optional, for securing parts)
- Multimeter (helpful for testing voltage and continuity)
- Sandpaper (if using wood—smooth edges)
Step 1: Prepare the Power Supply
Car stereos run on 12 volts DC, just like in your car. But you can’t plug it into a wall outlet directly. That’s where a 12V power supply comes in.
Choose the Right Adapter
Look for a power supply labeled “12V DC” with at least 5 amps of current. For example, a 12V 10A adapter gives you 120 watts—plenty for most car stereos. Laptop chargers often work well if they match the voltage and have enough amperage.
Modify the Connector
Most power supplies have a barrel plug. You’ll need to cut it off and strip the wires to expose the positive (usually red) and negative (usually black) leads. Be careful—always unplug the adapter before cutting!
Add a Fuse for Safety
Wire a 10-amp fuse into the positive line between the power supply and the stereo. Use an inline fuse holder for easy replacement. This protects your gear if something goes wrong.
Step 2: Wire the Stereo to Power
Now it’s time to connect your car stereo to the power supply.
Identify the Wiring Harness
Every car stereo has a wiring harness with color-coded wires. The most important ones are:
- Yellow: Constant 12V (for memory and clock)
- Red: Switched 12V (turns the stereo on/off)
- Black: Ground
Connect Power Wires
– Connect the yellow wire to the positive (+) terminal of your power supply.
– Connect the red wire to the same positive terminal (you can twist them together or use a connector).
– Connect the black wire to the negative (–) terminal.
This setup keeps the stereo always ready to turn on when power is applied. If your stereo has a separate “remote” wire (usually blue/white), connect it to the red wire so amplifiers or antennas activate properly.
Test the Power Connection
Plug in the power supply and turn on the stereo. If it lights up and plays sound, great! If not, double-check your connections and polarity. Never reverse positive and negative—it can damage the stereo.
Step 3: Connect the Speakers
Now let’s hook up the speakers so you can hear that sweet sound.
Match Impedance
Most car stereos are designed for 4-ohm speakers. If you use 8-ohm speakers, the volume will be a bit lower but safer. Avoid 2-ohm speakers unless your stereo specifically supports them.
Wire the Speakers
– Connect the stereo’s left speaker output to your left speaker (positive to positive, negative to negative).
– Do the same for the right channel.
Use screw terminals, solder, or crimp connectors—whatever gives a solid, secure connection. Loose wires cause crackling or no sound at all.
Secure the Speakers in the Enclosure
Drill holes in the front of your box to mount the speakers. Use speaker grilles if you have them—they protect the cones and improve sound. Seal any gaps around the speakers with hot glue or foam tape to prevent air leaks, which hurt bass response.
Step 4: Build the Enclosure
The case holds everything together and shapes the sound.
Choose Your Material
– Plywood: Affordable and easy to work with. Sand edges smooth.
– Plastic storage bin: Lightweight and portable. Great for beginners.
– MDF (medium-density fiberboard): Denser than plywood, better for sound but heavier.
Make sure the interior is deep enough for the stereo, speakers, and wiring with room to spare.
Cut Openings
– Cut a hole in the front for the stereo faceplate.
– Cut speaker holes in the front (or sides, depending on design).
– Add small ventilation holes on the sides or back to prevent overheating.
Mount the Components
– Secure the stereo using its mounting sleeve or brackets.
– Mount speakers with screws or strong adhesive.
– Place the power supply inside or outside the box—just make sure wires reach comfortably.
Add a Handle (Optional but Recommended)
Attach a sturdy handle to the top so you can carry your boombox easily. A simple metal or plastic handle works great.
Step 5: Final Assembly and Testing
Now it’s time to put it all together and make sure everything works.
Double-Check All Connections
Before closing the box, verify:
– Power wires are secure and fused.
– Speaker wires aren’t crossed or shorted.
– No loose screws or sharp edges inside.
Test the Sound
Plug in the power and play music. Check both left and right channels. Adjust bass, treble, and balance. If sound is distorted, check speaker polarity or wiring.
Secure Loose Wires
Use zip ties or hot glue to keep wires tidy and prevent them from touching hot components or moving parts.
Close the Enclosure
Screw or glue the back panel shut. Leave access to the fuse and power cord for future maintenance.
Troubleshooting Common Issues
No Power or Display
– Check if the power supply is working (use a multimeter).
– Verify the fuse isn’t blown.
– Ensure yellow and red wires are connected to positive power.
Distorted or Weak Sound
– Confirm speaker impedance matches the stereo.
– Check for loose or reversed speaker wires.
– Make sure the enclosure isn’t vibrating or rattling.
Overheating
– Add more ventilation holes.
– Reduce volume or use shorter play sessions.
– Consider adding a small 12V cooling fan.
Static or Hissing
– Keep power and audio wires separated to avoid interference.
– Use shielded audio cables if possible.
– Ground the enclosure if using metal.
Tips for Better Sound and Portability
– Use a crossover: If adding tweeters, a passive crossover improves clarity.
– Add a volume knob: Wire a potentiometer between the stereo and speakers for remote control.
– Paint or decorate: Make your boombox unique with spray paint, stickers, or vinyl wrap.
– Include a USB charger: Tap into the 12V supply to charge phones on the go.
– Use a battery pack (advanced): For true portability, connect a 12V sealed lead-acid or lithium battery.
Conclusion
Building a boombox with a car stereo is a fun, practical project that saves money and delivers impressive sound. With just a few tools and components, you’ve turned an ordinary car head unit into a powerful home audio system. Whether you’re rocking out in the garage or hosting a backyard BBQ, your DIY boombox will turn heads—and crank up the volume.
Remember: safety first, test often, and don’t be afraid to customize. Add lights, Bluetooth, or even a subwoofer later. The possibilities are endless. Now plug in, turn it up, and enjoy your creation!