Quick Summary: Your alternator keeps your battery charged by turning engine motion into electricity, then sending a steady 13.8–14.7V back to the battery while you drive. If your lights dim, the battery light comes on, or voltage is under 13.5V with the engine running, your charging system needs attention. Use a multimeter, check the belt, and test connections to confirm.
Your car won’t start. Or it starts but dies at a light. Maybe the battery light is staring at you. Good news: the fix is often simple once you know how alternator charges battery while you drive. In this guide, I’ll show you how the system works, the voltage you should see, and the exact steps to test and fix it at home. You’ll learn quick checks, tools to use, and when to replace parts.
How Alternator Charges Battery (Simple Explanation)
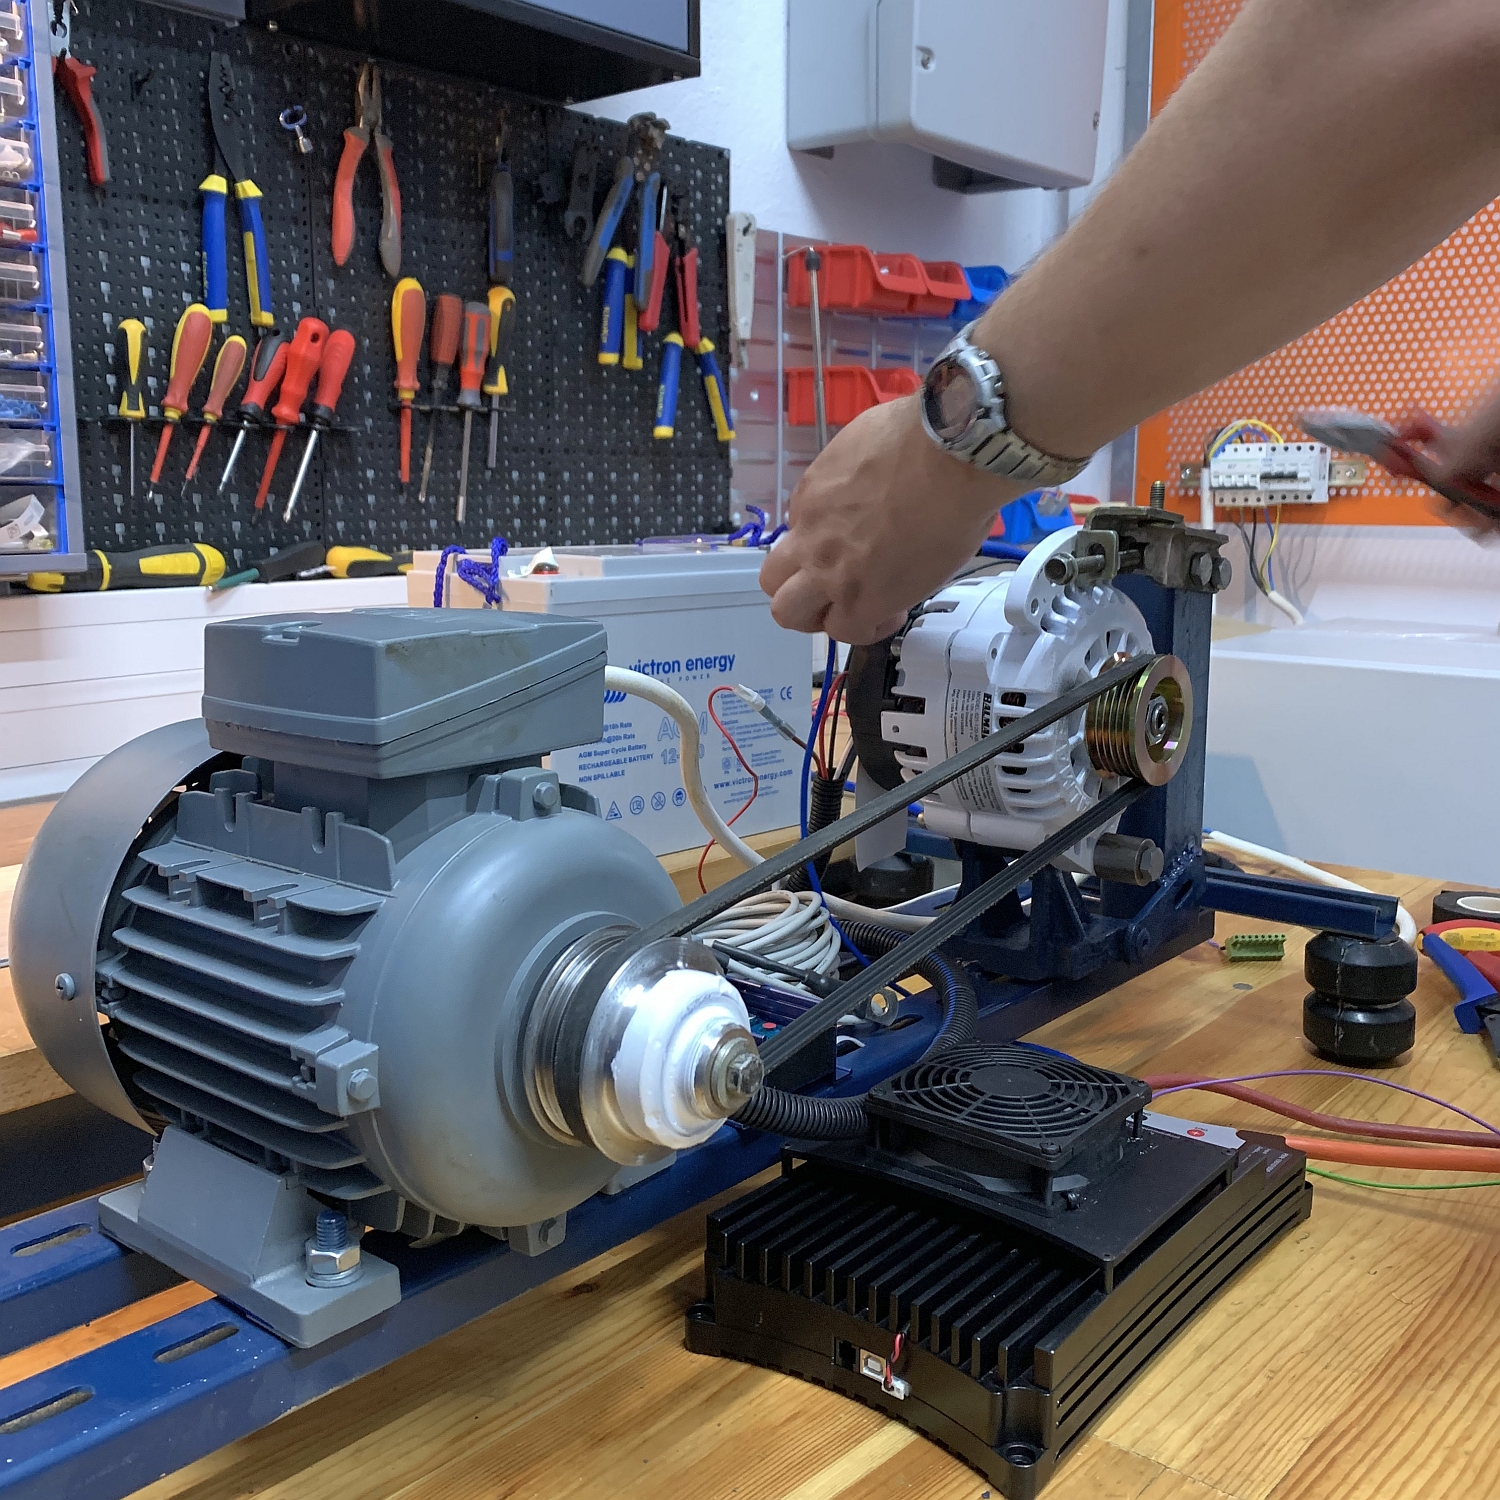
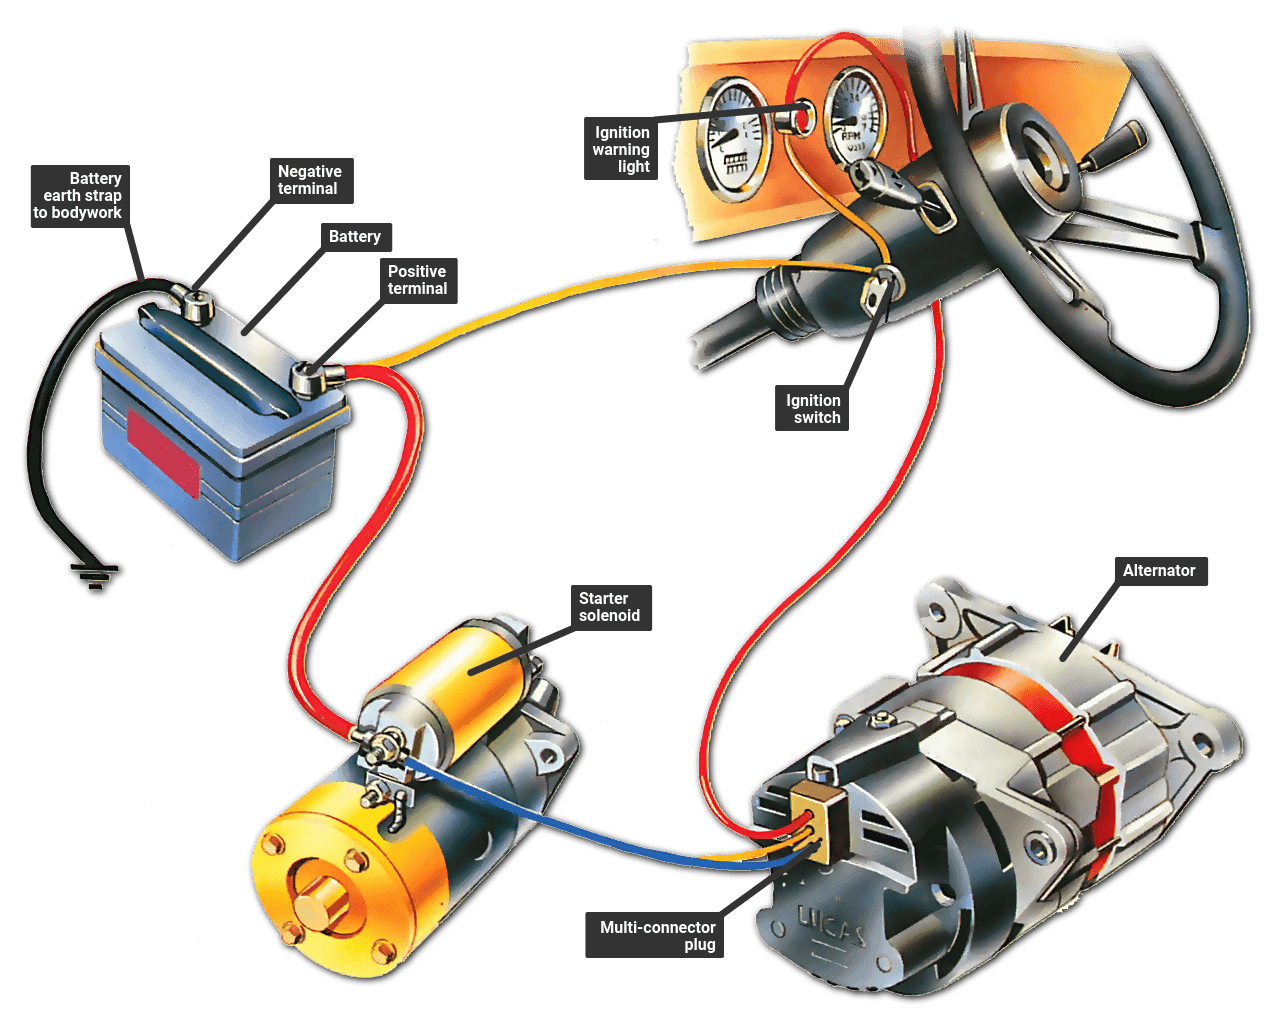
The alternator is a small generator driven by your engine belt. It makes AC power, turns it into DC, and pushes a steady charge into your 12V battery. A voltage regulator keeps the output safe, usually around 13.8–14.7 volts. That window is strong enough to charge but gentle enough to avoid damage. When everything works, the battery stays ready to start your car every time.
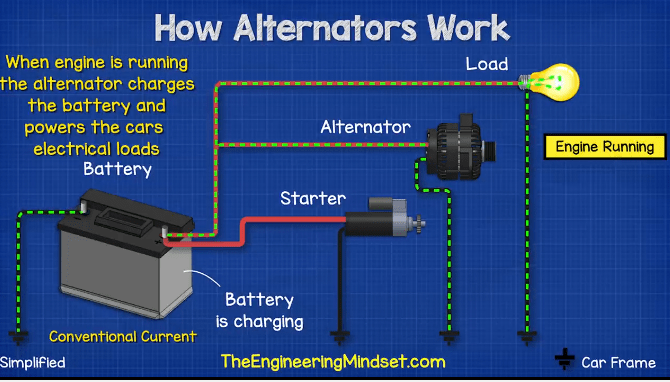
What the Alternator Does While You Drive
As the engine runs, the alternator powers all electrics first. That includes headlights, fans, fuel pump, and more. Any extra power goes back into the battery. If you sit at idle with big loads on, the alternator may struggle. RPM helps boost output, so a short highway run can top the battery faster.

Key Parts in Plain English
- Rotor: A spinning magnet inside the alternator.
- Stator: Coils of wire where power is made.
- Rectifier: Turns AC into DC power.
- Voltage regulator: Keeps charging voltage steady.
- Drive belt: Spins the alternator off the crank pulley.
- Battery: Stores energy and provides starting power.

Step-by-Step: What Happens from Key Turn to Full Charge
Let’s map the journey from start to recharge. This is what your car does in the background. Knowing this helps you diagnose fast.

- You turn the key (or push start). The battery sends power to the starter.
- The engine cranks and starts. The belt begins spinning the alternator.
- The alternator makes AC power in the stator. The rectifier converts it to DC.
- The regulator checks system voltage in real time. It raises or lowers output.
- The alternator handles live loads first. Lights, radio, blower motor, and more.
- Extra power charges the battery at about 13.8–14.7V.
- As the battery fills up, the regulator eases back. This prevents overcharge.
- When you shut off the engine, the battery holds the charge for next start.
Tools You Need to Test Your Charging System
You only need a few items. Most are cheap and easy to use. These tools help you avoid guesswork and bad parts buys.
- Digital multimeter (with DC volts and ideally min/max capture)
- OBD2 scanner (helpful for stored voltage or charging codes)
- Jumper cables or a jump pack (for emergencies)
- Battery load tester (optional, for deeper checks)
- 12V test light (optional for quick checks)
- Basic hand tools (socket set, wrench, screwdriver)
- Safety gear (gloves, glasses)
Safety First
Charging systems are simple, but stay safe. A few quick rules prevent sparks, burns, and shorts.

- Never disconnect the battery while the engine runs. You can fry electronics.
- Keep hands, hair, and tools away from belts and pulleys.
- Use insulated tools around battery terminals.
- Work in a ventilated area. Batteries can vent gas.
- Check your manual for jump-start points on newer cars.
- If you see smoking wires or smell burning, stop and tow it.
Quick Tests You Can Do at Home (5-Minute Checks)
These simple checks tell you if the alternator is charging. You can do them in your driveway with basic tools.
- Key-off battery voltage:
- Set your multimeter to DC volts.
- Touch red probe to positive (+), black to negative (−).
- Healthy battery at rest: 12.4–12.7V. Under 12.2V is low.
- Engine-running charging voltage:
- Start the car. Keep probes on the battery posts.
- Expect 13.8–14.7V. Under 13.5V means weak or no charge.
- Over 15.0V means overcharging. Regulator may be bad.
- Load test with lights and fan:
- Turn on headlights, rear defroster, and blower on high.
- Rev to 1,500–2,000 RPM. Voltage should stay above 13.5V.
- If it drops under 13.2V, the alternator may be weak.
- Dashboard battery light:
- If it stays on after start, the alternator may not be charging.
- If it flickers with bumps, check the belt and wiring.
- Drive belt and tension:
- Look for cracks, glazing, or squeal at start-up.
- A loose or slipping belt kills alternator output.
Battery Voltage Chart (Parked vs Running)
Use this chart to read your battery and alternator at a glance. Check parked voltage first, then running voltage.

| Battery/Engine State | Voltage Reading | What It Means | Action |
|---|---|---|---|
| Parked (key off) | 12.6–12.7V | Full charge | No action needed |
| Parked (key off) | 12.4–12.5V | Good, slightly low | Drive 20–30 mins or slow charge |
| Parked (key off) | 12.2–12.3V | Low | Charge battery and retest |
| Parked (key off) | 11.8–12.1V | Very low | Jump and test alternator after start |
| Running (idle) | 13.6–14.4V | Normal charging | No action needed |
| Running (idle) | Under 13.5V | Weak/no charge | Check belt, alternator, and grounds |
| Running (load on) | 13.5–14.2V | Healthy with accessories | No action needed |
| Running (how alternator charges battery range) | 13.8–14.7V | Optimal alternator output | System working as designed |
| Running (any) | Over 15.0V | Overcharging | Voltage regulator or sensor fault |
Symptoms, Causes, and Fixes for Charging Problems
Match what you see to what it means. This table helps you move from symptom to a confident fix.
| Symptom | Likely Cause | Quick Fix |
|---|---|---|
| Battery light on while driving | Alternator not charging, bad belt, loose plug | Check belt tension, inspect alternator connector, test voltage |
| Dim headlights at idle, brighter with revs | Weak alternator at low RPM, slipping belt | Raise idle briefly to test, replace belt/tensioner if worn |
| Click but no crank in morning | Weak battery from short trips, parasitic drain | Charge battery overnight, test draw, longer drives |
| Over 15V while running | Faulty regulator or bad sense wiring | Inspect alternator sense wire, replace alternator if internal reg |
| Burning rubber smell, squeal | Slipping or misaligned belt | Replace belt and inspect pulleys/tensioner |
| Dead after new battery install | Bad alternator, blown fuse, poor ground | Check main charge fuse, alternator output, clean grounds |
| Flickering dash lights | Loose battery cables, failing diode in alternator | Tighten terminals, test AC ripple with meter |
Common Reasons the Alternator Won’t Charge the Battery
Most charging failures are simple. Here are the top culprits and what to do.
- Worn drive belt:
- Cracks, shiny glaze, or chunks missing mean it slips.
- Replace belt and check pulley alignment.
- Weak belt tensioner:
- If the tensioner is soft or bouncy, the belt cannot grip.
- Replace the tensioner and idler if noisy or loose.
- Corroded battery terminals:
- White or green crust creates resistance and heat.
- Clean with baking soda mix, wire brush, and reinstall tight.
- Bad alternator connector or charge cable:
- Look for broken clips, loose studs, or overheated wires.
- Repair or replace damaged connectors and fuses.
- Blown main fuse or fusible link:
- Charging cable often runs through a high-amp fuse.
- Test continuity and swap the fuse if blown.
- Failed voltage regulator:
- Can be inside the alternator or external on some cars.
- Over- or under-charging points to this part.
- Diode failure in rectifier:
- Causes AC ripple and flicker. Battery never charges well.
- Replace alternator or rectifier assembly.
- Bad grounds:
- Check battery negative to chassis and engine ground straps.
- Clean, tighten, or replace rusty straps and bolts.
- Parasitic drain:
- Dead battery after sitting overnight.
- Track with an ammeter. Pull fuses to find the circuit.
- Short trips with big loads:
- Heated seats, lights, audio, and short drives keep battery low.
- Do a weekly 30–45 minute drive or trickle charge.
How to Diagnose a No-Charge Condition (Step-by-Step)
Follow these steps when your battery light is on or voltage is low with the engine running. Go from simple to advanced.
- Baseline battery test:
- Key off. Meter on DC volts at the battery.
- If under 12.2V, charge the battery first. A dead battery can mislead tests.
- Start the engine:
- Measure at battery posts. Look for 13.8–14.7V.
- If under 13.5V, continue to next steps.
- Load test at 2,000 RPM:
- Turn on headlights, blower, and rear defrost.
- Voltage should stay above 13.5V. If not, suspect alternator or belt.
- Check the belt:
- Look for wear or slack. Push down halfway between pulleys.
- More than about 1/2” deflection on a long run is too loose.
- Inspect the alternator plug and charge wire:
- Wiggle the connector. Make sure it is locked in.
- Check for heat damage on the main output stud.
- Test grounds:
- Put black meter lead on engine metal. Red on battery negative.
- Any reading above 0.3V drop while running points to a bad ground.
- Voltage drop test on the positive side:
- Red lead on alternator output, black on battery positive.
- Over 0.5V drop with load means resistance in the cable or fuse.
- Check for AC ripple:
- Set meter to AC volts. Measure at the battery while running.
- Over about 0.3V AC suggests diode failure in the alternator.
- Scan for codes:
- Use an OBD2 scanner. Some cars log charging faults.
- Fix stored wiring or sensor codes first.
- Confirm with a known good alternator or bench test:
- Many parts stores bench-test alternators for free.
- If it fails, replace the unit and retest system voltage.
How to Fix Poor Charging (Beginner-Friendly)
You can solve most charging issues at home. Work methodically and retest after each fix.
- Clean and tighten battery terminals:
- Disconnect negative first, then positive.
- Scrub posts and clamps with a brush and baking soda water.
- Reconnect positive first, then negative. Tighten snug.
- Replace a worn belt:
- Draw a quick routing diagram or take a photo.
- Use a wrench on the tensioner to release the belt.
- Install the new belt and ensure proper seating on all grooves.
- Swap a weak tensioner or idler:
- Listen for chirps or grinding. Spin pulleys by hand.
- Replace noisy bearings and a soft tensioner spring.
- Repair bad grounds:
- Remove ground straps. Clean contact areas to shiny metal.
- Reinstall tight. Add a second ground strap if needed.
- Replace the alternator (if failed):
- Disconnect the battery negative first.
- Remove the belt, connector, and main charge wire.
- Swap the old unit for a quality reman or new one.
- Reconnect, reinstall belt, and test 13.8–14.7V while running.
- Recharge a weak battery:
- Use a smart charger at 2–10A. Slow is safer.
- After charging, let it rest, then confirm 12.6V+ at rest.
How Long to Recharge a Battery by Driving
It depends on how low the battery is and how you drive. City idling adds little. Highway speeds help a lot.
- From 12.2V (low) to full: 45–90 minutes of steady driving.
- From 11.8V (very low): 90+ minutes, or better yet, use a charger.
- Short trips and idling won’t cut it. The battery stays undercharged.
Tip: After a jump-start, plan a 30–45 minute highway drive. Then retest voltage. If it drops overnight, you may have a drain or a failing battery.
Alternator vs Battery: What Actually Fails?
Drivers often blame the wrong part. Use this guide to avoid wasting money.
| Problem | More Likely Culprit | Why | What to Do |
|---|---|---|---|
| Slow crank on cold mornings | Battery | Cold reduces battery output | Test at rest. Charge or replace if old |
| Battery dies while driving | Alternator | No charging once engine runs | Check running voltage and belt |
| Dim at idle, bright with revs | Alternator or belt | Low output at low RPM/slip | Inspect belt/tensioner, test at 2,000 RPM |
| Over 15V while running | Regulator | Overcharging harms battery | Replace alternator or regulator |
| Click, then nothing | Battery or terminals | Poor contact or low state of charge | Clean/tighten posts, charge battery |
Cold Weather, Short Trips, and Modern Loads
Winter hits hard. Oil is thick, heaters and lights are on, and the battery is weaker in the cold. Short trips never let the alternator catch up. Add modern features like seat heaters and big touchscreens, and the system stays stressed.
- Plan a weekly 30–45 minute highway drive.
- Use a maintainer if you do mostly short trips.
- Turn off big loads at stoplights if voltage is borderline.
- Keep the battery warm if possible. A garage helps.
As explained by AAA, cold weather reduces battery capacity and exposes weak cells sooner. Smart habits in winter prevent no-starts.
When to Replace the Battery or Alternator
You can test both at home. If the numbers do not add up, consider replacement. It saves time and towing costs.
- Replace the battery if:
- Resting voltage will not hold 12.4V+ after a full charge.
- It is 4–6 years old and struggles in cold weather.
- Load testing shows voltage drops too fast.
- Replace the alternator if:
- Running voltage stays under 13.5V with a good battery and belt.
- AC ripple is above 0.3V at the battery.
- It shows over 15.0V output (regulator failure).
- Fix wiring or grounds if:
- You see big voltage drops between alternator and battery.
- Terminals are corroded or loose after cleaning.
Consumer Reports notes that many “bad battery” complaints are actually charging or connection issues. Test before you buy.
Pro Tips to Extend Battery and Alternator Life
Small habits make a big difference. These add years to your parts and help avoid roadside trouble.
- Use a smart charger overnight if the car sits a lot.
- Keep terminals tight and clean. Corrosion is the enemy.
- Replace the belt and tensioner together when worn.
- Avoid blasting the sound system with the engine off.
- Do not jump cars with poor connections. Heat kills diodes.
- Fix oil leaks near the alternator. Oil ruins brushes and windings.
- Park under cover in harsh winters if possible.
Understanding Voltage Regulators and Smart Charging
Older cars used simple regulators. Many modern cars use “smart charging.” The computer controls alternator output based on load, battery health, and even deceleration. So you may see 12.8–13.2V at times. That can be normal in light-load cruising.
- If voltage dips but rises with load, it may be strategy, not failure.
- Scan for charging mode data on newer models, if available.
- Some regulators read a “sense wire.” A bad sense wire skews output.
- After a battery swap, some cars need a battery registration or relearn.
According to the National Highway Traffic Safety Administration, electrical issues can trigger warning lights and recalls. If your dash lights stay on after service, check for Technical Service Bulletins or campaigns.
Hybrid and Start-Stop Differences
Some hybrids and start-stop vehicles use beefier batteries and advanced control. The alternator can be replaced by a belt-driven starter-generator. Charging strategy changes often to save fuel.
- Do not assume normal voltage targets. Check the service manual.
- Battery testing and replacement can need special tools.
- Use the specified battery type (AGM/EFB). They are not optional.
As highlighted by AAA, using the wrong battery type can shorten life and cause poor stop-start performance.
What If the Battery Is Dead? Emergency Steps
You can jump-start the car and let the alternator recharge it. But do it right. Bad jumps can damage electronics.
- Connect jumper cables:
- Red to dead battery positive (+), red to donor positive (+).
- Black to donor negative (−). Black to a bare metal ground on the dead car, away from the battery.
- Start the donor car. Let it run for 2–3 minutes.
- Start the dead car. If it cranks slow, wait another minute and try again.
- Remove cables in reverse order. Do not let clamps touch.
- Drive 30–45 minutes at highway speed to recharge.
If it dies as soon as you remove cables, the alternator may be dead. Test running voltage to confirm.
After a Jump-Start: What to Do Next
A jump gets you moving. But you still need to diagnose the cause. Follow this plan to avoid a repeat.
- Check resting voltage after your drive. Aim for 12.6V.
- Test running voltage. Aim for 13.8–14.7V.
- Look for parasitic draws if it dies overnight.
- Inspect the belt and connections.
- Charge fully with a smart charger if it remains low.
Myths and Truths About Charging
Let’s clear up some confusion. These myths send people chasing the wrong fixes.
- Myth: “The alternator charges at 12 volts.” Truth: It must be above battery voltage, usually 13.8–14.7V.
- Myth: “A new battery will fix a bad alternator.” Truth: The car will die again without charging.
- Myth: “Driving five minutes each day keeps it charged.” Truth: Short trips drain more than they add.
- Myth: “Corrosion is normal.” Truth: It is a sign of venting and poor connections. Clean it.
- Myth: “All voltage dips mean failure.” Truth: Smart charging can lower voltage by design.
Glossary: Simple Definitions
Here are the terms you will see when testing and fixing charging systems. Keep this handy.
- Alternator: Engine-driven generator that charges the battery.
- Voltage regulator: Controls alternator output for safe charging.
- Rectifier/diodes: Convert AC power to DC.
- Battery SOC: State of charge, how full the battery is.
- Parasitic draw: Power drain when the car is off.
- Voltage drop: Lost voltage across a cable or connection.
- AC ripple: Leftover AC from a bad diode in the alternator.
- AGM/EFB: Advanced battery types used in modern cars.
FAQs
Why is my battery light on while I’m driving?
Because the alternator is not charging enough. It could be a loose belt, bad regulator, failed alternator, or a blown fuse. Test running voltage and inspect the belt and connectors.
Can I drive with a bad alternator?
Only for a short time. The car runs off the battery until it dies. You may make it a few miles in daylight with no accessories. It is risky. Fix the alternator first.
What voltage should I see with the engine running?
Most cars show 13.8–14.7V at the battery. If it is under 13.5V, charging is weak. Over 15.0V is overcharging.
How long to recharge a dead battery by driving?
Expect 45–90 minutes of steady highway driving. Very low batteries may need a charger instead. Short trips will not do it.
Will a new battery fix dim lights?
Not if the alternator is weak. Dim lights at idle that brighten with revs usually mean low alternator output or a slipping belt.
Is 12.4V good for a parked battery?
Yes, but it is not full. Full is around 12.6–12.7V. Top up with a charger or a longer drive.
Do I need a special battery for start-stop cars?
Yes. Use the exact type (AGM or EFB) the car calls for. Wrong batteries fail early and cause poor stop-start function.
Conclusion
Your alternator is the silent hero that keeps your car alive. It turns engine motion into steady voltage and keeps your battery ready for every start. In a healthy system, you will see 13.8–14.7V with the engine running and 12.6V at rest. If readings fall outside those ranges, test the belt, connections, and the alternator itself. Use a multimeter, follow the steps in this guide, and you can diagnose most issues in less than an hour. Keep your battery clean and charged, fix a slipping belt, and plan longer drives when possible. Do that, and you will avoid no-start mornings and surprise tow bills. Now grab your meter, check your voltage, and drive with confidence.

