How to Power Car Stereo at Home Easily and Safely
Powering a car stereo at home is easier than you think—no car required! With the right power supply and a few basic tools, you can enjoy your favorite tunes indoors safely and efficiently.
How to Power Car Stereo at Home Easily and Safely
Have you ever wanted to use your car stereo at home—maybe to test it, enjoy music in your garage, or build a custom audio setup? You don’t need to keep it in the car to enjoy it. With the right tools and a little know-how, you can power a car stereo at home safely and easily. Whether you’re a DIY enthusiast, a car audio lover, or just curious, this guide will walk you through the entire process step by step.
In this guide, you’ll learn how to connect your car stereo to a home power source using simple equipment. We’ll cover everything from choosing the right power supply to wiring it up correctly and troubleshooting common issues. By the end, you’ll have a working car stereo setup that’s safe, reliable, and ready to play your favorite music indoors.
Why Power a Car Stereo at Home?
Visual guide about How to Power Car Stereo at Home Easily and Safely
Image source: tffn.net
Car stereos are built for vehicles, but they’re also great for home use. They often have powerful built-in amplifiers, support for multiple audio sources (like Bluetooth, USB, and AUX), and crisp sound quality. People use them in home workshops, garages, man caves, or even as part of a custom entertainment system.
Plus, if you’ve upgraded your car stereo and want to test it before installing it, powering it at home is a smart move. It lets you check all the features—radio, Bluetooth, volume, and display—without needing to be in the car.
What You’ll Need
Before you begin, gather these essential tools and components:
- A 12V DC power supply (also called a “wall wart” or “bench power supply”)
- Wire strippers and cutters
- Electrical tape or heat shrink tubing
- Inline fuse holder and fuse (5A or 10A, depending on your stereo)
- Wire connectors (spade or butt connectors)
- Multimeter (optional, but helpful for testing)
- Your car stereo unit
Make sure your power supply matches the stereo’s voltage and current needs. Most car stereos require 12 volts DC and draw between 5 to 10 amps. Check the label on the back of your stereo or the owner’s manual for exact specs.
Step 1: Choose the Right Power Supply
The most important part of powering a car stereo at home is using the correct power source. Car stereos are designed for 12-volt DC power—the same kind used in car batteries. Household outlets provide 120V AC, which will destroy your stereo instantly.
Option 1: Use a 12V DC Power Adapter
Look for a 12V DC power adapter with enough amperage. For example, a 12V 5A (60-watt) adapter works for most single-DIN stereos. If your stereo has a built-in amplifier or powers multiple speakers, you may need a 10A (120-watt) supply.
Check the adapter’s label to confirm:
– Output: 12V DC
– Current: At least 5A (higher is better for safety margin)
Avoid cheap, unbranded adapters—they may not deliver stable power and could damage your stereo.
Option 2: Use a Bench Power Supply
If you plan to test multiple stereos or want more control, a variable bench power supply is ideal. These let you adjust voltage and current limits, and often have built-in overload protection. They’re more expensive but offer greater safety and precision.
Option 3: Use a Car Battery (with Caution)
You can use a car battery, but it’s not ideal for indoor use. Batteries can leak, emit fumes, or overheat. If you go this route, place the battery in a ventilated area and use a battery tender to maintain charge.
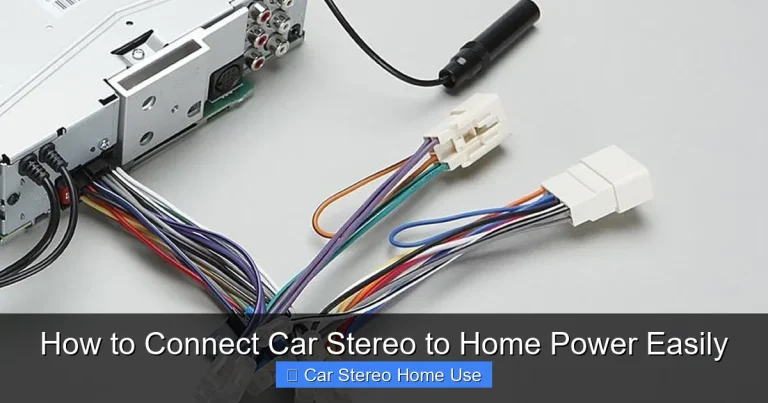
Step 2: Understand the Stereo’s Wiring
Car stereos have several wires, but only a few are needed for basic power. Here’s what you need to know:
- Yellow wire: Constant 12V power (connects to the power supply’s positive terminal)
- Red wire: Accessory/ignition power (also connects to positive, but only turns on with key)
- Black wire: Ground (connects to the power supply’s negative terminal)
- Other wires: Speakers, antenna, illumination—these are optional for basic power
For home use, you can connect both the yellow and red wires to the positive terminal of your power supply. This simulates the “on” state of a car ignition.
Step 3: Prepare the Wires
Now it’s time to connect your stereo to the power supply.
Strip the Wires
Use wire strippers to remove about 1/2 inch of insulation from the yellow, red, and black wires on the stereo harness. Be careful not to cut the copper strands.
Connect the Power Wires
– Join the yellow and red wires together using a wire connector or by twisting them and soldering.
– Connect this combined wire to the positive (+) terminal of your power supply.
– Connect the black wire to the negative (–) terminal.
Add an Inline Fuse
Safety first! Install an inline fuse holder on the positive wire (between the stereo and power supply). Use a 5A or 10A fuse, matching your stereo’s fuse rating. This protects against short circuits and power surges.
Secure the Connections
Use electrical tape or heat shrink tubing to cover all exposed wires. This prevents accidental shorts and keeps everything neat.
Step 4: Connect and Test
Now it’s time to power it up!
Double-Check Connections
Before plugging in the power supply, verify:
– Yellow and red wires are connected to positive
– Black wire is connected to negative
– Fuse is installed correctly
– No bare wires are touching
Power On
Plug in the power supply. The stereo should turn on immediately. If it has a display, you should see lights and possibly a welcome screen.
Test the Audio
Insert a USB drive, connect your phone via Bluetooth, or plug in an AUX cable. Play some music and adjust the volume. If you hear sound, congratulations—your setup works!
If the stereo doesn’t turn on, don’t panic. Move to the troubleshooting section below.
Step 5: Optional – Add Speakers and Antenna
To get the full experience, connect speakers and an antenna.
Connect Speakers
Most car stereos have four speaker outputs: front left, front right, rear left, rear right. Use standard speaker wire to connect compatible speakers. Make sure the impedance (ohms) matches your stereo’s specs—usually 4 ohms.
Add an Antenna
For radio reception, attach a simple FM/AM antenna. You can use a spare car antenna or a small indoor antenna. Plug it into the back of the stereo where the original antenna connects.
Troubleshooting Common Issues
Even with careful setup, problems can happen. Here’s how to fix the most common ones.
Stereo Won’t Turn On
– Check if the power supply is plugged in and working. Test it with a multimeter.
– Verify all wires are connected correctly—especially ground.
– Ensure the fuse isn’t blown. Replace if necessary.
– Make sure the power supply is delivering 12V DC.
No Sound
– Confirm speakers are connected and powered.
– Check volume settings and mute function.
– Test with different audio sources (USB, AUX, Bluetooth).
– Ensure speaker wires aren’t crossed or shorted.
Distorted or Weak Sound
– Your power supply may be underpowered. Upgrade to a higher-amperage unit.
– Check speaker impedance—using 8-ohm speakers on a 4-ohm stereo can cause issues.
– Make sure all connections are tight and secure.
Stereo Turns Off Randomly
– The power supply may be overheating or overloaded. Let it cool and try again.
– Check for loose wires or poor connections.
– If using a battery, it may be low on charge.
Safety Tips
Safety is crucial when working with electricity. Follow these tips to avoid accidents:
- Always unplug the power supply before making or changing connections.
- Never touch bare wires when the power is on.
- Use insulated tools and wear safety glasses if needed.
- Keep the setup away from water, heat sources, and flammable materials.
- Don’t overload the power supply—stay within its rated amperage.
- If you smell burning or see smoke, disconnect power immediately.
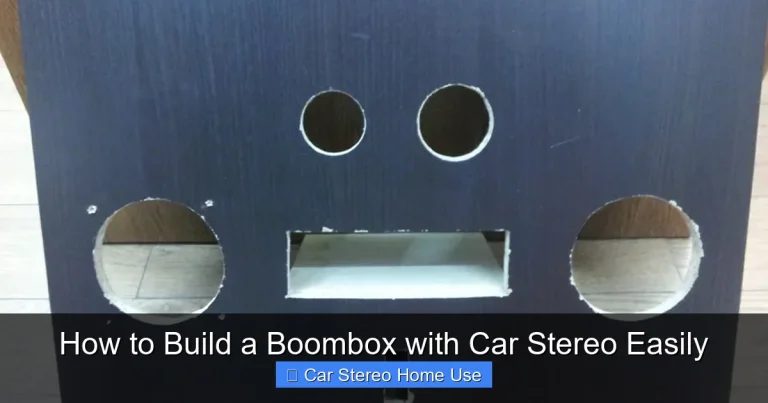
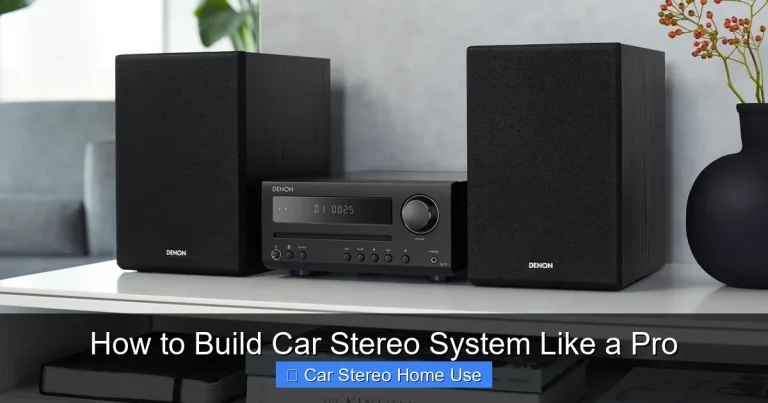
Alternative: Build a Permanent Home Audio System
If you love your car stereo and want to use it regularly at home, consider building a permanent setup. Mount the stereo in a custom enclosure, add a cooling fan, and use a high-quality power supply. You can even integrate it with home speakers and a subwoofer for a full audio experience.
Some enthusiasts convert old car stereos into garage sound systems or outdoor party setups. With a little creativity, the possibilities are endless.
Conclusion
Powering a car stereo at home is a simple and rewarding project. With a 12V DC power supply, basic tools, and careful wiring, you can enjoy your car audio system anywhere. Whether you’re testing a new unit, building a garage sound system, or just having fun with DIY electronics, this guide gives you everything you need to succeed.
Remember to prioritize safety, double-check your connections, and always use the right power source. Once your stereo is up and running, you’ll wonder why you didn’t try it sooner. So grab your tools, follow these steps, and start enjoying your music at home—no car required!