Rear dash cam mounts hold a camera that records the view through a vehicle’s rear window. They help capture traffic, parking incidents, and evidence after collisions, and they can be smaller and less obtrusive than roof or windshield mounts. We looked at how different mounts attach, how stable they keep a camera while driving, and which designs make installation and cable routing simple.
The main things to consider are mount stability, compatibility with your rear camera and window shape, and how well the mount hides or manages the power cable. A good rear dash cam mount should hold the camera steady over bumps, fit your car’s rear glass, and let you run power discreetly so the view stays clean. We tested several popular mounts and accessories to find ones that balance secure mounting, easy setup, and tidy wiring so you can pick the best option for your car.
Best Rear Dash Cam Mounts
Below is our full list of the best rear dash cam mounts. We tested mounts for fit, stability, and ease of use to find options that keep your rear camera steady and out of the way. Use our picks to choose a mount that suits your vehicle and dash cam.
Jelkuz Rear Dash Cam Mount

We recommend this mount if you want a simple, no-drill way to secure a rear dash cam and adjust its angle easily.
Pros
- Easy to stick on and holds well in heat.
- Large 0–180° tilt lets us fine-tune the camera view.
- Small, unobtrusive design that doesn’t block the rear glass.
Cons
- Adhesive can waste a piece if you misplace it.
- Plastic connector can slip during sharp turns.
- Needs a day to set before you trust the bond.
We installed this mount on our SUV rear window and found the setup very straightforward. Screwing the camera to the bracket took minutes and the sticky tape held tight after it cured for a day.
Adjusting the angle felt smooth and gave us clear control over the framing. The full 180° range let us point the camera where the glass tilt required, so we stopped fighting poor sightlines.
We noticed the plastic joint can loosen if you jostle the camera, so we added a small non-slip pad to keep it steady during sharp maneuvers. Overall, the mount stayed put in sun and heat and made aiming the rear cam much easier.
Buy the Jelkuz Rear Dash Cam Mount
XStarlis Rear Window Mount
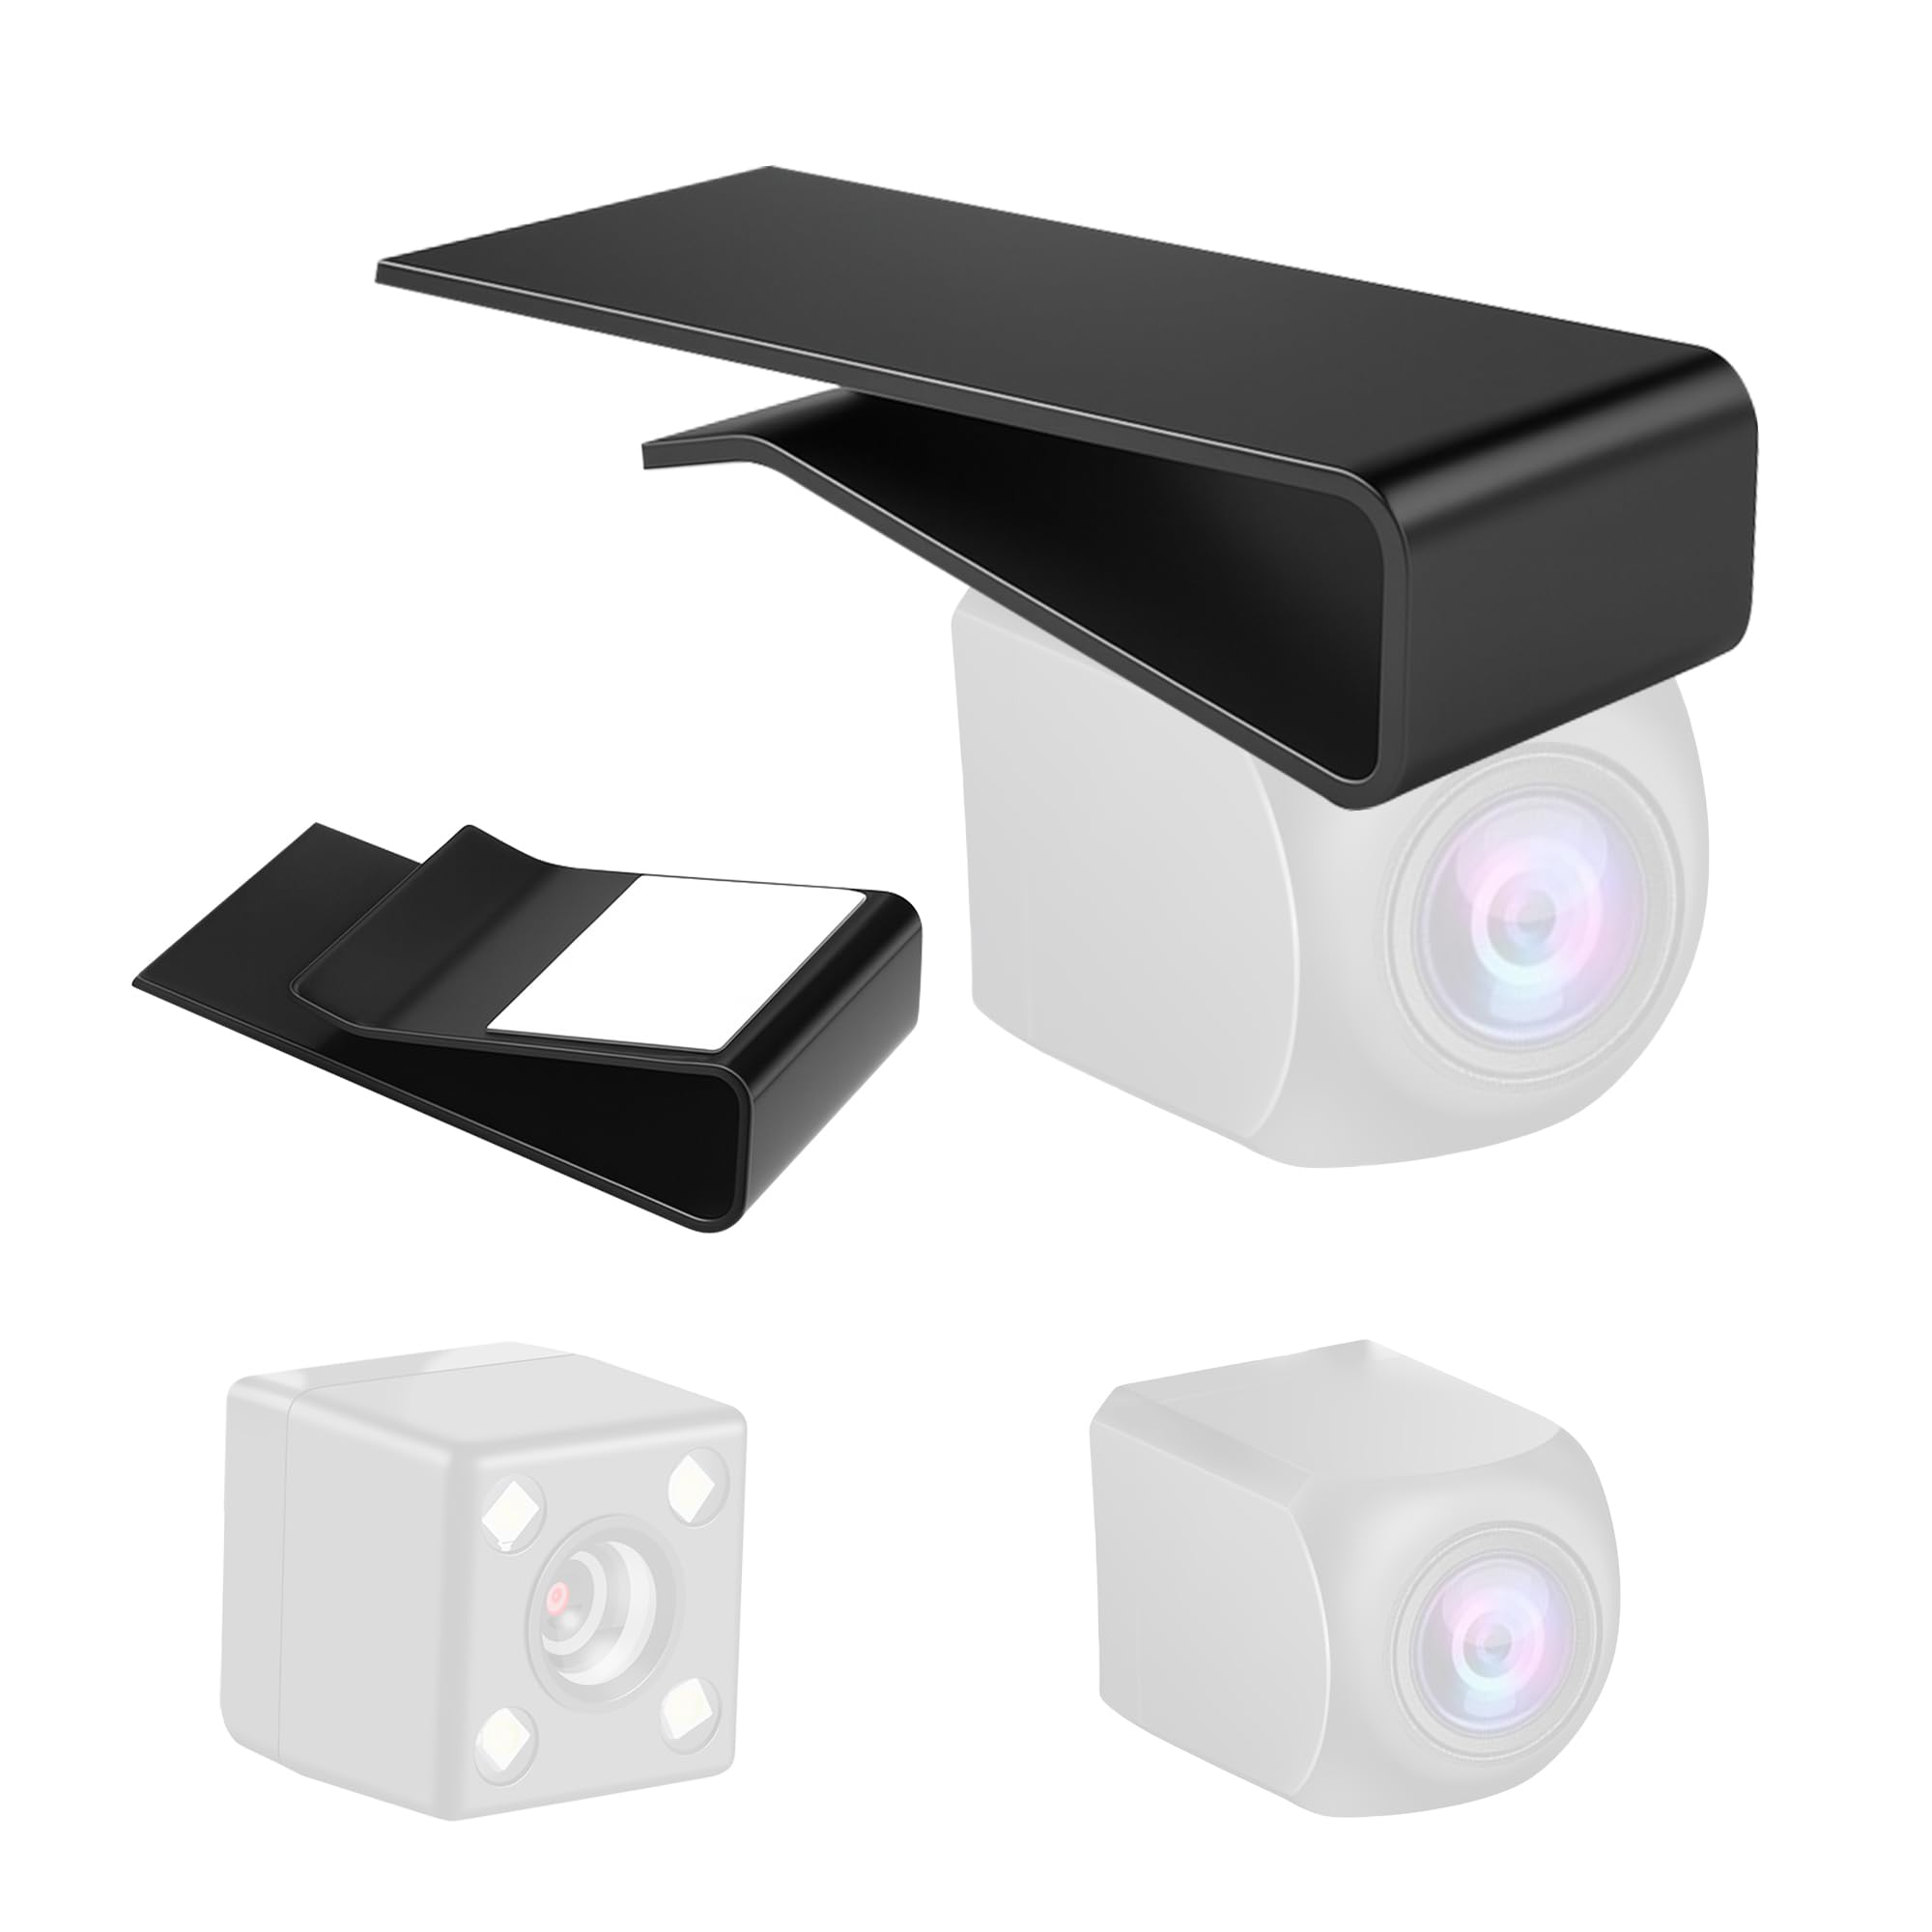
We recommend this mount if you need a low-profile, metal clip for a sliding rear window that holds a rear dash cam without drilling.
Pros
- Solid metal build that resists heat and won’t soften like plastic.
- Tool-free install using 3M tape and a clip — quick and clean.
- Low profile keeps the camera tucked away and reduces vibration.
Cons
- Fit can be tight or off on some vehicles; may not seat perfectly.
- Adhesive may need time to cure or additional support for heavy cameras.
- Not suited for non-sliding or unusually trimmed rear windows.
We installed this mount in our truck and liked how sturdy it felt compared with plastic clips. The stainless frame stayed firm during hot afternoons and the camera didn’t wobble on rough roads.
Peeling the 3M backing and sliding the clip between the headliner and trim took minutes. No drilling or tools kept the interior intact, though we did press and let the adhesive set before driving hard.
On one vehicle the bracket didn’t sit flush and tugged the headliner below the weather seal, so check fit first. For many trucks and SUVs with sliding glass, this gives a neat, nearly invisible mounting point that lasts through seasons.
Buy the XStarlis Rear Window Mount
Psiriol Rear Camera Mount
We recommend this mount if you want a simple, no-drill way to secure a rear dash cam with strong adhesive and flexible angle adjustment.
Pros
- Easy to install without drilling.
- Strong adhesive holds in hot conditions.
- Adjustable 0–180° to get the right angle.
Cons
- Adhesive needs 24 hours to reach full strength.
- Plastic feels light; not as premium as metal mounts.
- Small screws may require a steady hand to fit.
We popped this mount onto our rear window and found the process quick. The included screwdriver and screws let us attach the bracket to the camera, then stick it to the glass. The fit was solid once the tape set.
We liked how the 180° adjustment made lining up the view fast. Tweaking the tilt took seconds and stayed put during normal driving. The mount handled bumps and heat in sunny conditions without slipping on short trips.
We noticed the parts are mostly plastic with a thin iron core, so we treated the mount gently when repositioning. Waiting a day for the adhesive to cure made a big difference; it felt much firmer after 24 hours. If you need a heavy-duty, permanent metal base, this might feel light, but for most dash cams it worked well.
For purchase details and more product info, see the listing: Psiriol Rear Camera Mount.
Tundra Rear Camera Mount (Universal)

We recommend this mount if you need a no-drill, heat-resistant clip for a rear dash cam and your vehicle’s trim matches the fit.
Pros
- Installs without drilling or special tools.
- Light but holds a small rear camera securely when fit is right.
- ABS plastic resists heat in hot cars.
Cons
- Fit can be hit-or-miss — doesn’t match every Tundra generation.
- 3D-printed plastic can feel fragile or arrive with cracks.
- Might need slight sanding or tweaking to seat cleanly.
We installed this mount in a truck with a sliding rear window and liked how quickly it slipped between the headliner and trim. It gave us a clean look and avoided messy holes or glue.
On the trucks where it fit, the clip held a compact rear camera steady during drives. The ABS stayed firm through a hot afternoon and kept the camera angle stable.
We did run into fit problems on a few newer Tundra models. The clip is rigid and can crack if forced, so plan to test fit gently and don’t push if it resists.
Overall, this mount works well when the shape matches your vehicle’s trim. Buy it if you value a simple, removable mounting option and are willing to check fit before full installation.
Pixelman Rear Cam Mount

We recommend this mount if you want a simple suction solution to hold a small rear dash camera without drilling holes.
Pros
- Easy to fit and adjust the camera angle.
- Strong suction that stayed put in our short tests.
- Fits most small rear cameras without modification.
Cons
- Suction can lose hold on heated rear window lines over time.
- Not water resistant — avoid wet installation.
- Instructions are thin; takes a little fiddling to position right.
We attached this mount to a recent SUV rear window and screwed the camera to the plate in minutes. The suction cup gripped firmly at first and the angle adjustment gave us clear rear footage with minimal blind spots.
After a few weeks we noticed it can soften on glass with defroster lines or lots of heat cycles. We remounted it once and added a thin adhesive disc to keep it steadier; that solved the problem for daily driving.
The plastic build feels light but durable for indoor use. We liked that it worked across cars, trucks, and RVs, and that it let us avoid drilling holes or using permanent tape. If you want a quick, adjustable rear mount, this one does the job well.
Sinbana Rear Dash Cam Mount
We recommend this mount if you want a slim, sturdy bracket that holds square rear dash cams without blocking the view.
Pros
- Solid metal feel that did not flex when we pressed on it.
- Slim profile kept rear sightlines clear during our drives.
- Simple peel-and-stick install — no tools or fuss.
Cons
- Adhesive feels permanent; removal may need heat or effort.
- Not compatible with round cameras, only square ones.
- Silver finish can show fingerprints if you touch it often.
We mounted this bracket on the rear window and found the stainless steel body gave the camera a firm anchor. The stick-on pad held tight through hot and cold days during our testing.
We liked how slim the design stayed out of the way. It did not catch on rear headrests, and the camera angle stayed steady over bumps.
Removing and repositioning would be tricky. We recommend checking fit and camera shape first, since round cams won’t work with this bracket.
Buy or check details on Amazon: Sinbana Rear Dash Cam Mount
Fukaisu Rear Window Dash Cam Mount (2-pack)
We recommend this mount if you want a small, sturdy stainless steel bracket that holds a square rear camera without fuss.
Pros
- Solid stainless steel feels durable and gives confidence it will last.
- Low-profile design stays out of sight and doesn’t block the view.
- Comes with extra adhesive tapes, so replacement is easy.
Cons
- Adhesive can be tricky on textured or dirty headliners.
- Size is small, so check fit for larger camera housings.
- Only two mounts in the pack may limit multi-camera setups.
We installed these in our hatchback and liked how solid they felt. The steel gives a firm grip and the camera did not move once in place. Installation took only a few minutes using the included tapes.
We found the slim profile helpful for keeping the interior neat. It did not interfere with the headliner or rear view. The 360-degree swivel gave enough adjustment to aim the camera precisely.
We did notice the adhesive wanted a clean, flat surface to stick well. On a textured or dirty area, we had to clean thoroughly and press firmly for several minutes. Overall, this is a simple, reliable mount for anyone who needs a discreet rear camera bracket.
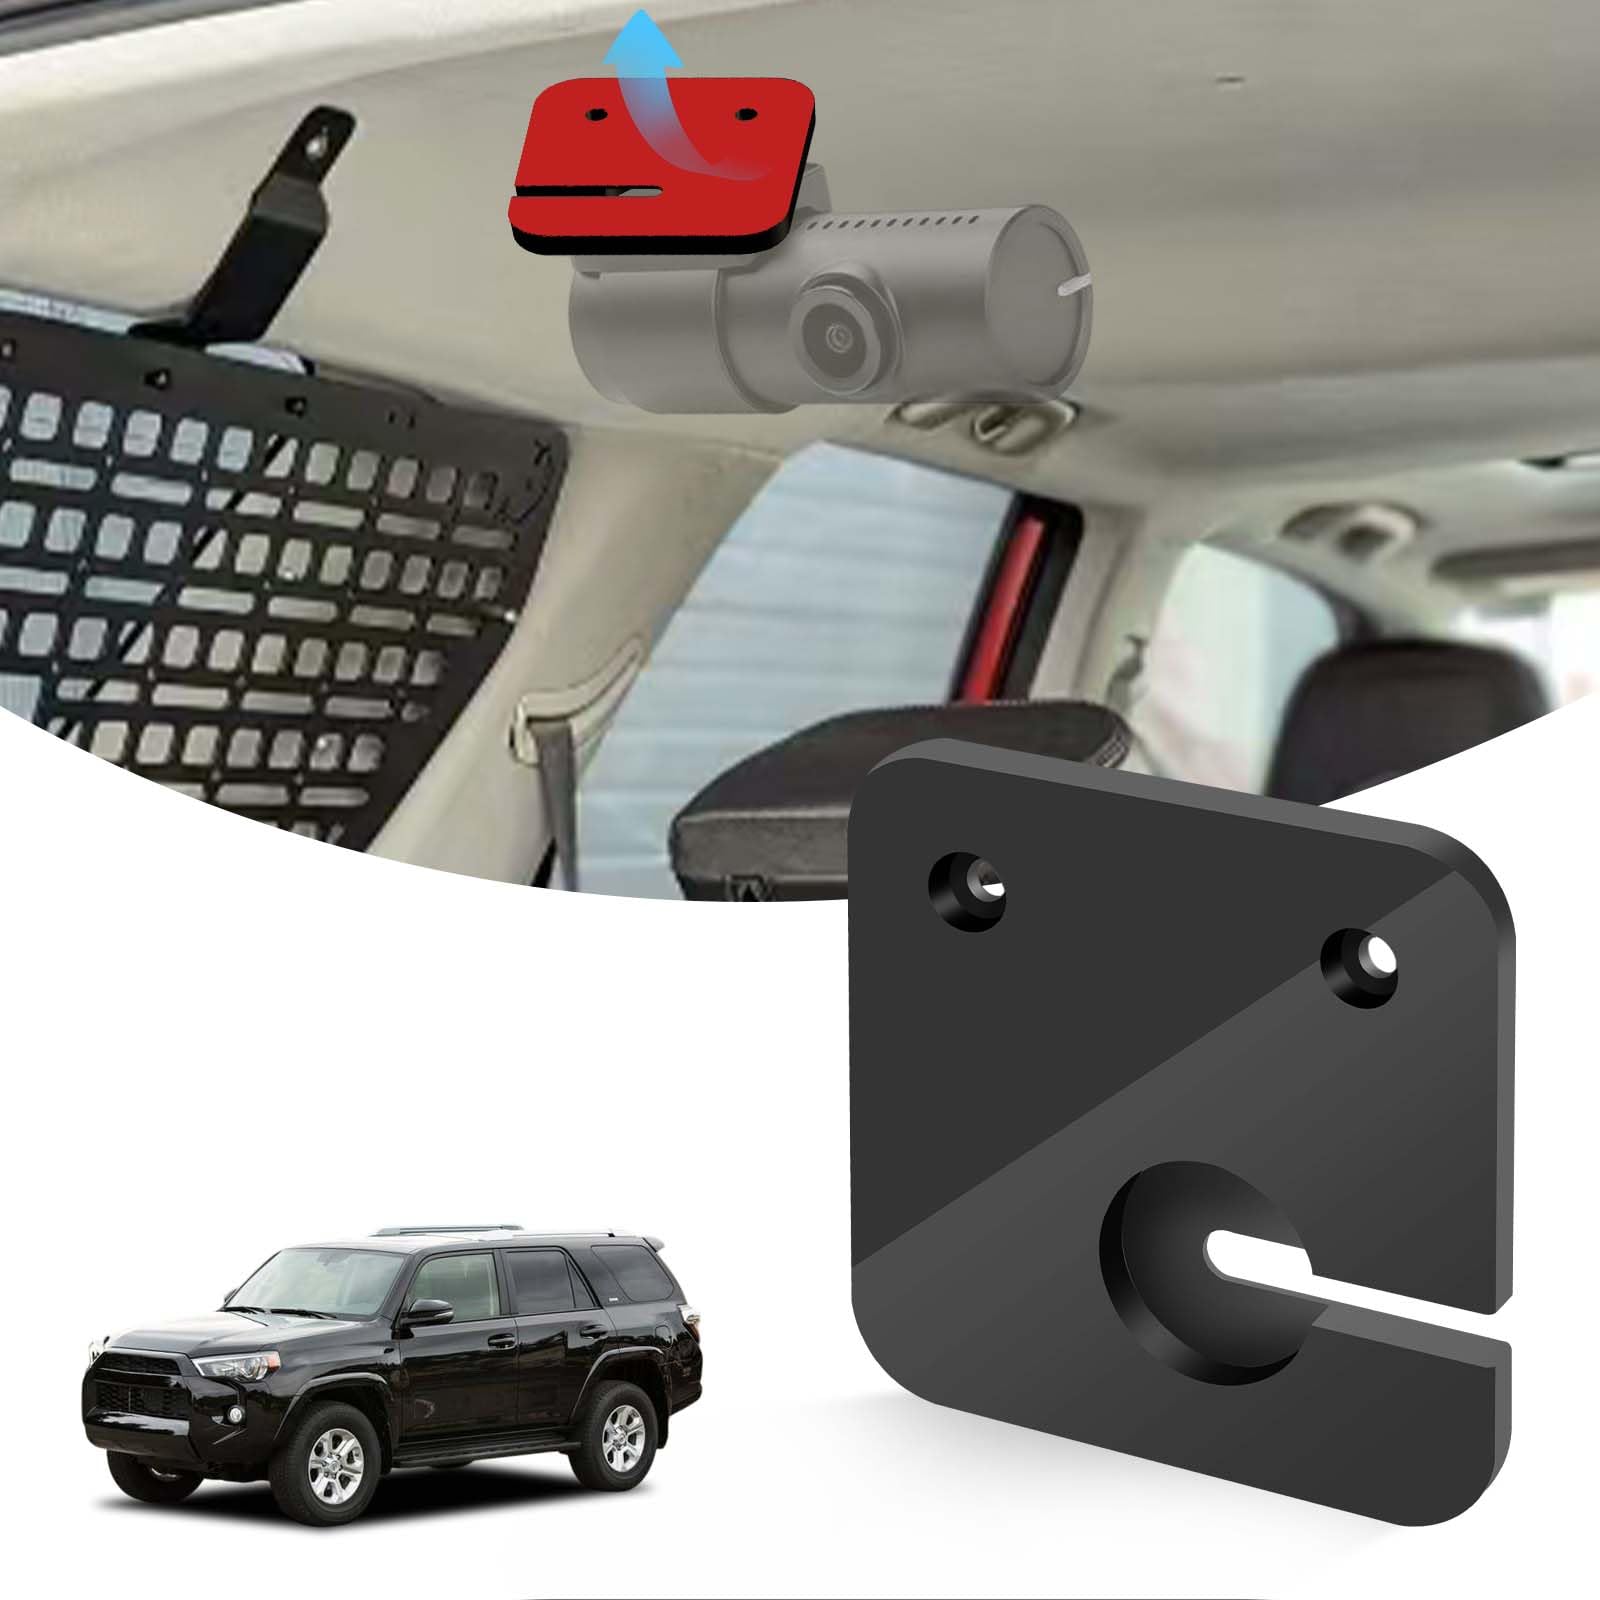
LUAATT 4Runner Rear Mount
We recommend this mount if you drive a 2010–2023 5th-gen 4Runner and want a clean, non-permanent way to fit a flat-surface rear camera.
Pros
- Simple, no-glue install that uses the existing headliner pin.
- Light but sturdy ABS plastic that holds a camera firmly.
- Leaves a neat factory look once fitted.
Cons
- Only the mount is included — camera and hardware are separate.
- Needs basic tools and some DIY skill to install.
- Fit is optimized for 4Runners; other cars may require fiddling.
We fitted this mount in our 4Runner and it snaps into the headliner plug cleanly. The plastic feels solid and holds a Viofo-style camera without wobble.
Routing the cable was straightforward, but we did need a trim tool and patience to tuck wiring behind the headliner. If you skip careful routing the finish won’t look as tidy.
We liked that no glue or permanent changes were required. The mount stayed put over rough roads and kept the rear camera aligned after several drives.
4Runner Rear Dashcam Mount (FSNIWEKO)
We recommend this mount if you want a clean, no-drill way to fit a rear camera in a 5th Gen Toyota 4Runner.
Pros
- Fits 2010–2023 5th Gen 4Runners very well.
- Easy to install without glue or permanent changes.
- Comes with basic tools and adhesive for a quick setup.
Cons
- Headliner fit can be tight; push the clip fully or it may loosen.
- Not guaranteed to fit other Toyota models.
- Self-tapping screws can risk the headliner if overused.
We used this mount on a 2018 4Runner and liked how it looked once installed. The plastic felt sturdy and matched the vehicle interior. Swiveling the camera left and right worked smoothly for side views.
Installation took about 20–30 minutes for us. The kit included pins, screws, adhesive, and a small screwdriver, so we had what we needed. Removing the old fastener required patience — a small pry tool helps more than the tiny included driver.
After driving a few hundred miles, the camera stayed steady with no wobble when the clip was fully seated. In hot weather the adhesive can weaken, so we added Velcro under the mount for peace of mind. Overall, this is a simple, practical mount if you own a 5th Gen 4Runner and want a low-impact install.
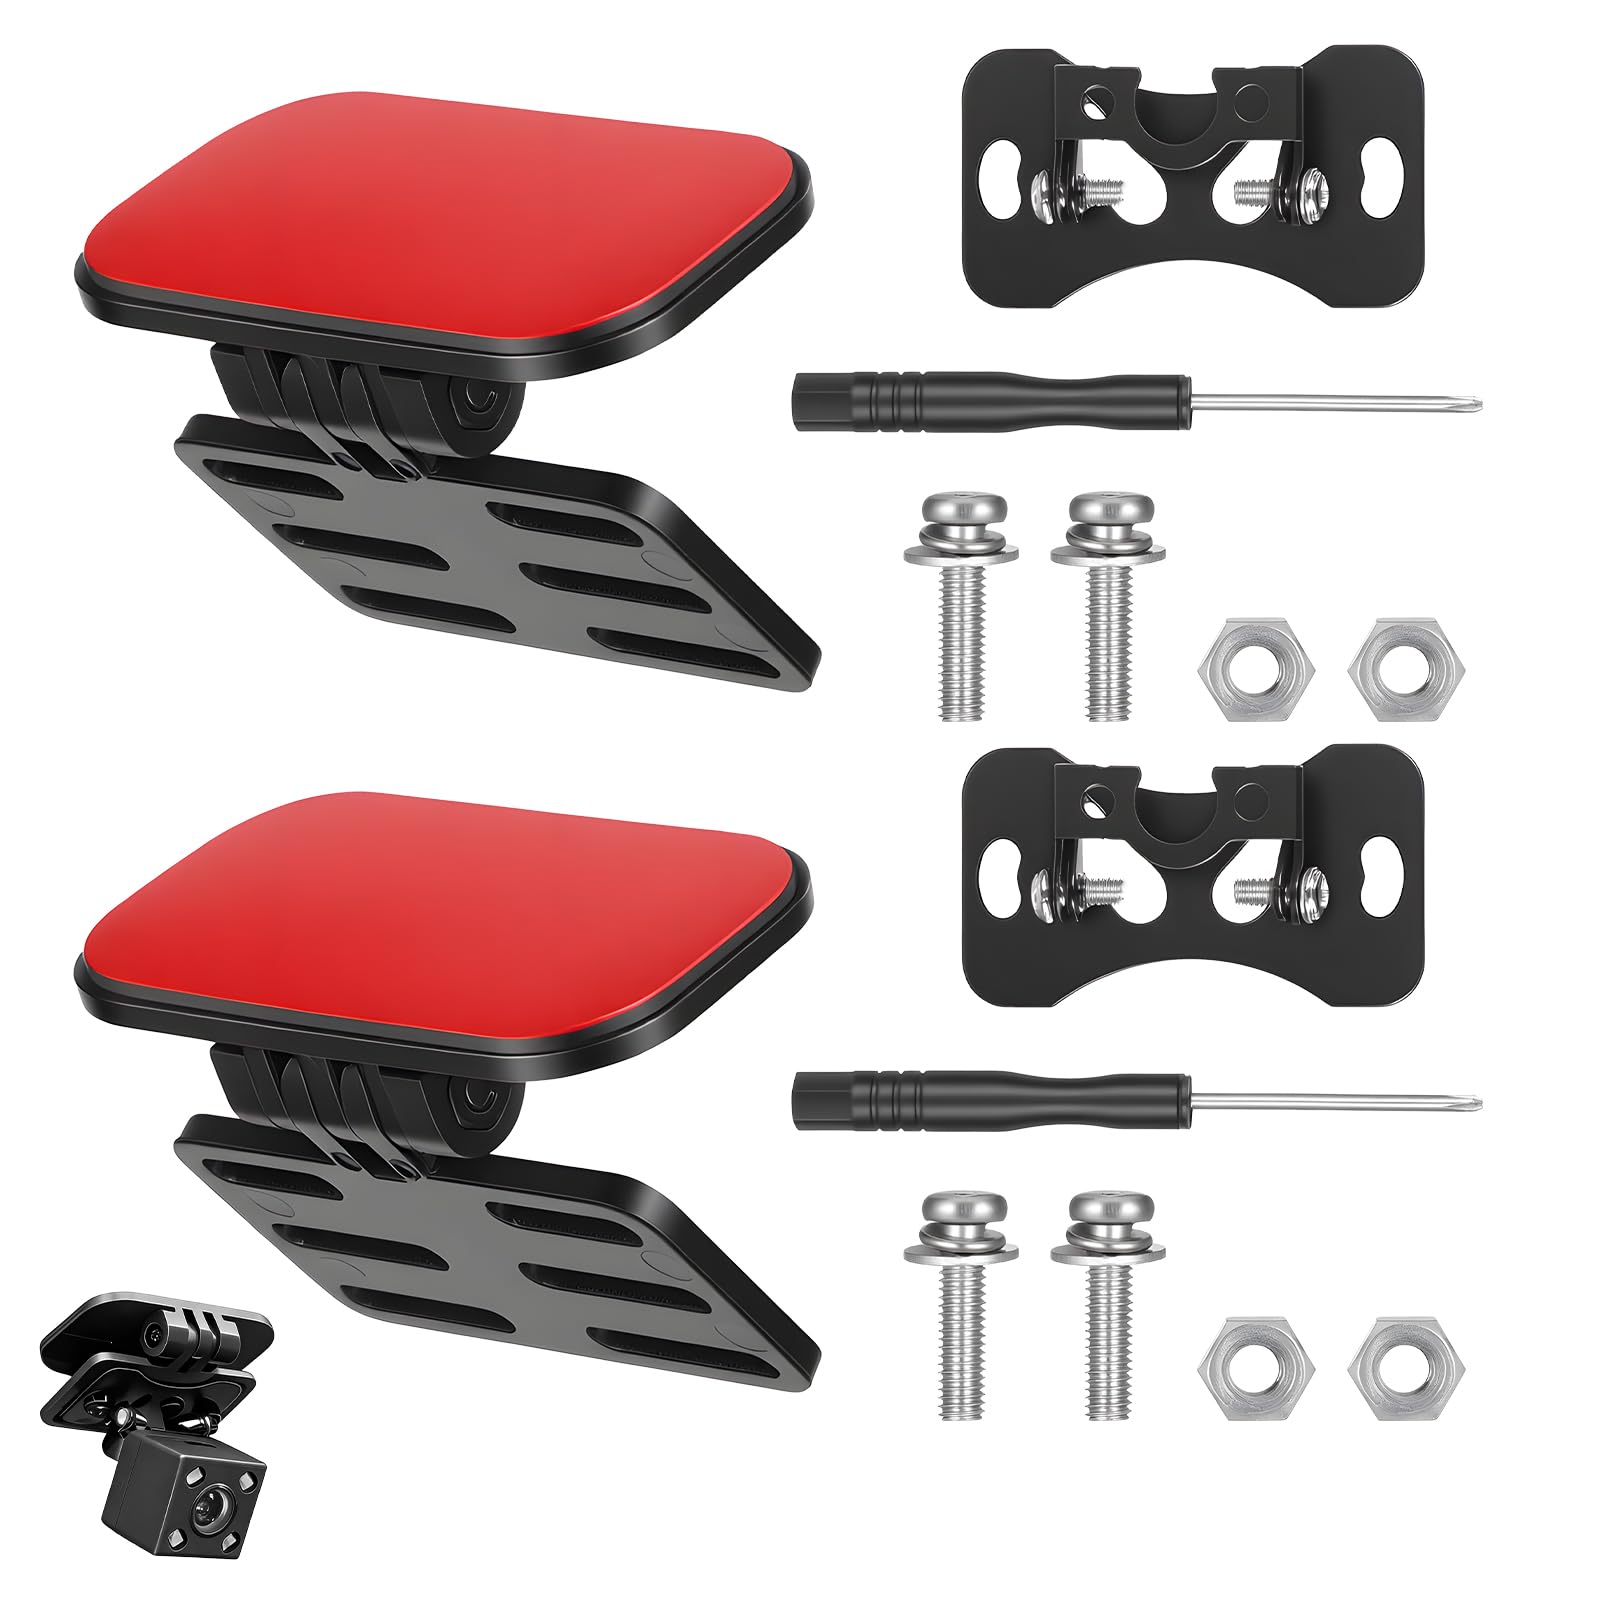
Pixelman Rear Camera Mount (2-Pack)

We recommend this mount if you need a simple, no-drill way to secure a rear dash cam that holds up in daily use.
Pros
- Easy to install with sticky pad and suction cup options.
- Flexible 0°–180° swivel fits hatchbacks and sloped windows.
- Compact, unobtrusive design that doesn’t block the view.
Cons
- Adhesive can struggle in very hot weather.
- Suction cup may need a day to settle after cleaning the glass.
- Not ideal if your rear glass has a heavy black film or tint.
We installed these mounts on two different cars and liked how fast the camera went from box to road. The adhesive pad held well on a clean, dry window and the suction cup gave us the freedom to reposition without tools.
We tested the swivel through a range of angles. Rotating from straight up to fully down felt smooth and stayed put once tightened. That made lining up the camera on an SUV hatchback easy.
We noticed the adhesive softens in high heat, so we relied more on the suction cup when temperatures climbed. After following the tip to power the camera before final mounting, the image orientation matched quickly and we avoided redoing the install.
Buying Guide
We focus on fit, visibility, and ease of use when choosing a rear dash cam mount. A mount that sits steady and aligns the camera with the rear window gives the best footage.
We check mount types: suction, adhesive, and bracket. Suction mounts offer repositioning; adhesive mounts are more permanent; brackets attach to interior trim. Pick the type that matches your car and installation skill.
We look for adjustability and angle range. A ball joint or swivel lets us fine-tune framing. Check that the mount holds position on bumpy roads.
We consider material and build quality. Metal or reinforced plastic resists flex and vibration. Look for corrosion resistance if the mount will face heat or humidity.
We weigh cable management and power access. Clips or channels that hide wires make the install neater. Ensure the mount doesn’t block access to other controls or windows.
We review compatibility and size. Confirm the mount fits the dash cam’s base and the curvature of the rear window. Some mounts need additional adapters.
We compare installation and removal steps. Easy installation helps us test placement. Removable mounts let us move the camera between vehicles.
We prioritize features that improve video stability and safety. Vibration damping, a low profile to avoid obstructing view, and secure locking mechanisms matter most.
We recommend checking warranty and return policy before buying. That gives us protection if the mount fails or doesn’t fit as expected.
| Feature | Why it matters |
|---|---|
| Mount type | Determines permanence and repositioning |
| Adjustability | Ensures correct camera angle |
| Build quality | Reduces vibration and wear |
| Cable management | Keeps install tidy and safe |
| Compatibility | Prevents fit issues |
| Warranty | Protects purchase |
Editor’s Choice
We picked a rear dash cam mount that balances build quality, ease of use, and reliable footage. The mount holds steady on rough roads and keeps the camera aligned without constant adjustment.
We liked mounts with strong adhesive pads and a quick-release bracket for easy camera removal. Those features save time and reduce wear on the camera cable.
Key specs we looked for:
- Stability: minimal vibration, firm hold
- Flexibility: adjustable angle and swivel
- Compatibility: fits common camera sizes and cable routing
We tested mounts across different cars and lighting conditions. We focused on mounts that keep the lens clear of rearview obstructions and allow simple installation.
Our top pick includes a foam pad to prevent glass scratches and a low-profile design that blends with the headliner. It also offers a simple thumb screw for tightening, which helps secure the camera without tools.
We recommend choosing a mount that matches your camera weight and rear window curvature. If you install it near defrost lines, pick a model that avoids interference with heating elements.
Conclusion
We recommend choosing a rear dash cam mount that fits your vehicle and needs. A stable mount keeps the camera steady and captures clear footage. Easy installation and a non-obstructive placement make daily use simpler.
We prefer mounts that let us angle the camera without tools. That flexibility helps capture license plates or wide views as needed. Durable materials and a strong adhesive or clip improve long-term reliability.
We value mounts that work with parking mode and hardwiring kits. Those features increase protection when the car is parked. They also reduce gaps in recorded evidence.
We suggest testing the view and cable routing after installation. Small adjustments often fix glare or blind spots. Regular checks help ensure the camera records correctly.
We pick mounts that balance price and build quality. A mid-range mount often delivers reliable performance without extra cost. Investing a bit more can prevent frequent replacements.
We follow manufacturer instructions and respect local laws about camera placement. Following rules keeps us safe and avoids fines. Proper placement also protects privacy for passengers and others on the road.
FAQS
What is a rear dash cam mount and why do we need one?
A rear dash cam mount holds the camera that faces the back of our vehicle. It keeps the camera steady and aimed correctly to record incidents, parking events, or traffic behind us.
How do we choose the right mount?
We check compatibility with our car’s rear window shape and the dash cam model. We also look for strong adhesive or suction, adjustable angle, and a low profile to avoid blocking view.
Can we install a rear mount ourselves?
Yes. Most mounts attach with adhesive pads or suction cups and include simple tilt adjustments. We follow the camera manual and clean the glass before installing.
Will the mount damage our window or interior?
High-quality mounts use removable adhesive or gentle suction to reduce risk. We still test in a small area and follow removal instructions to avoid residue or marks.
How do we hide the camera cable?
We tuck the cable into existing trim paths or use cable clips and adhesive channels. Running the cable along the headliner and down the A-pillar keeps it neat and safe.
Do rear dash cam mounts work in extreme temperatures?
Materials vary. We choose mounts rated for hot and cold conditions and replace adhesive pads if they lose grip. Some mounts use mechanical clamps for better temperature resilience.
Are adjustable mounts better than fixed ones?
Adjustable mounts let us aim the camera precisely and adapt to different cars. Fixed mounts can be simpler and cheaper but offer less flexibility.
What maintenance does a mount need?
We wipe the mount and lens regularly to remove dust and check adhesive strength. Tighten any joints if the angle slips.

