Removing a car seat cover doesn’t have to be a frustrating chore. With the right tools and a clear step-by-step approach, you can take off your car seat cover quickly and safely—without tearing fabric or damaging clips. This guide walks you through the entire process for a clean, hassle-free removal.
Key Takeaways
- Prepare your workspace: Clear space and gather tools like a flathead screwdriver, pliers, and gloves to make removal smoother and safer.
- Start from the bottom: Most seat covers are secured at the base first, so begin by lifting the front edge and working your way around.
- Use gentle force: Avoid pulling too hard—most covers are held by clips or Velcro that release with steady, even pressure.
- Take photos as you go: Snap pictures of how the cover is attached to make reinstallation much easier later.
- Watch for hidden fasteners: Some covers have clips under flaps or behind headrests—check thoroughly before forcing anything.
- Clean while it’s off: Use this opportunity to vacuum and wipe down the seat frame and cushions.
- Store the cover properly: Fold or roll the removed cover and keep it in a dry place to prevent wrinkles or mildew.
How to Get Car Seat Cover Off Easily in Minutes
Whether you’re cleaning your car interior, replacing a worn-out seat cover, or installing a new custom fit, knowing how to get car seat cover off safely is essential. Many drivers dread this task, fearing ripped fabric, broken clips, or a tangled mess of straps and fasteners. But with the right approach, removing a car seat cover can be quick, clean, and stress-free—often in under 10 minutes.
In this guide, we’ll walk you through a simple, step-by-step process to remove your car seat cover without damage. You’ll learn where to start, what tools to use, and how to avoid common mistakes. Whether you have a sedan, SUV, or truck, these tips apply to most standard seat covers. Let’s get started!
Why You Might Need to Remove a Car Seat Cover
There are several reasons you might want to remove your car seat cover:
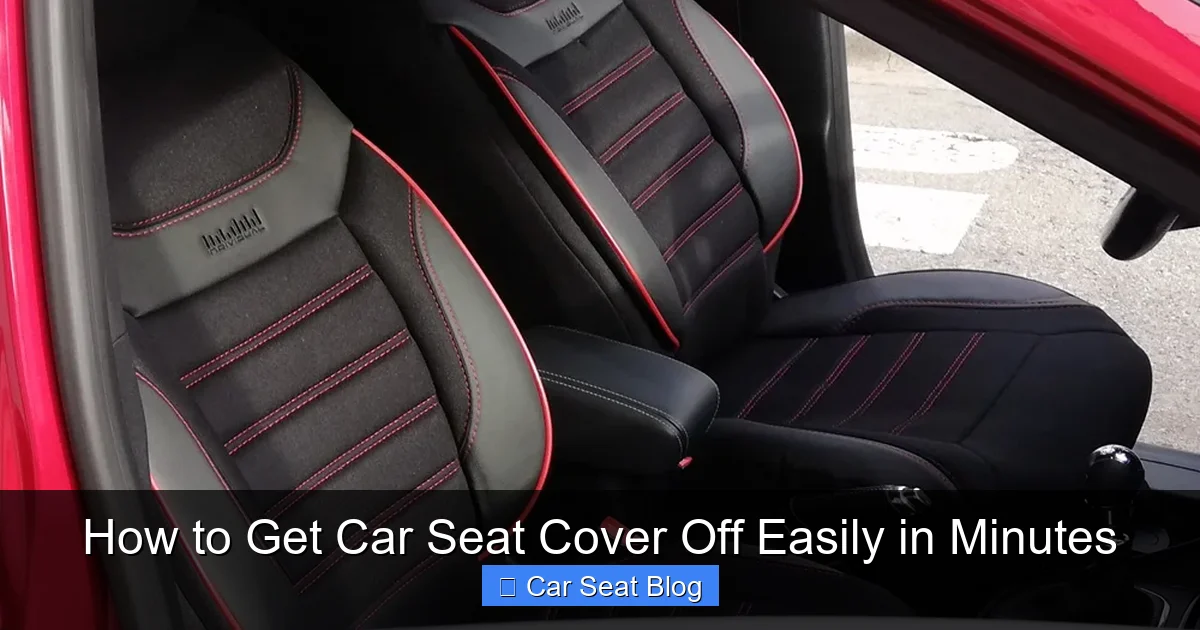
Visual guide about How to Get Car Seat Cover Off Easily in Minutes
Image source: cover-company.com
- Deep cleaning: Over time, spills, crumbs, and dirt accumulate under the cover. Removing it allows you to clean the foam and frame thoroughly.
- Replacement: If your cover is torn, faded, or stained beyond repair, it’s time for a new one.
- Upgrading style: Many drivers switch to leather, neoprene, or custom-fit covers for better comfort and aesthetics.
- Repair access: Sometimes, seat mechanisms or heating elements need servicing, and the cover must be removed first.
No matter your reason, the process is similar. The key is patience and attention to detail.
Tools You’ll Need
Before you begin, gather these basic tools to make the job easier:
- A flathead screwdriver (preferably plastic-tipped to avoid scratches)
- Needle-nose pliers
- Work gloves (to protect your hands)
- A flashlight (to see hidden clips)
- A camera or smartphone (to take reference photos)
- A clean workspace (like a garage or driveway)
Having everything ready saves time and reduces frustration. You don’t want to be halfway through and realize you’re missing a tool.
Step 1: Prepare Your Vehicle and Workspace
Start by parking your car on a flat surface and turning off the engine. If your car has airbags in the seats (common in modern vehicles), disconnect the battery and wait at least 15 minutes before touching any seat components. This prevents accidental airbag deployment.
Next, clear out the area around the seat. Remove floor mats, trash, and any items that could get in the way. If you’re working inside a small garage, consider moving the car outside for better lighting and space.
Put on your gloves and have your tools within reach. This simple prep work makes the entire process smoother.
Step 2: Remove the Headrest (If Necessary)
Many seat covers are attached around the headrest posts. To remove the cover easily, you’ll often need to take off the headrest first.
How to Remove the Headrest
- Look for a small button or lever on the side or back of the headrest post.
- Press or pull it while gently lifting the headrest upward.
- If it doesn’t budge, wiggle it slightly as you lift—some models require a bit of movement to release.
- Set the headrest aside in a safe place.
Not all headrests are removable, so check your owner’s manual if you’re unsure. If it doesn’t come off, don’t force it—proceed carefully around the posts.
Step 3: Lift the Front Edge of the Seat Cover
Now it’s time to start removing the cover. Begin at the front edge of the seat—this is usually where the cover is tucked under the seat frame.
How to Lift the Front Edge
- Kneel in front of the seat and grab the front corner of the cover.
- Gently pull upward and outward to expose the underside.
- Look for clips, hooks, or elastic straps holding the cover in place.
- Use your flathead screwdriver to carefully pry up any plastic clips.
- If you see Velcro strips, slowly peel them apart.
Take your time. Rushing can tear the fabric or break clips. If something feels stuck, stop and investigate—there’s likely a fastener you missed.
Step 4: Work Your Way Around the Seat
Once the front is loose, move to the sides and back. Most seat covers are secured with a combination of clips, hooks, and elastic bands.
Check the Sides and Back
- Run your hands along the sides of the seat to feel for hidden clips or straps.
- Use the flashlight to look under flaps or behind the seat back.
- Release any clips with the screwdriver or pliers.
- If the cover is tucked into the crevice between the seat bottom and back, gently pull it out.
Some covers have a “J-hook” design—a metal or plastic hook that tucks under the seat frame. These can be tricky. Use pliers to grip and pull them out slowly.
Step 5: Remove the Seat Back Cover (If Applicable)
If your seat has a separate back cover (common in bucket seats), you’ll need to remove it after the bottom portion.
Steps for the Seat Back
- Look for clips along the top and sides of the backrest.
- Release them using the screwdriver or your fingers.
- If the cover is attached to the headrest posts, slide it off carefully.
- Some covers are held by a zipper at the bottom—unzip it before pulling the cover away.
Be extra cautious with heated or ventilated seats. Avoid pulling on wires or sensors. If you see electrical connectors, disconnect them gently before removing the cover.
Step 6: Take Photos and Label Parts (Optional but Helpful)
As you remove the cover, take photos of how it was attached. This is especially useful if you plan to reinstall the same cover or a new one later.
You can also label clips or straps with tape and a marker. For example, “Front Left Clip” or “Back Right Hook.” This makes reassembly much faster and prevents confusion.
Even if you’re throwing the old cover away, photos help you understand how the new one should fit.
Step 7: Clean the Seat Frame and Cushions
With the cover off, you now have access to the seat’s inner components. This is the perfect time to clean them.
Cleaning Tips
- Use a vacuum with a crevice tool to remove dust, crumbs, and debris from under the seat and around the frame.
- Wipe down plastic and metal parts with a damp cloth and mild cleaner.
- If the foam is stained, use a fabric cleaner or upholstery shampoo (test on a small area first).
- Let everything dry completely before reinstalling the cover.
A clean seat base ensures your new or existing cover fits better and lasts longer.
Troubleshooting Common Problems
Even with careful steps, you might run into issues. Here’s how to handle them:
Problem: A Clip Won’t Release
Don’t yank it. Use pliers to grip the clip and wiggle it gently. If it’s plastic, it may break—so apply even pressure. If it snaps, most clips are inexpensive and easy to replace at an auto parts store.
Problem: The Cover Is Stuck Around the Seat Belt
Some covers loop around the seat belt anchor. Check if the belt needs to be loosened or if there’s a flap that tucks behind it. Never cut the cover—there’s usually a way to maneuver it free.
Problem: You Can’t Find a Fastener
Use the flashlight to inspect hidden areas. Some clips are tucked under fabric flaps or behind the seat frame. Patience pays off here.
Problem: The Cover Is Torn During Removal
If the fabric rips, assess the damage. Small tears can sometimes be repaired with fabric glue or patches. If it’s beyond repair, now’s the time to replace it.
Tips for Reinstalling the Cover
When you’re ready to put the cover back on (or install a new one), follow these tips:
- Start at the front and work your way back, just like removal—but in reverse.
- Reattach clips and hooks in the same order you removed them.
- Use your photos and labels as a guide.
- Make sure the cover is smooth and wrinkle-free before securing the final clips.
- Reinstall the headrest and test the seat for comfort and fit.
A well-fitted cover not only looks better but also stays in place during driving.
Final Thoughts
Learning how to get car seat cover off doesn’t have to be a daunting task. With the right tools, a calm approach, and this step-by-step guide, you can remove your seat cover in minutes—without damage or frustration. Whether you’re cleaning, replacing, or upgrading, taking the time to do it right pays off in the long run.
Remember: go slow, stay organized, and don’t force anything. Your car’s interior will thank you with a fresher, cleaner look and better comfort on every ride.

