Removing a car stereo without keys might seem tricky, but it’s totally doable with the right tools and techniques. This guide walks you through safe, step-by-step methods using removal keys, coat hangers, or screwdrivers—perfect for DIYers who want to upgrade or replace their head unit fast.
How to Remove Car Stereo Without Keys Easily
So, you want to upgrade your car’s audio system, replace a broken head unit, or install a new stereo—but you’ve lost the removal keys? Don’t panic! Many car owners face this exact problem, and the good news is: **you don’t always need the original keys** to get that stereo out.
In this guide, we’ll show you how to remove a car stereo without keys using simple tools you probably already have at home. Whether you’re dealing with a factory-installed unit or an aftermarket system, these step-by-step methods are safe, effective, and designed for DIYers of all skill levels.
We’ll cover everything from using specialized removal tools to clever DIY hacks—plus essential safety tips to protect your car’s interior and electrical system. By the end, you’ll be able to pull out that stereo confidently and get your new system installed in no time.
Why You Might Need to Remove a Car Stereo Without Keys
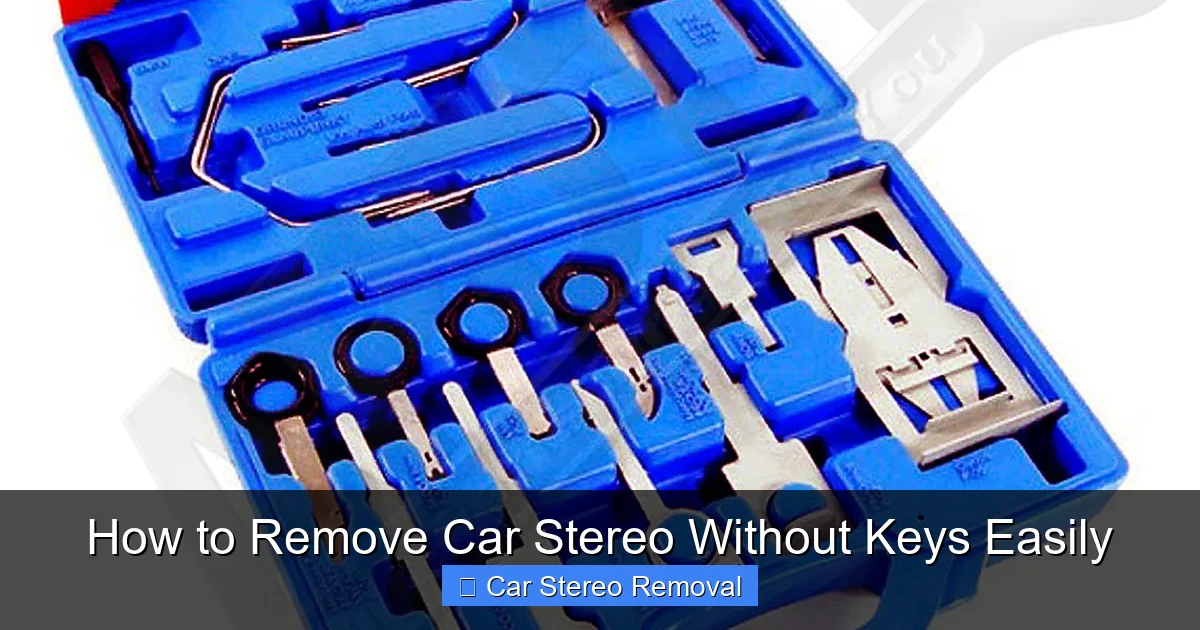
Visual guide about How to Remove Car Stereo Without Keys Easily
Image source: d3d71ba2asa5oz.cloudfront.net
There are several common reasons you might find yourself needing to remove a car stereo without the original keys:
– You’ve lost or misplaced the removal keys that came with your vehicle.
– You bought a used car and the previous owner didn’t include the tools.
– You’re installing a new stereo and need to take out the old one first.
– Your current stereo is malfunctioning and needs replacement or repair.
Factory-installed stereos often use a locking mechanism that requires special keys (also called DIN tools or removal keys) to release the internal clips. These keys fit into small slots on the sides of the stereo and push the clips inward, allowing the unit to slide out. But if you don’t have them, don’t worry—there are alternatives.
Tools You’ll Need
Before we dive into the steps, gather these tools. Most are inexpensive or already in your toolbox:
- Stereo removal keys (available online or at auto parts stores)
- A straightened wire coat hanger (with a small hook bent at the end)
- Flathead screwdriver (preferably wrapped in tape to prevent scratches)
- Trim removal tools (plastic pry tools to avoid damaging dash panels)
- Needle-nose pliers
- Electrical tape or zip ties (for labeling wires)
- Flashlight (to see into tight spaces)
- Camera or smartphone (to take reference photos)
Having the right tools makes the job faster and safer. If you plan to upgrade your stereo regularly, investing in a set of universal removal keys is worth every penny.
Step 1: Disconnect the Car Battery
Safety first! Before touching any electrical components, **disconnect the negative terminal of your car battery**. This prevents accidental short circuits, blown fuses, or damage to your stereo’s wiring.
How to Safely Disconnect the Battery
- Turn off the ignition and remove the key.
- Open the hood and locate the battery.
- Use a wrench to loosen the nut on the negative terminal (marked with a “-” or black cover).
- Carefully remove the cable and tuck it away from the battery terminal.
Wait at least 5–10 minutes before proceeding. This ensures any residual power in the system dissipates.
Step 2: Remove Trim Panels (If Necessary)
Many cars have plastic trim panels surrounding the stereo that must be removed first. These panels often hide screws or clips holding the stereo in place.
How to Remove Trim Panels Safely
- Use a plastic trim removal tool to gently pry around the edges. Avoid metal tools—they can scratch or crack the dashboard.
- Work slowly and methodically. Start at the bottom or sides and work your way up.
- If you encounter resistance, stop and check for hidden screws. Some panels are held by screws under cup holders, vents, or storage compartments.
- Once the panel is loose, carefully disconnect any attached cables (like climate control or hazard light buttons) before setting it aside.
Take a photo of the panel layout before removing it. This helps during reassembly.
Step 3: Locate the Stereo Mounting Mechanism
Now that the trim is off, you’ll see the stereo unit. Look for:
– Small slots on the sides of the stereo (for removal keys)
– Screws or bolts securing the stereo bracket
– Clips or springs holding the unit in place
Most factory stereos use spring-loaded clips that engage when the unit is pushed in. To remove it, you need to release these clips.
Step 4: Use Stereo Removal Keys (Recommended Method)
If you have stereo removal keys (or can borrow/buy a set), this is the easiest and safest method.
How to Use Removal Keys
- Insert one key into the left slot and the other into the right slot. Push them in until you feel resistance.
- Gently pull both keys outward while applying slight pressure. The stereo should begin to slide forward.
- Once the unit moves, carefully pull it out far enough to access the wiring harness and antenna cable behind it.
- Disconnect the wiring harness by pressing the release tab and pulling it apart. Unplug the antenna cable (usually a single plug).
Pro tip: Wiggle the keys slightly if the stereo doesn’t release immediately. Don’t force it—gentle pressure is key.
Step 5: DIY Method – Use a Coat Hanger
No removal keys? No problem. A straightened wire coat hanger can work in a pinch.
How to Make and Use a DIY Removal Tool
- Straighten a wire coat hanger using pliers.
- Bend a small hook (about 1/4 inch) at one end of the wire.
- Insert the hooked end into one of the side slots on the stereo. Angle it slightly upward to catch the clip.
- Gently pull outward while inserting a second wire (or a flathead screwdriver) into the opposite slot.
- Once both sides are engaged, the stereo should release and slide forward.
Be patient—this method takes practice. If the wire slips, adjust the angle or try a thicker gauge wire.
Step 6: Alternative – Use a Flathead Screwdriver (With Caution)
If you don’t have keys or a coat hanger, a flathead screwdriver can sometimes work—but use it carefully to avoid damage.
How to Use a Screwdriver Safely
- Wrap the tip of the screwdriver in electrical tape to prevent scratching.
- Insert the screwdriver into one of the side slots and gently pry outward.
- Use a second screwdriver on the opposite side to balance the pressure.
- Once the clips release, pull the stereo forward slowly.
Warning: This method risks damaging the stereo faceplate or dashboard. Only use it as a last resort.
Step 7: Disconnect Wires and Remove the Stereo
Once the stereo is loose, don’t yank it out. Take your time to disconnect everything properly.
How to Disconnect Wiring Safely
- Take a photo of the back of the stereo to remember wire positions.
- Press the release tab on the main wiring harness and pull it apart.
- Unplug the antenna cable (usually a single, thick plug).
- If there are additional cables (like for steering wheel controls or amplifiers), label them with tape before disconnecting.
- Carefully slide the stereo completely out of the dashboard.
Store the stereo in a safe place if you plan to reinstall it later.
Troubleshooting Common Issues
Even with the right tools, you might run into problems. Here’s how to handle them:
Stereo Won’t Budge
– Double-check for hidden screws or clips.
– Ensure the removal keys or tools are fully inserted.
– Try wiggling the stereo gently while pulling.
Wires Are Too Short
– Don’t force the stereo out. Disconnect only what you can reach safely.
– Use zip ties to bundle and extend wires if needed during reinstallation.
Clips Broke During Removal
– Replacement clips are cheap and available online.
– Use zip ties or electrical tape to secure the new stereo temporarily.
Dashboard Got Scratched
– Use a plastic trim repair kit or touch-up paint to fix minor scratches.
– In the future, always use plastic tools or wrap metal ones in tape.
Tips for a Smooth Reinstallation
When you’re ready to install a new stereo or put the old one back:
- Match wire colors or use a wiring harness adapter for easy connection.
- Secure the new stereo with the original bracket or a universal mounting kit.
- Test the system before reassembling trim panels.
- Reconnect the battery and check all functions (radio, Bluetooth, volume, etc.).
Taking photos during removal makes reinstallation much easier.
Conclusion
Removing a car stereo without keys might seem daunting at first, but with the right approach, it’s a manageable DIY task. Whether you use official removal keys, a clever coat hanger hack, or a carefully used screwdriver, the key is to work slowly and safely.
Always disconnect the battery, protect your dashboard, and label wires to avoid confusion later. And remember—most car stereos are designed to be removable, so with a little patience, you’ll have that old unit out and a new one in before you know it.
Now that you know how to remove car stereo without keys easily, you’re ready to upgrade your ride’s sound system with confidence. Happy installing!
🎥 Related Video: How to safely remove a car stereo without din tool
📺 Tech MC

