This guide walks you through how to install car stereo without wiring harness using basic tools and direct wire connections. You’ll learn safe methods, avoid common mistakes, and get your new stereo working in under an hour.
Key Takeaways
- No wiring harness? No problem: You can still install a car stereo by connecting wires directly to the vehicle’s harness or battery.
- Use a multimeter for safety: Always test wires for power and ground before connecting to avoid short circuits or damage.
- Match wire colors carefully: Most car stereos and vehicle harnesses follow standard color codes—match them precisely.
- Secure connections with solder or crimp: Tape alone isn’t enough; use heat shrink tubing or crimp connectors for durability.
- Double-check polarity: Reversing positive and negative wires can damage your stereo or blow a fuse.
- Test before finalizing: Power on the stereo and test all functions before reassembling the dashboard.
- Keep a wiring diagram handy: Print or save a copy of your car’s wiring layout for quick reference.
How to Install Car Stereo Without Wiring Harness Easily
Upgrading your car’s stereo doesn’t have to be complicated—even if you don’t have a wiring harness. Whether you’re installing a new head unit for better sound, Bluetooth, or smartphone integration, you can still do it safely and effectively without a pre-made harness. This guide will show you exactly how to install car stereo without wiring harness using simple tools and smart techniques.
Many car owners assume they need a specific wiring harness to connect a new stereo. But with a little patience and the right approach, you can bypass that step entirely. This method works for most vehicles, from older models to newer ones, as long as you follow basic electrical safety rules.
In this guide, you’ll learn how to identify wires, make secure connections, and test your system—all without a harness. We’ll cover everything from removing the old stereo to powering up your new one. No experience? No problem. Just follow along step by step.
Tools and Materials You’ll Need
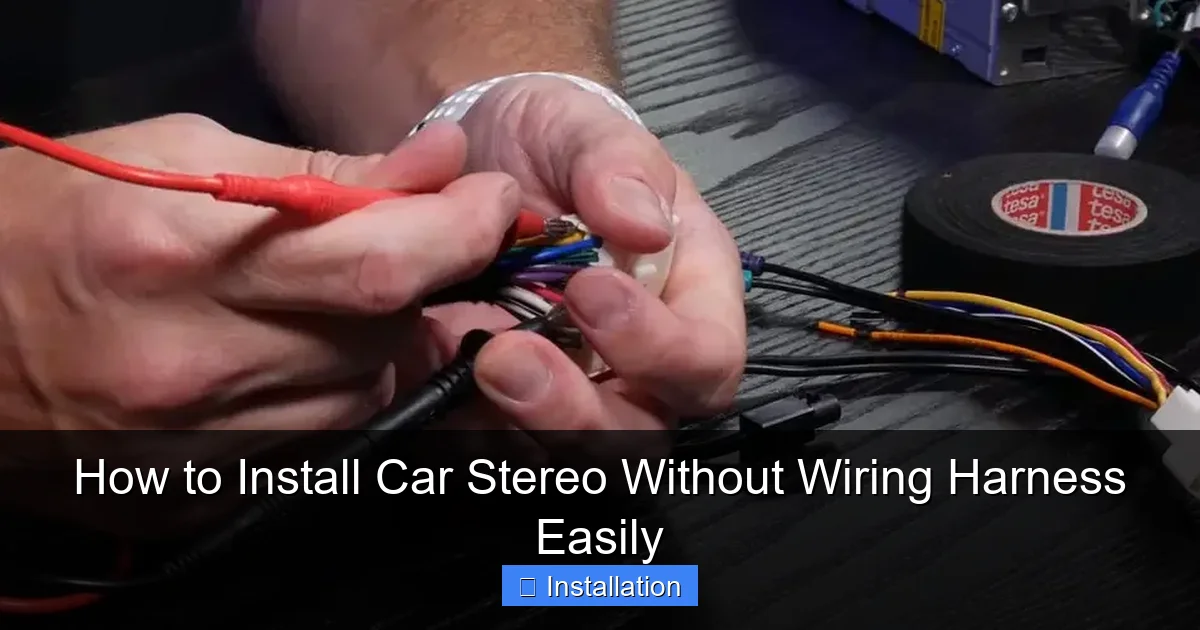
Visual guide about How to Install Car Stereo Without Wiring Harness Easily
Image source: 99carstereo.com
Before you begin, gather these essential tools and supplies:
- New car stereo (double-DIN or single-DIN, depending on your dash)
- Wire strippers
- Crimping tool or soldering iron
- Electrical tape or heat shrink tubing
- Multimeter (highly recommended)
- Wire connectors (butt connectors, spade terminals, or bullet connectors)
- Panel removal tools (plastic pry tools)
- Screwdrivers (Phillips and flathead)
- Zip ties (for cable management)
- Wiring diagram for your vehicle (check the owner’s manual or online)
Having these on hand will make the process smoother and safer. A multimeter is especially important—it helps you confirm which wires carry power, ground, and audio signals.
Step 1: Disconnect the Battery
Safety first! Always disconnect the negative terminal of your car battery before working on any electrical system. This prevents accidental shorts, sparks, or damage to your stereo.
How to Disconnect the Battery
- Open the hood and locate the battery.
- Use a wrench to loosen the nut on the negative (black) terminal.
- Lift the cable off and secure it away from the battery post.
Leaving the battery connected while wiring can fry your new stereo or blow a fuse. Take this step seriously—even if you’re in a hurry.
Step 2: Remove the Old Stereo
Now it’s time to take out the factory or old aftermarket stereo.
Access the Stereo Unit
- Use plastic pry tools to gently remove the trim panel around the stereo. Start at the edges and work your way around.
- Once the trim is off, you’ll see screws or clips holding the stereo in place.
- Remove the screws or release the clips, then carefully slide the stereo out.
Be gentle—dashboard panels can be fragile. If your car uses a DIN sleeve (a metal frame), you may need a DIN removal tool (often included with new stereos).
Disconnect the Wiring
- Unplug the factory wiring harness from the back of the stereo.
- If there’s an antenna cable, disconnect that too.
Now you’ll see a bundle of wires. This is where things get interesting—since you’re not using a harness, you’ll need to identify and connect these wires manually.
Step 3: Identify the Wires
This is the most critical step. You need to know which wire does what before connecting your new stereo.
Use a Wiring Diagram
Find a wiring diagram for your specific car make and model. You can usually find this:
- In the owner’s manual
- On the manufacturer’s website
- On car audio forums or sites like Crutchfield
Most factory harnesses follow standard color codes, but they can vary. Here’s a general guide:
- Yellow: Constant 12V+ (battery power—keeps memory alive)
- Red: Switched 12V+ (ignition power—turns stereo on/off with key)
- Black: Ground
- Orange: Illumination (dashboard lights)
- Blue/White: Power antenna or amplifier remote
- White, White/Black, Gray, Gray/Black, etc.: Speaker wires (front left, front right, rear left, rear right)
Test with a Multimeter
Don’t rely solely on color. Use a multimeter to confirm:
- Set the multimeter to DC voltage.
- Touch the black probe to a ground (like the car chassis).
- Touch the red probe to each wire while the key is off, then on.
- The yellow wire should show ~12V all the time (constant power).
- The red wire should show ~12V only when the key is in “ACC” or “ON.”
- The black wire should show 0V—it’s the ground.
This step ensures you don’t mix up power and ground, which could damage your stereo.
Step 4: Prepare the New Stereo Wires
Now, look at the back of your new stereo. It will have a set of wires coming out—usually color-coded to match standard car audio wiring.
Match the Wires
Match each wire from the car to the corresponding wire on the stereo:
- Yellow to Yellow (constant power)
- Red to Red (switched power)
- Black to Black (ground)
- Orange to Orange (illumination)
- Blue/White to Blue/White (remote amp/antenna)
- Speaker wires: match colors (e.g., white to white for front left)
If your stereo doesn’t have an orange wire, you can leave the illumination wire disconnected or connect it to a dashboard light circuit if desired.
Strip and Prepare the Ends
- Use wire strippers to remove about ½ inch of insulation from each wire end.
- Twist the exposed copper strands to prevent fraying.
Step 5: Connect the Wires
Now it’s time to make the actual connections. You have two main options: crimping or soldering.
Option 1: Use Crimp Connectors
- Insert the stripped ends of the car wire and stereo wire into a butt connector.
- Use a crimping tool to secure the connection.
- Give the wires a gentle tug to ensure they’re locked in.
Option 2: Solder the Wires
- Twist the two wires together.
- Apply heat with a soldering iron and melt solder over the joint.
- Let it cool, then cover with heat shrink tubing and apply heat to seal.
Soldering creates the most reliable connection, but crimping works well if done properly. Avoid using only electrical tape—it can loosen over time.
Secure and Insulate
- Cover each connection with electrical tape or heat shrink tubing.
- Use zip ties to bundle wires neatly and prevent them from touching metal parts.
Step 6: Connect the Antenna and Mount the Stereo
Attach the Antenna Cable
Plug the factory antenna cable into the back of the new stereo. Most use a standard Motorola-style plug.
Mount the Stereo
- Slide the new stereo into the dash opening.
- Secure it with screws or the included mounting brackets.
- Reattach the trim panel.
Make sure the stereo sits flush and doesn’t rattle.
Step 7: Reconnect the Battery and Test
Reconnect the Battery
- Reattach the negative battery cable and tighten the nut.
- Turn the ignition to “ACC” or “ON.”
Test the Stereo
- Power on the stereo.
- Check that it turns on and displays correctly.
- Test all functions: volume, radio, Bluetooth, aux input, etc.
- Play music and test all speakers—front and rear.
If something doesn’t work, don’t panic. Double-check your connections, especially power and ground.
Troubleshooting Common Issues
Stereo Won’t Turn On
- Check if the red (switched power) wire is connected.
- Verify the fuse in the stereo or car’s fuse box.
- Use the multimeter to confirm 12V at the red and yellow wires.
No Sound from Speakers
- Ensure speaker wires are connected to the correct terminals.
- Check polarity—positive to positive, negative to negative.
- Test each speaker individually.
Battery Drains Overnight
- This means the yellow (constant power) wire is connected but the stereo isn’t going into sleep mode.
- Check if the stereo has a “power save” setting.
- Ensure no accessories are drawing power when the car is off.
Flickering Display or Random Resets
- Likely a poor ground connection.
- Reconnect the black wire to a clean, bare metal spot on the chassis.
- Sand the area lightly if needed to remove paint or rust.
Final Tips for a Clean Install
- Label your wires before disconnecting anything—use tape and a marker.
- Keep wires away from moving parts like pedals or seat rails.
- Use cable management—zip ties and loom tape keep things tidy.
- Take your time—rushing leads to mistakes.
- Save your old stereo—you might need it for reference or resale.
Conclusion
Installing a car stereo without a wiring harness is totally doable—and often simpler than people think. By identifying wires correctly, making secure connections, and testing thoroughly, you can upgrade your car’s audio system safely and effectively.
You don’t need fancy tools or professional help. With this guide, you’ve learned how to install car stereo without wiring harness using basic equipment and smart techniques. Whether you’re a first-time DIYer or a seasoned tinkerer, this method gives you full control over your installation.
Remember: safety first, double-check everything, and test before you finalize. Once your new stereo is playing your favorite tunes, you’ll be glad you took the time to do it right.
Now go enjoy that crisp, clear sound—your car deserves it.
🎥 Related Video: How To Install A Radio Without A Wiring Harness Adapter
📺 Do It Yourself Bri
Diy Bri gives you in-depth instructions and tips to successfully wire a radio into any vehicle without a wiring harness adapter.

